Documentation Index
Fetch the complete documentation index at: https://mulerun.com/docs/llms.txt
Use this file to discover all available pages before exploring further.
Overview
In this tutorial, we’ll walk you step by step through building an Agent with n8n and the MuleRun API that uses Nano-Banana to generate pixel-art style images.
Difficulty: ★☆☆☆☆ (1 / 5)
For n8n-related questions, check the official documentation.
You can also ask in the n8n community.
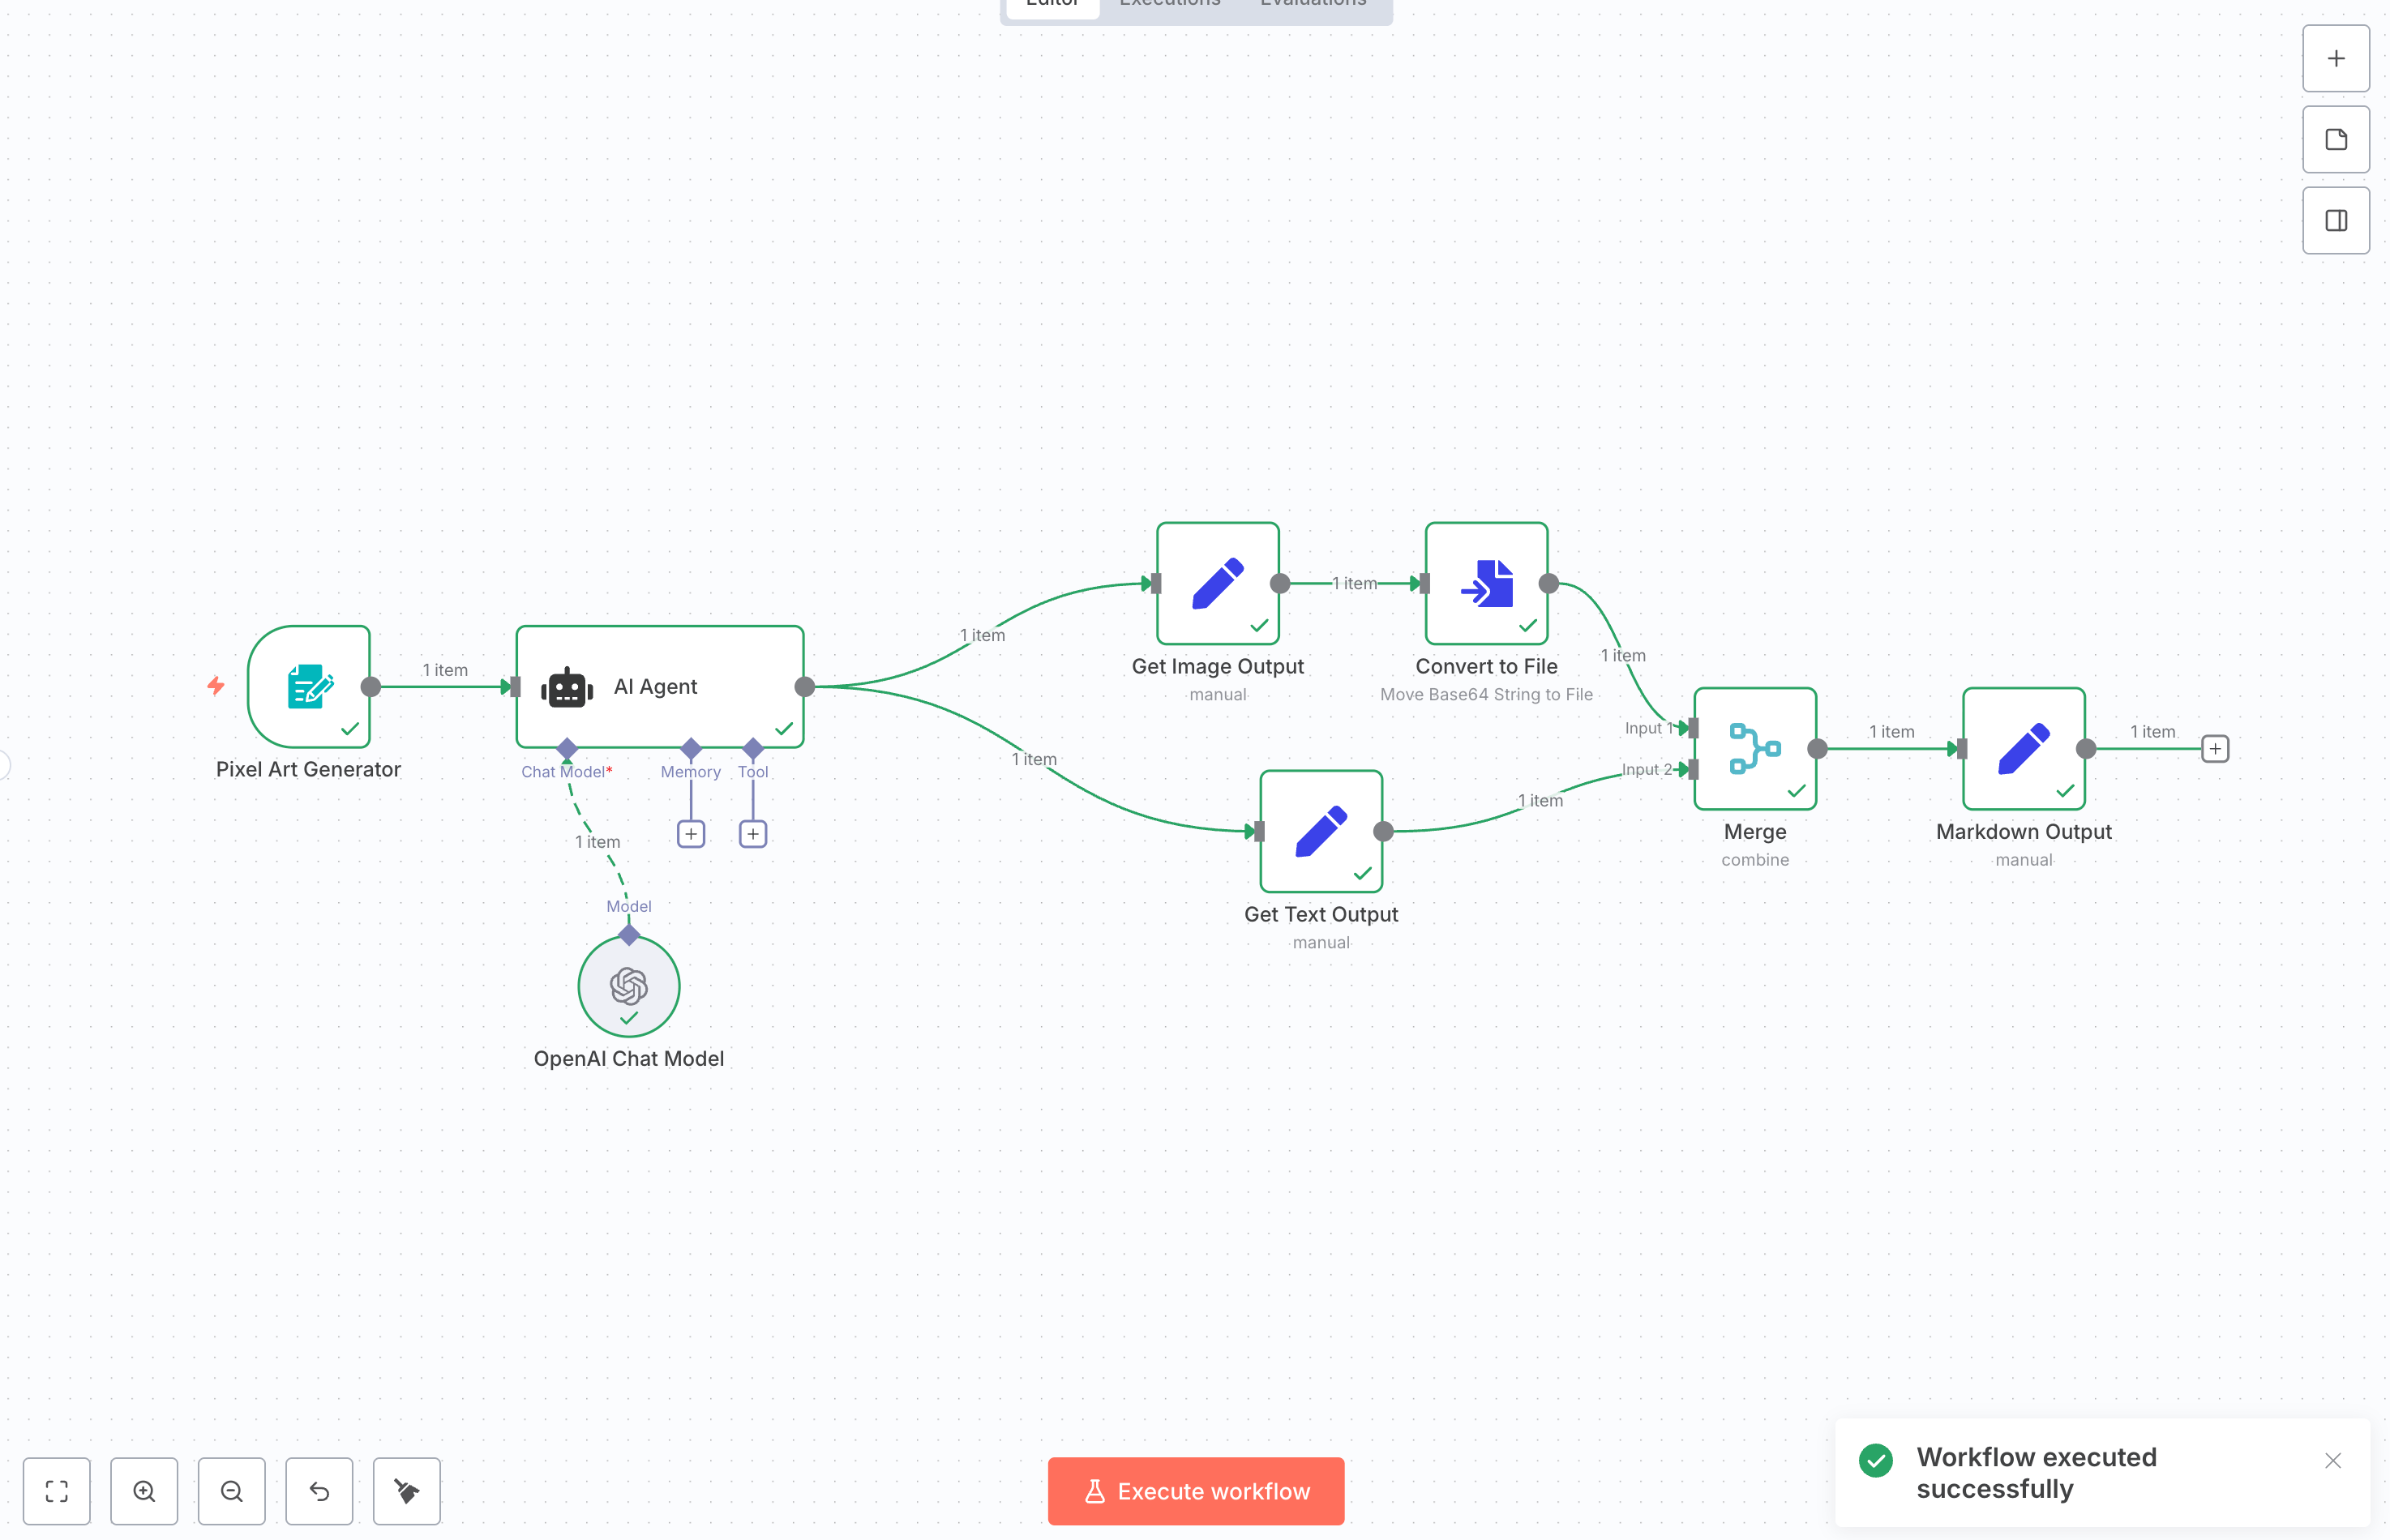
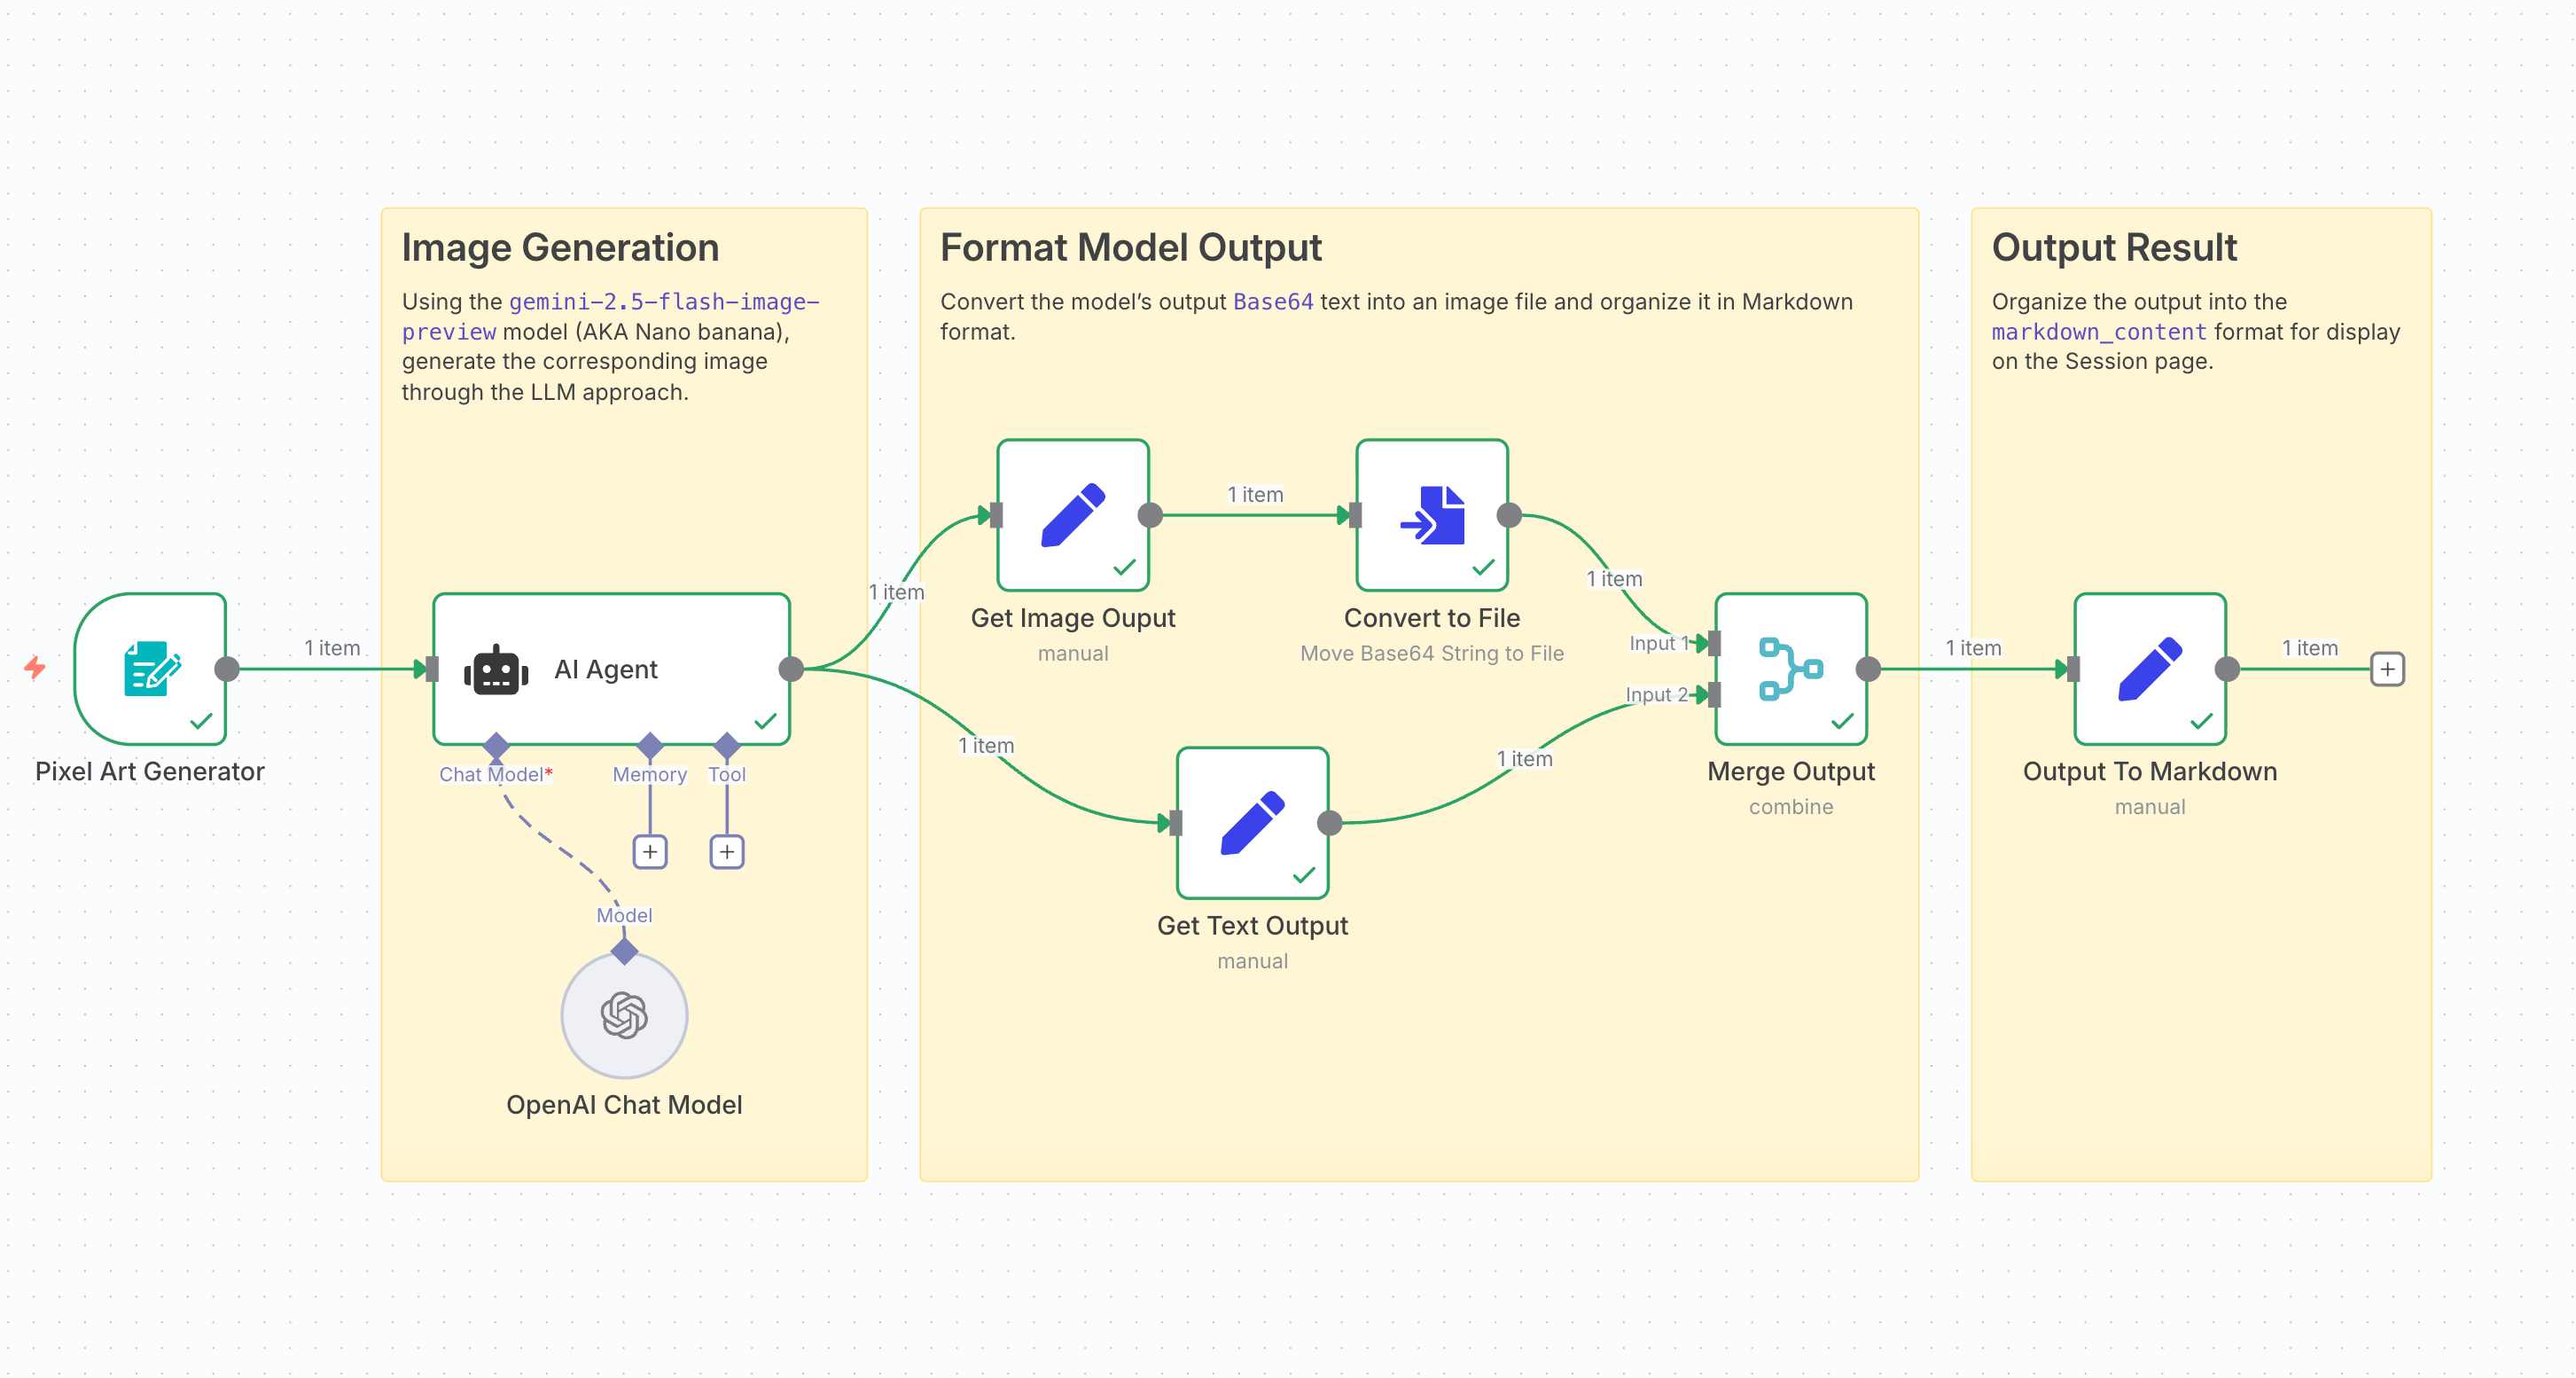 We’ll build a workflow like the one above by combining n8n nodes. The workflow will:
- Receive user input from MuleRun
- Use an AI Agent to generate an image
- Display the result in the user’s Session page
Step 1: Create a new n8n workflow
First, you’ll need a running n8n instance. You can either use n8n Cloud or install it locally.
Check out this comparison to decide which option fits you best.
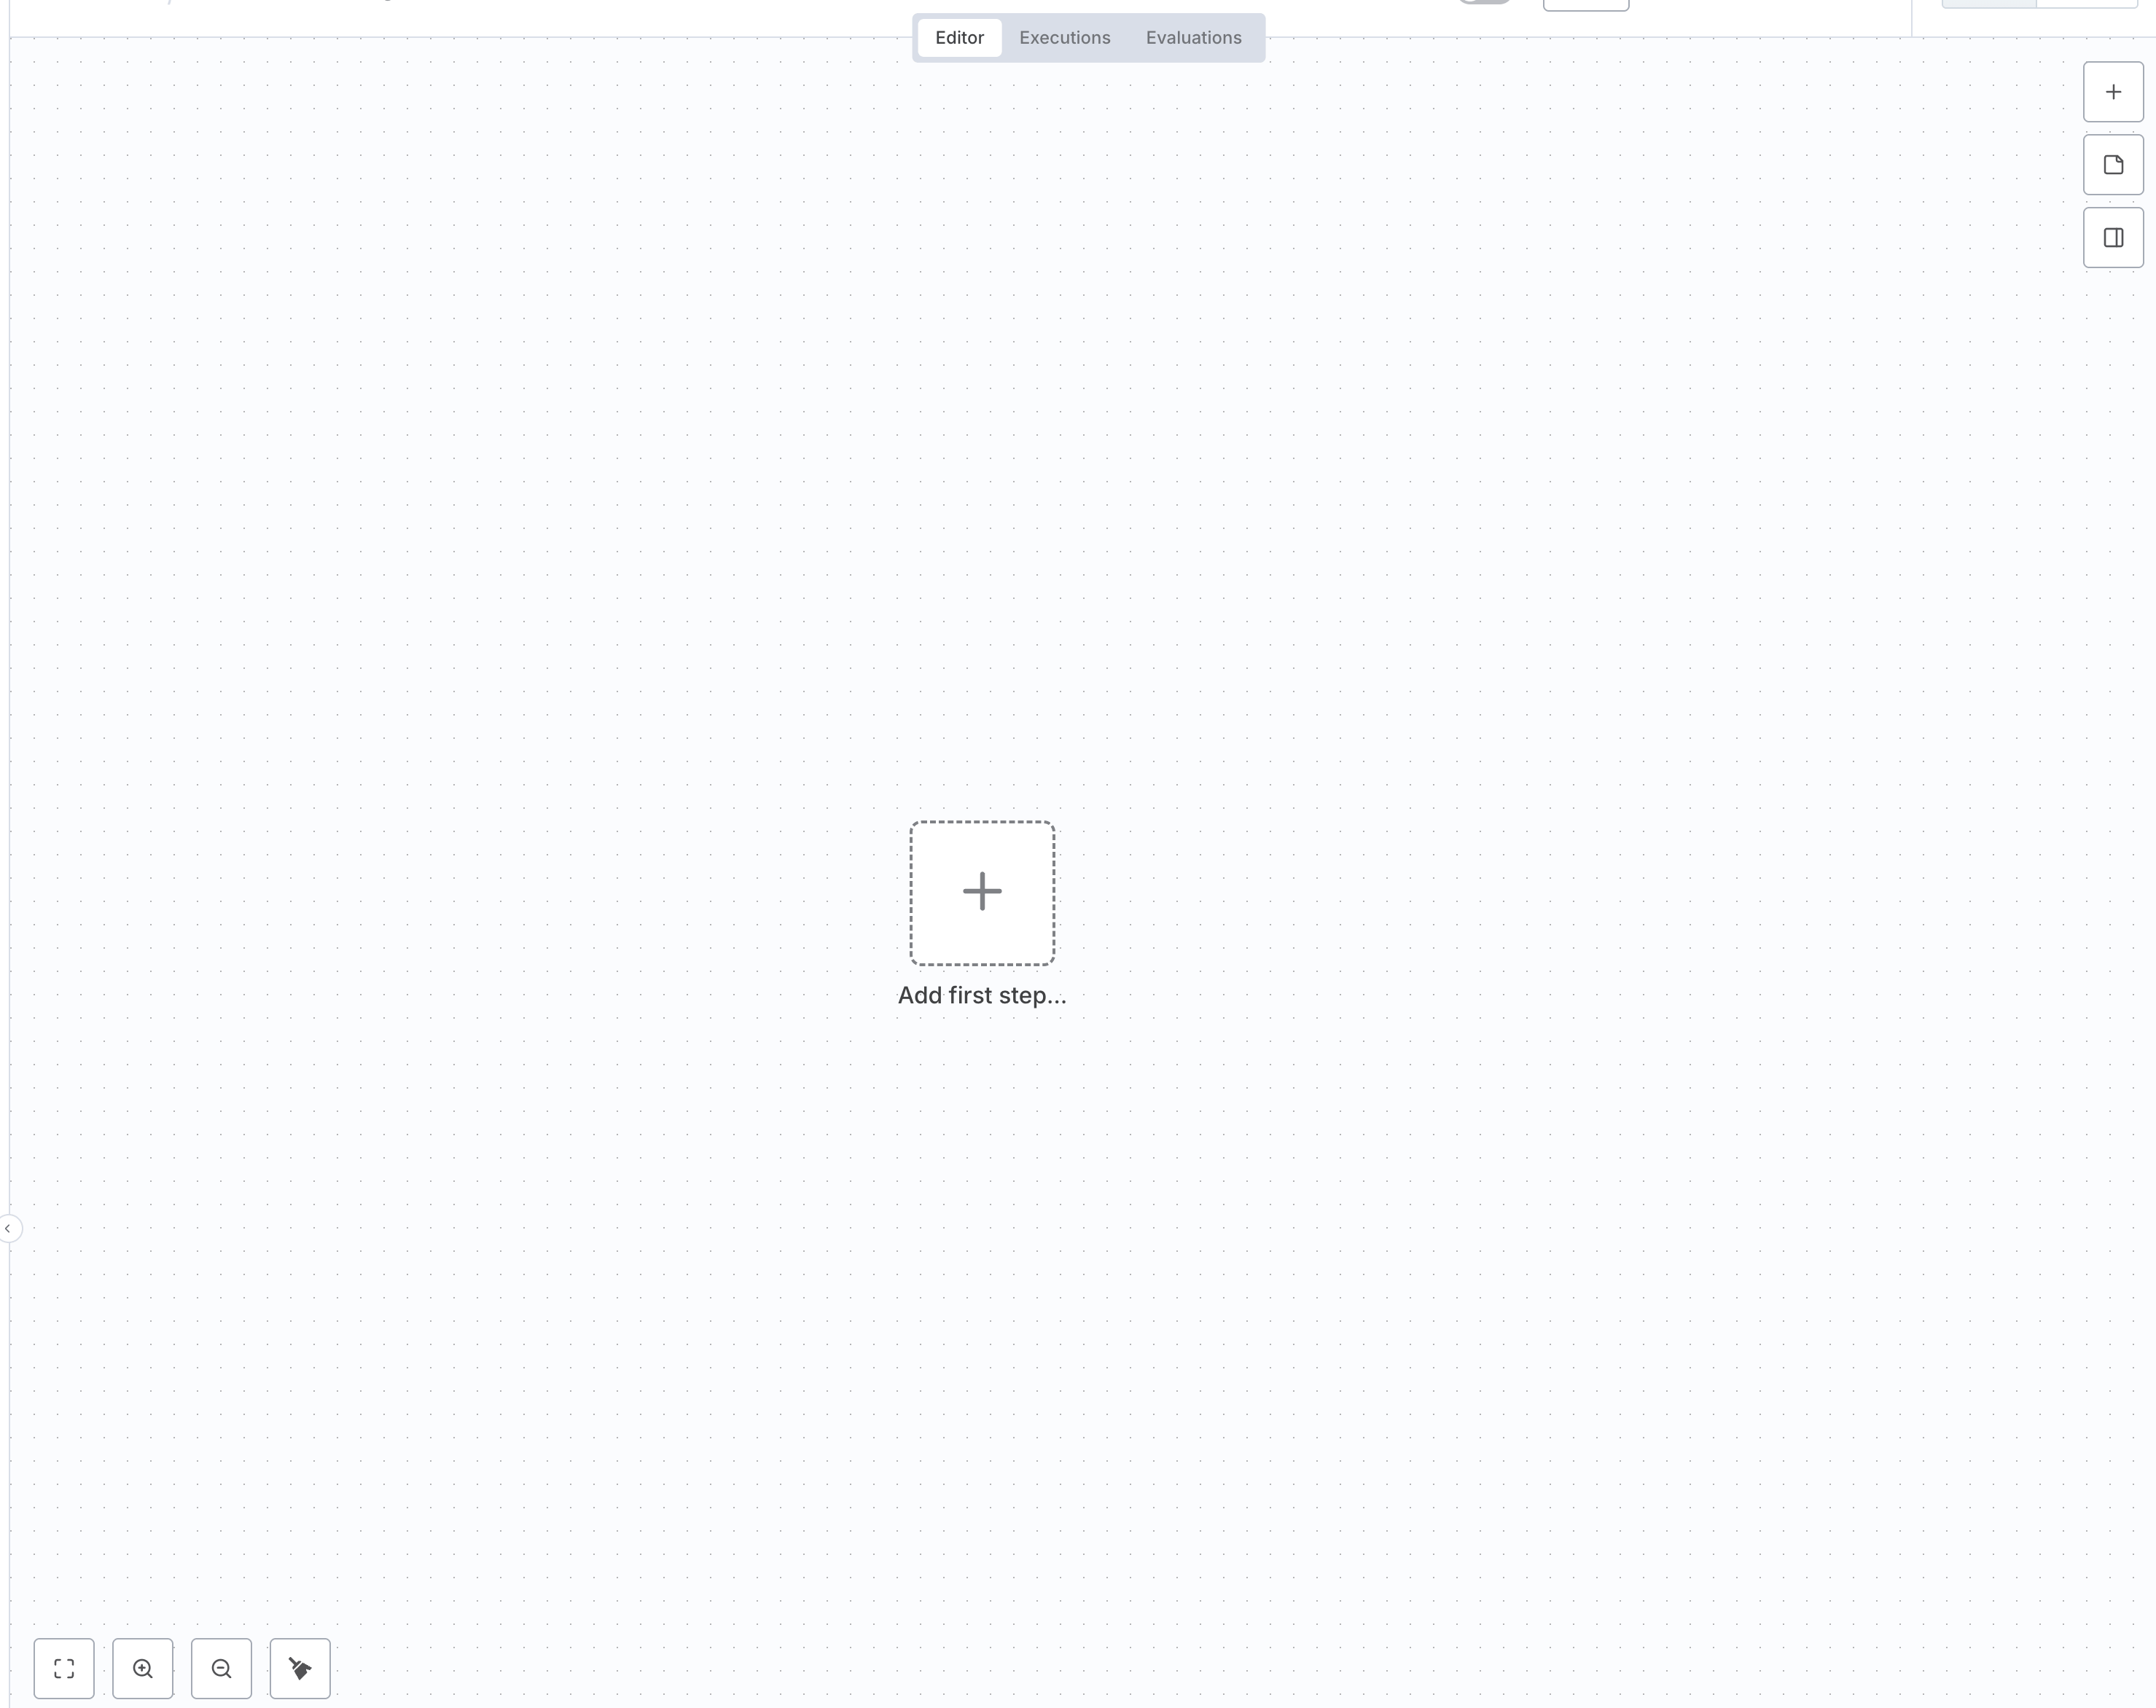
Create a new workflow, and you’ll see an empty canvas like this:
 A typical n8n workflow has three main parts:
- Input nodes: receive user requests
- Processing nodes: handle tasks (AI, data processing, etc.)
- Output nodes: send results back to the Session page
You build workflows by dragging nodes onto the canvas and connecting them.
Currently, MuleRun only supports starting a workflow with the n8n Form Trigger node. More details here.
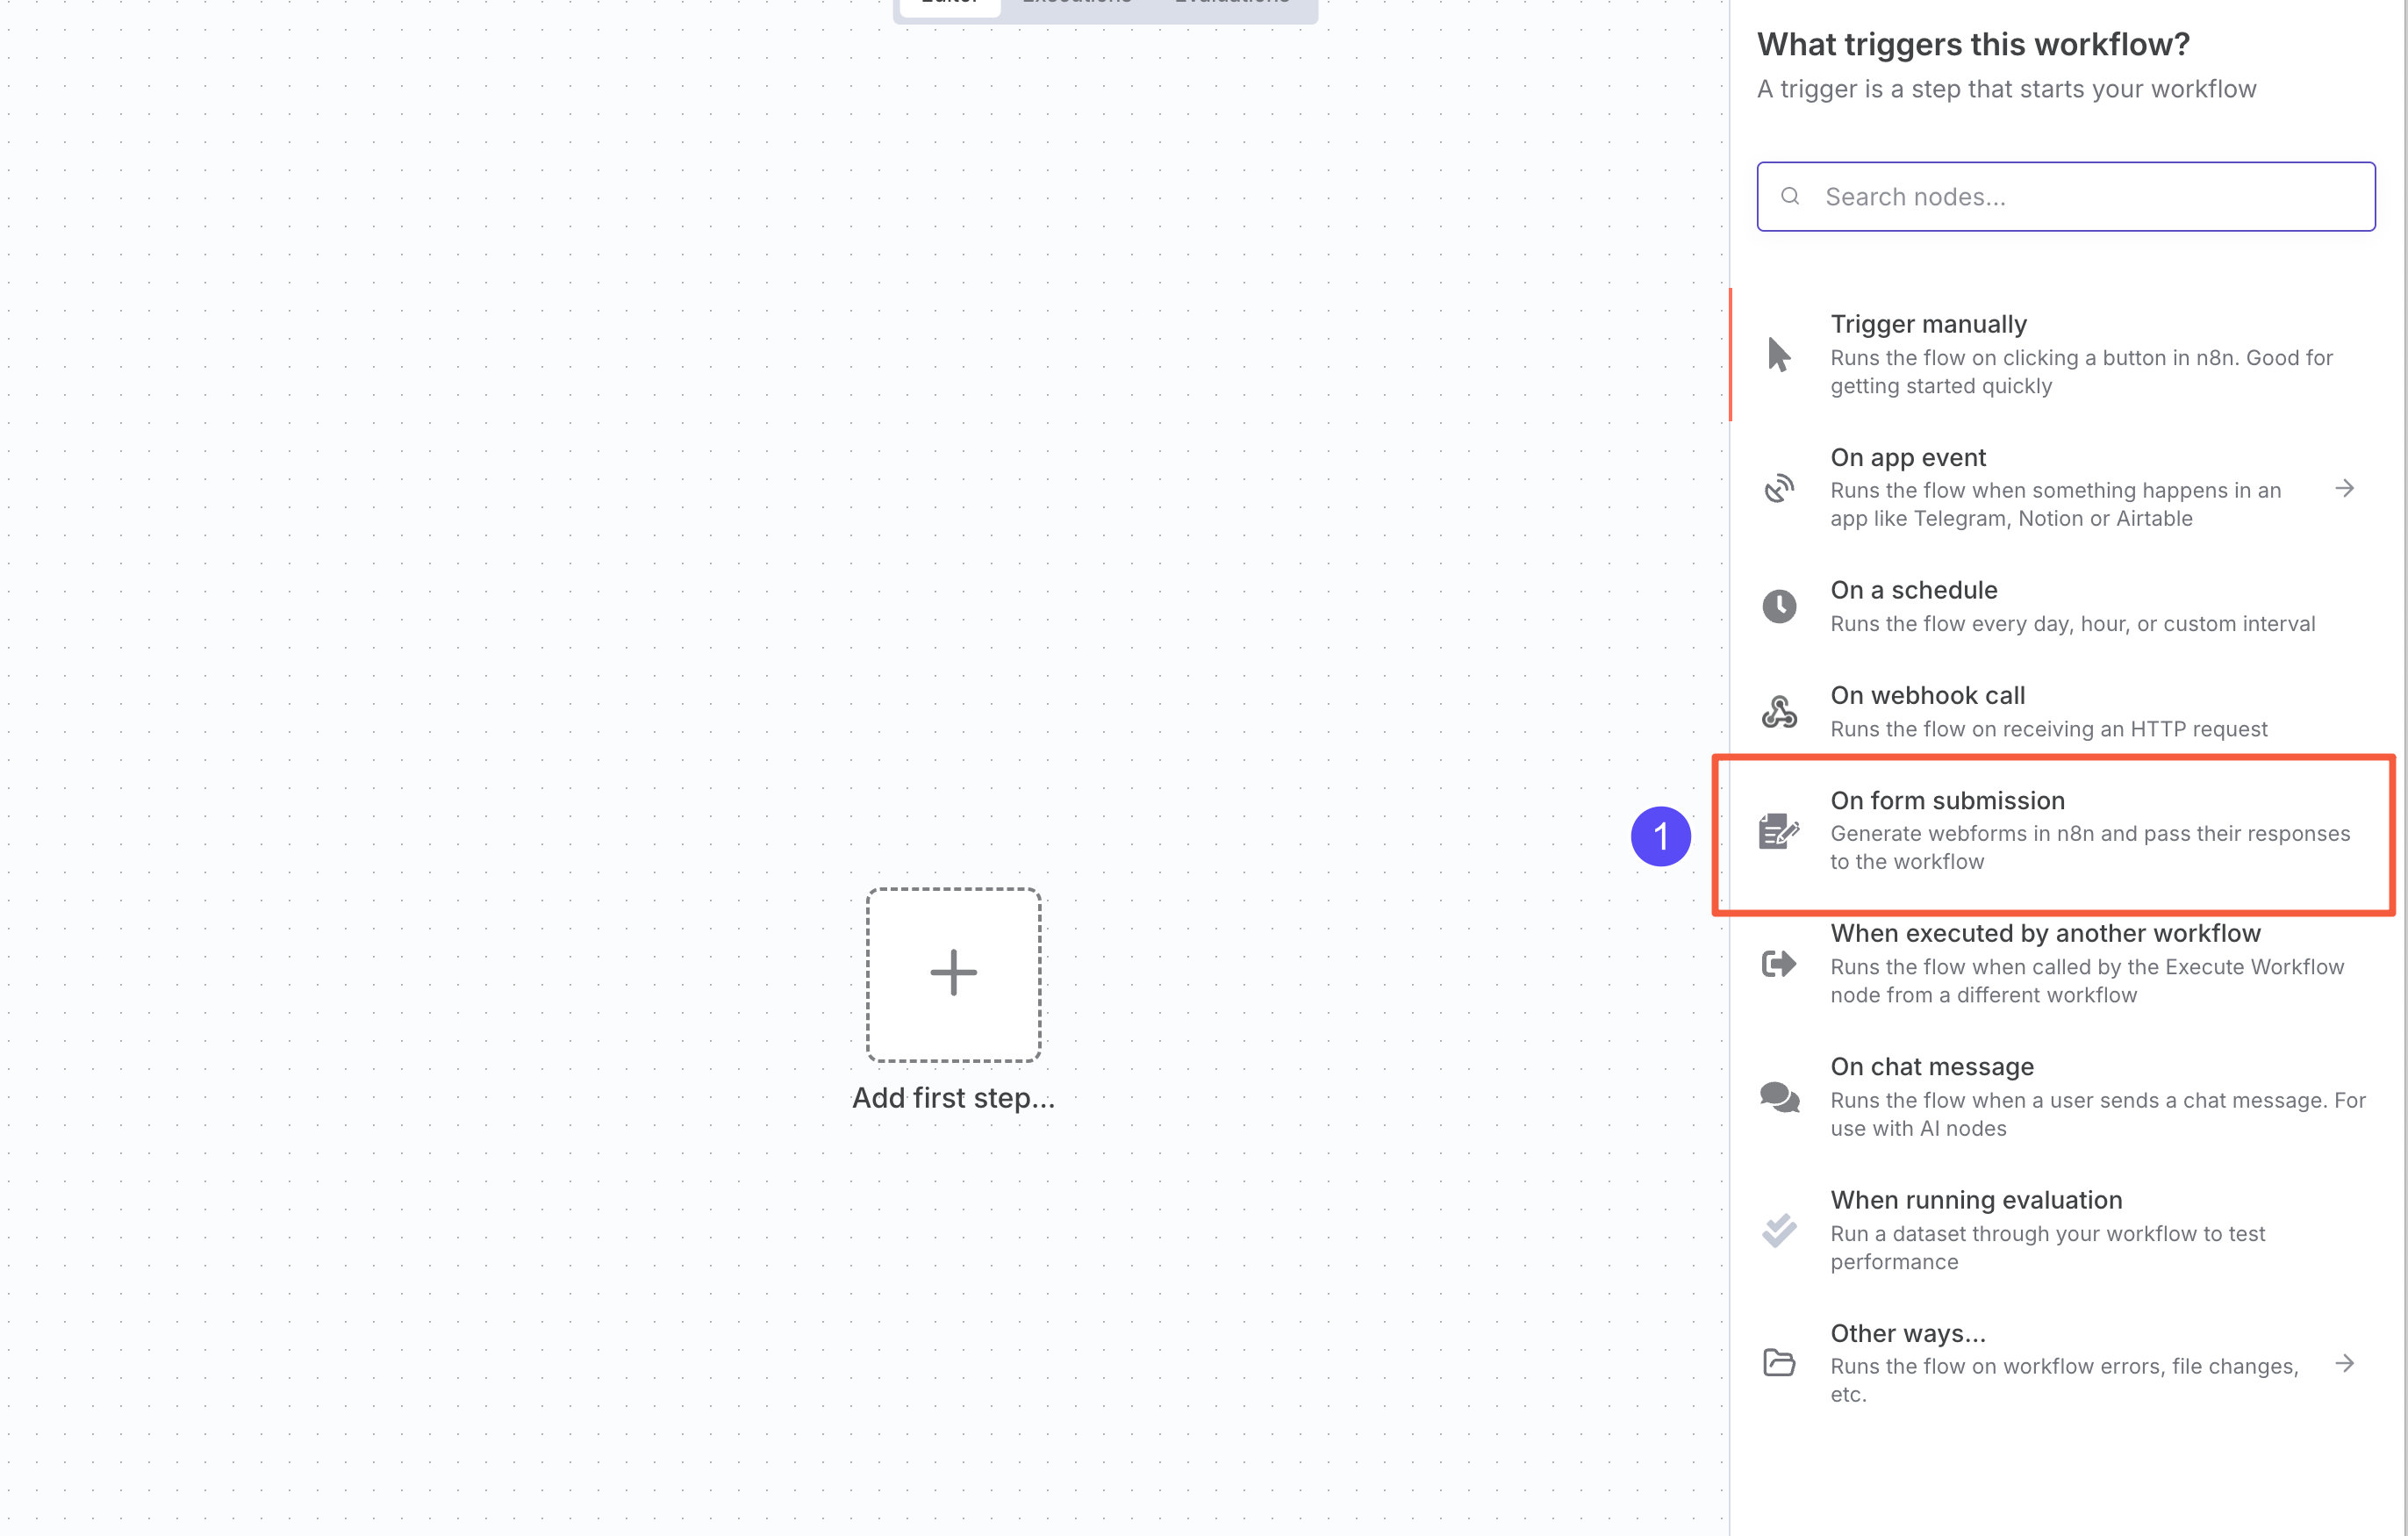 Click the ”+” in the top-right corner and select On form submission to add an
 n8n Form Trigger node.
You can also search for “n8n Form” and select On new n8n Form Event.
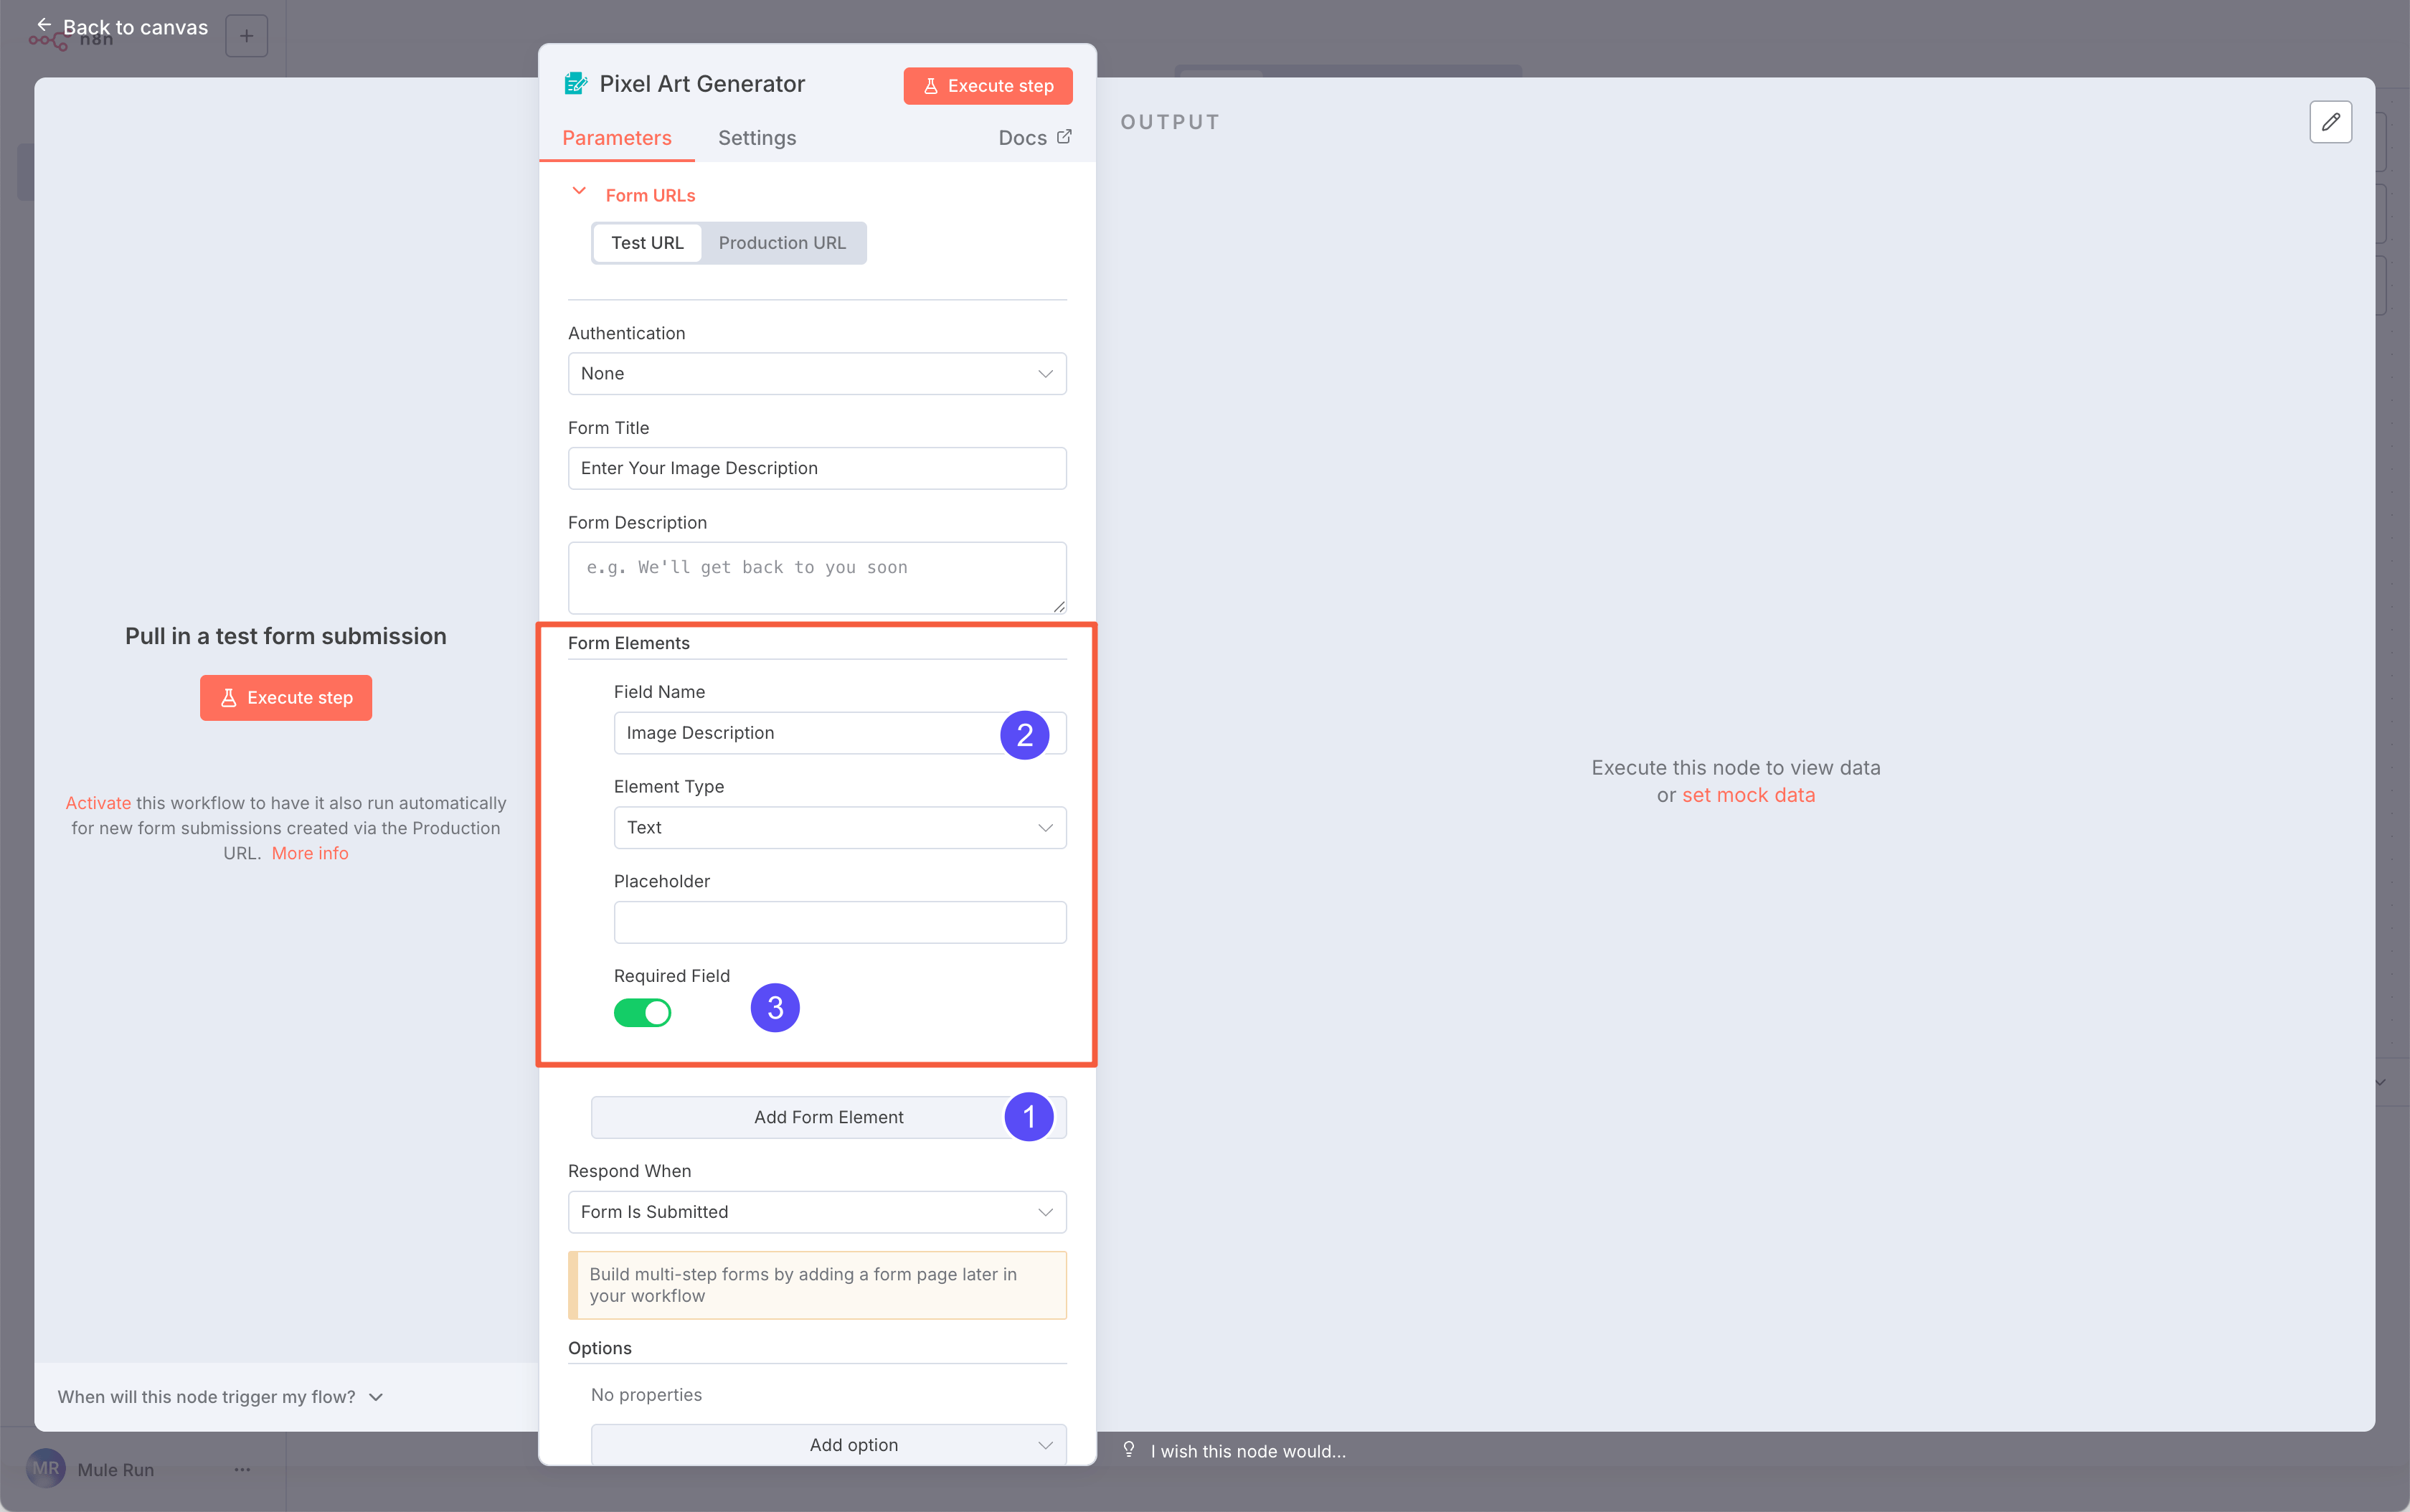 Here, we want to collect the user’s description of the image.
Click Add Form Element, choose a Text field, and name it
Here, we want to collect the user’s description of the image.
Click Add Form Element, choose a Text field, and name it Image Description. Mark it as required.
The Field Name will appear in the Session form. You can also edit the Form Title and node name for a better display.
Step 3: Add an AI node
Now let’s add an AI Agent node to handle the LLM task.
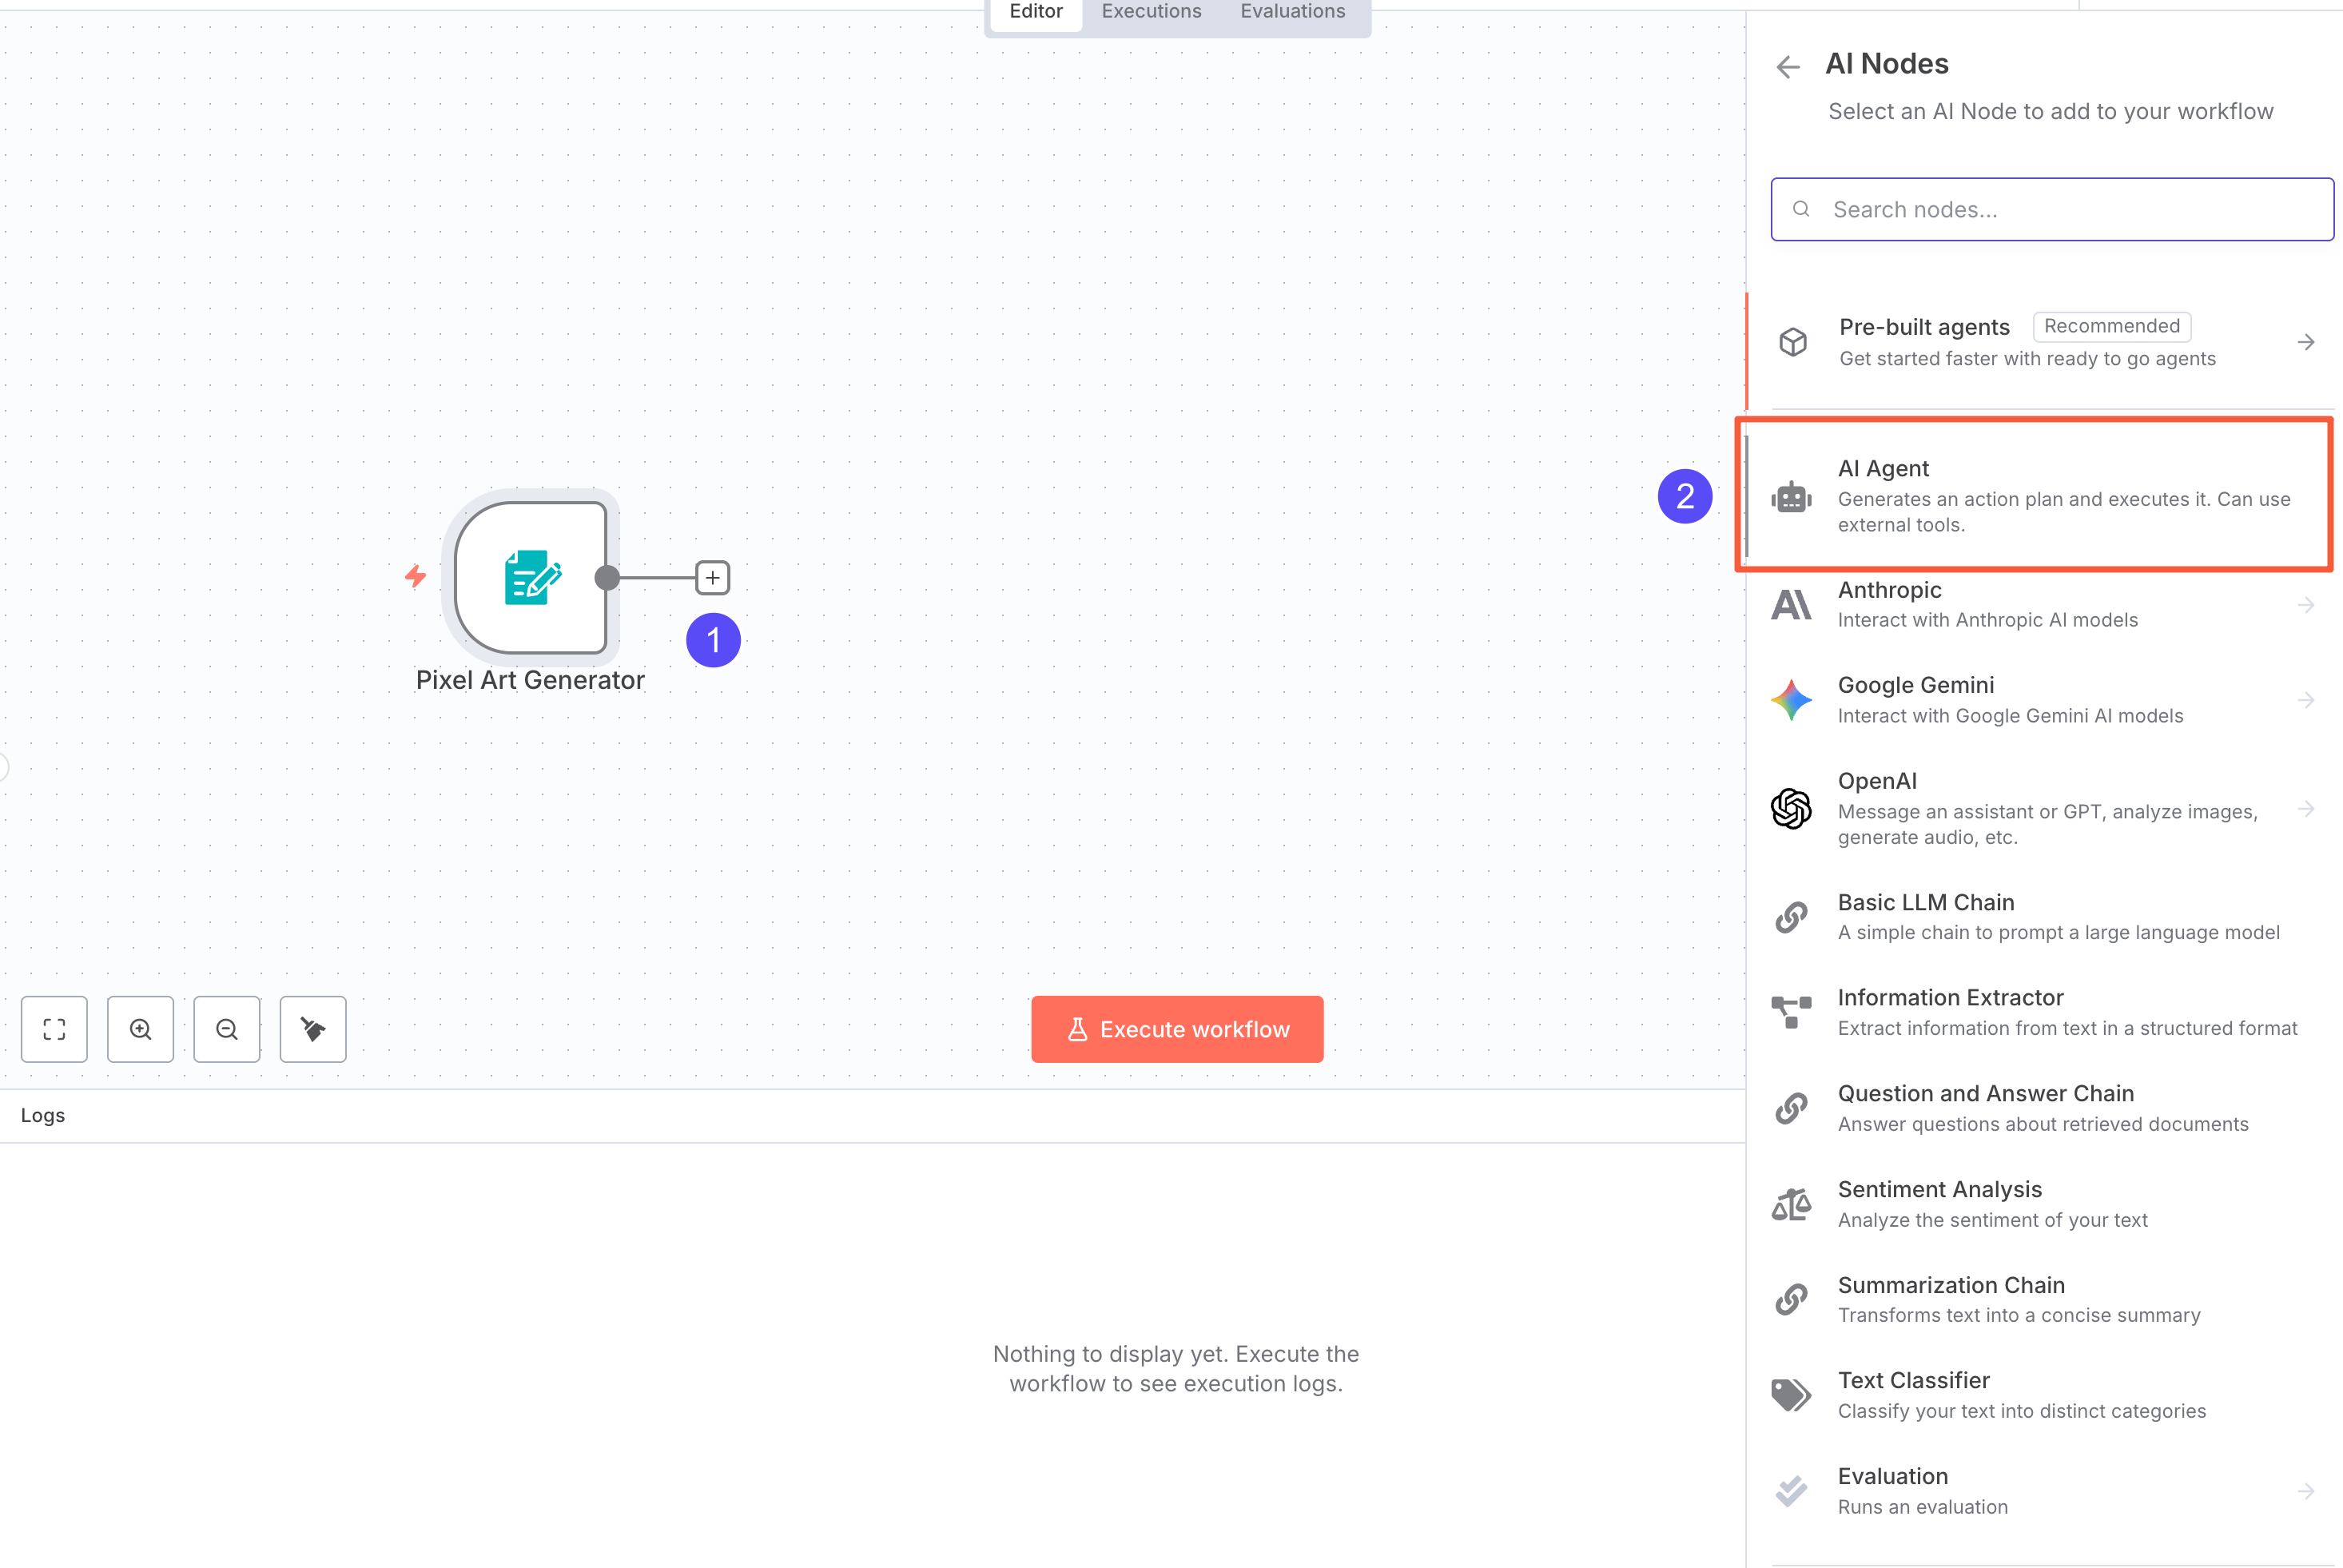 Click the plus button after the input node, and from AI Nodes, select AI Agent.
We recommend only using the AI Agent node for LLM-related work.
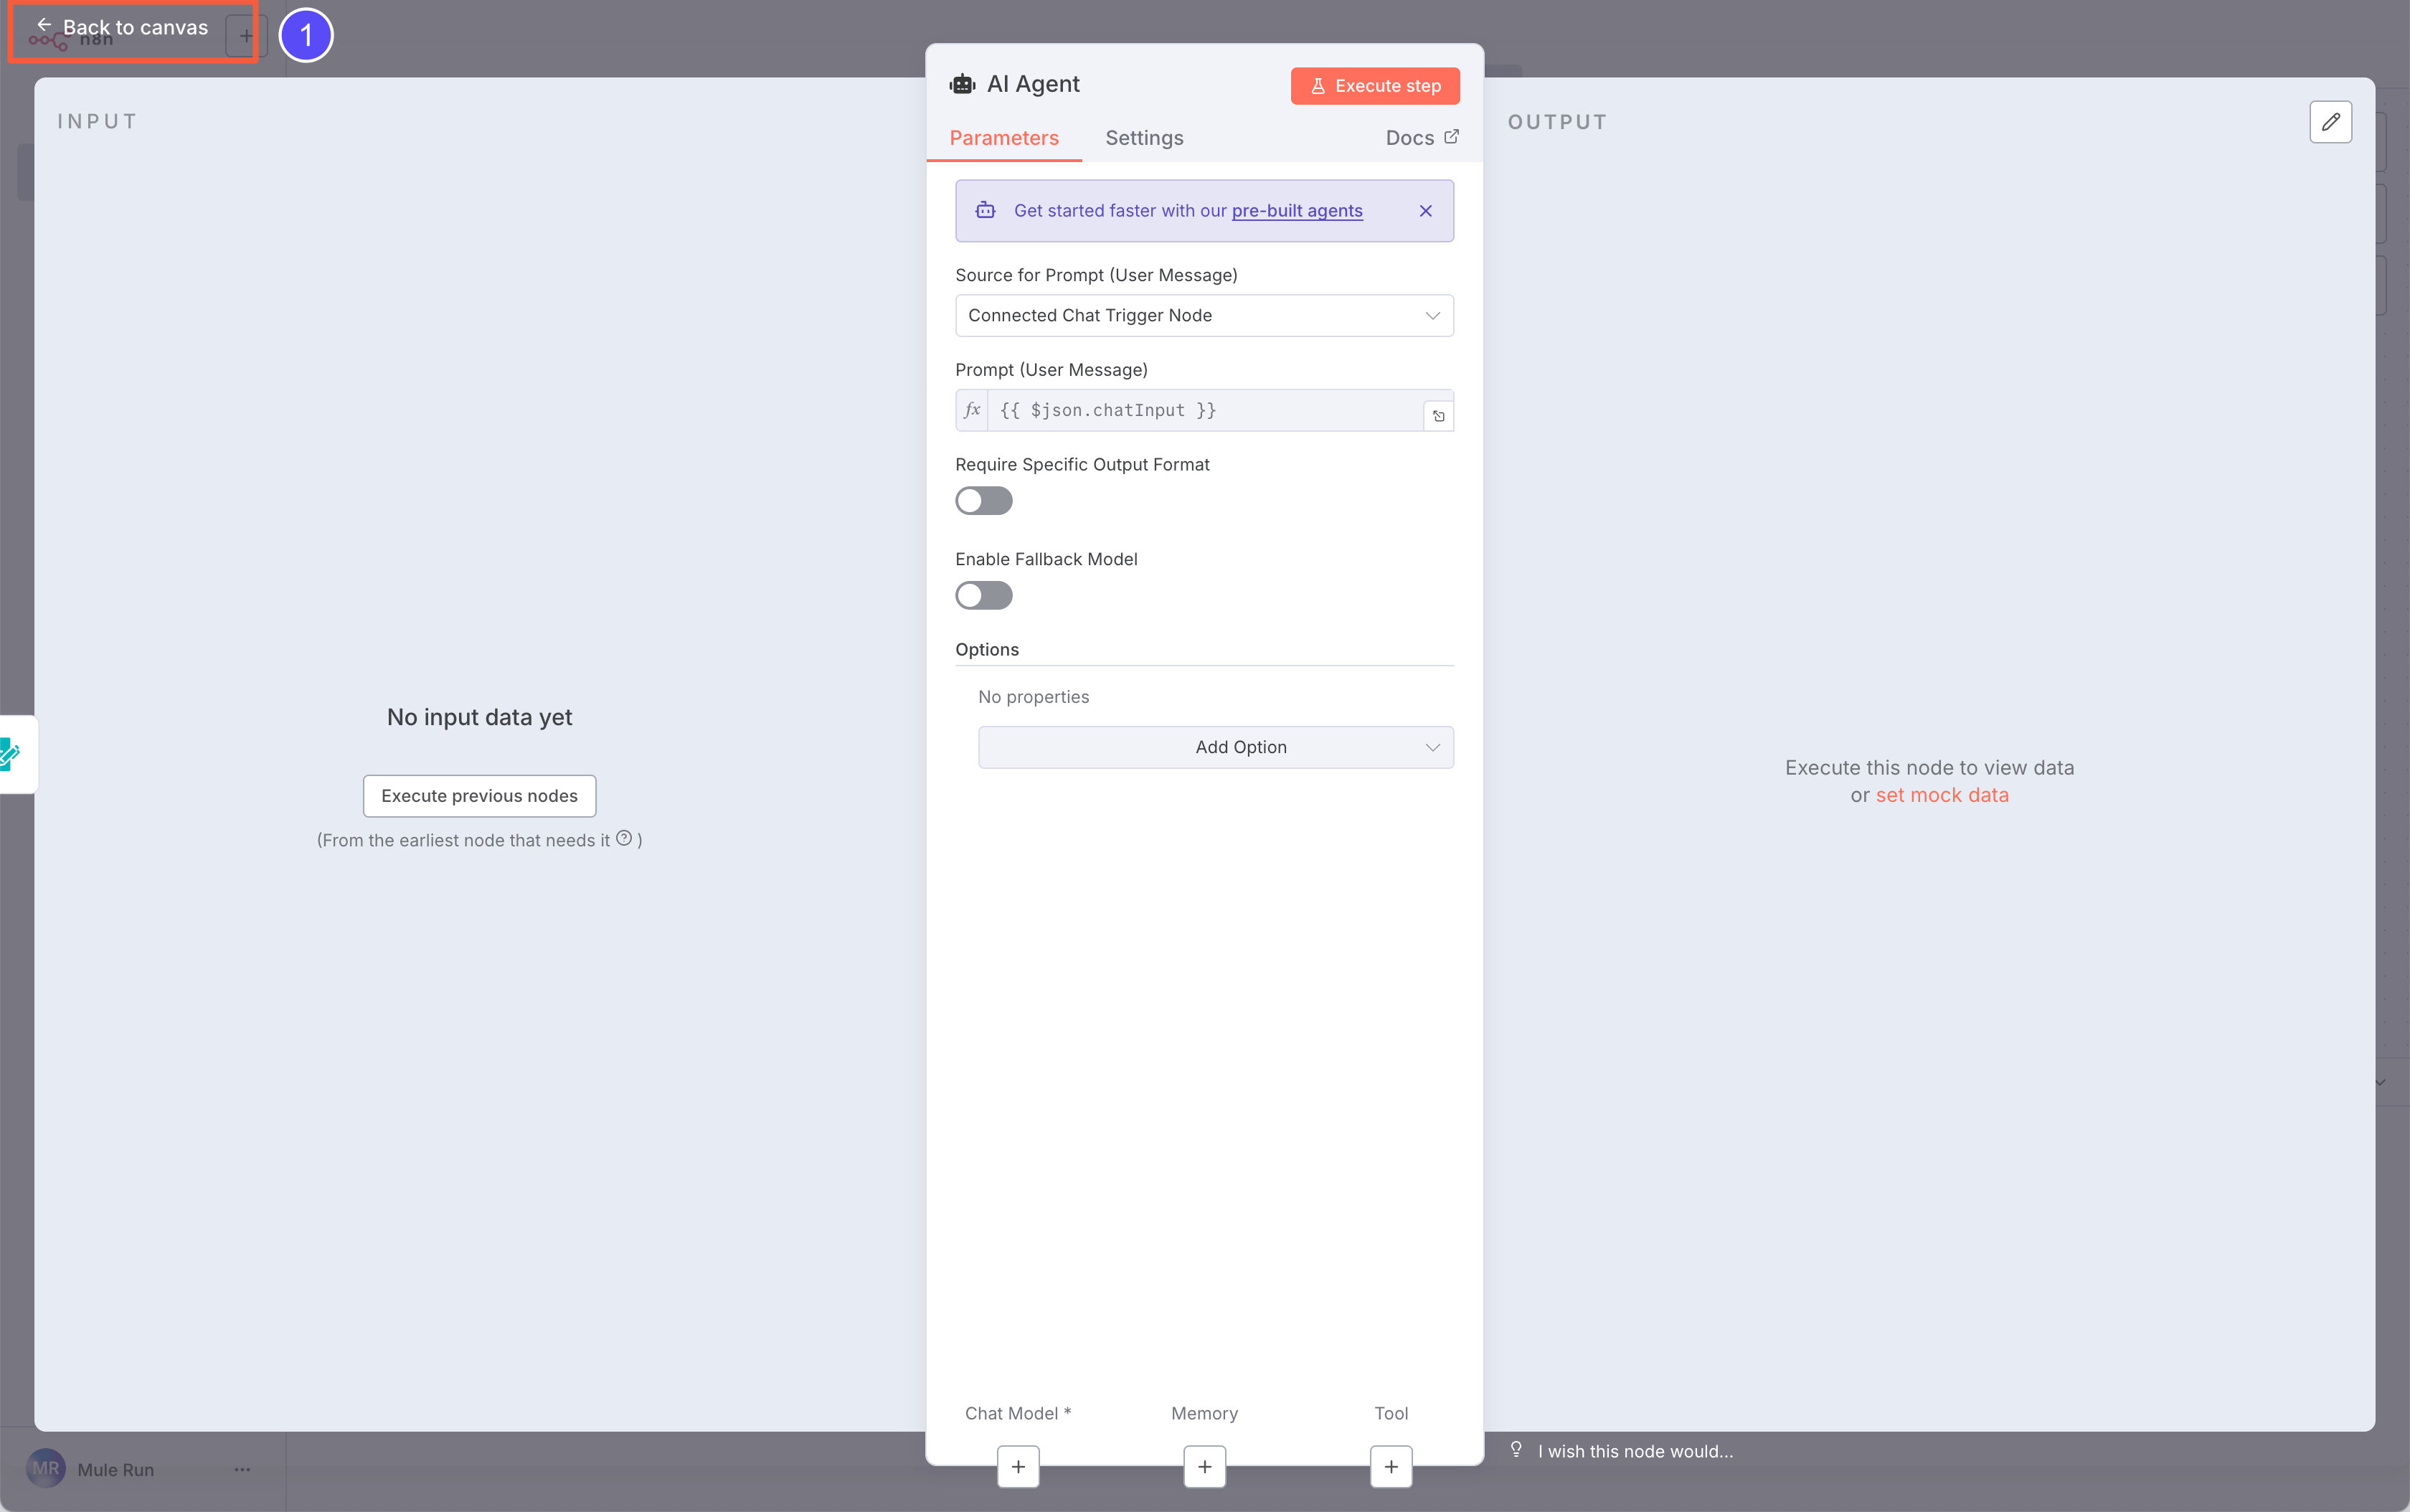 Before setting up the Agent, configure the AI model:
 We’ll use the
 Gemini 2.5 Flash Image Preview model via an OpenAI-compatible API. So, set the provider to OpenAI.
MuleRouter’s LLM APIs (including Gemini) are all OpenAI-compatible. For the best compatibility, you should prioritize using the OpenAI format.
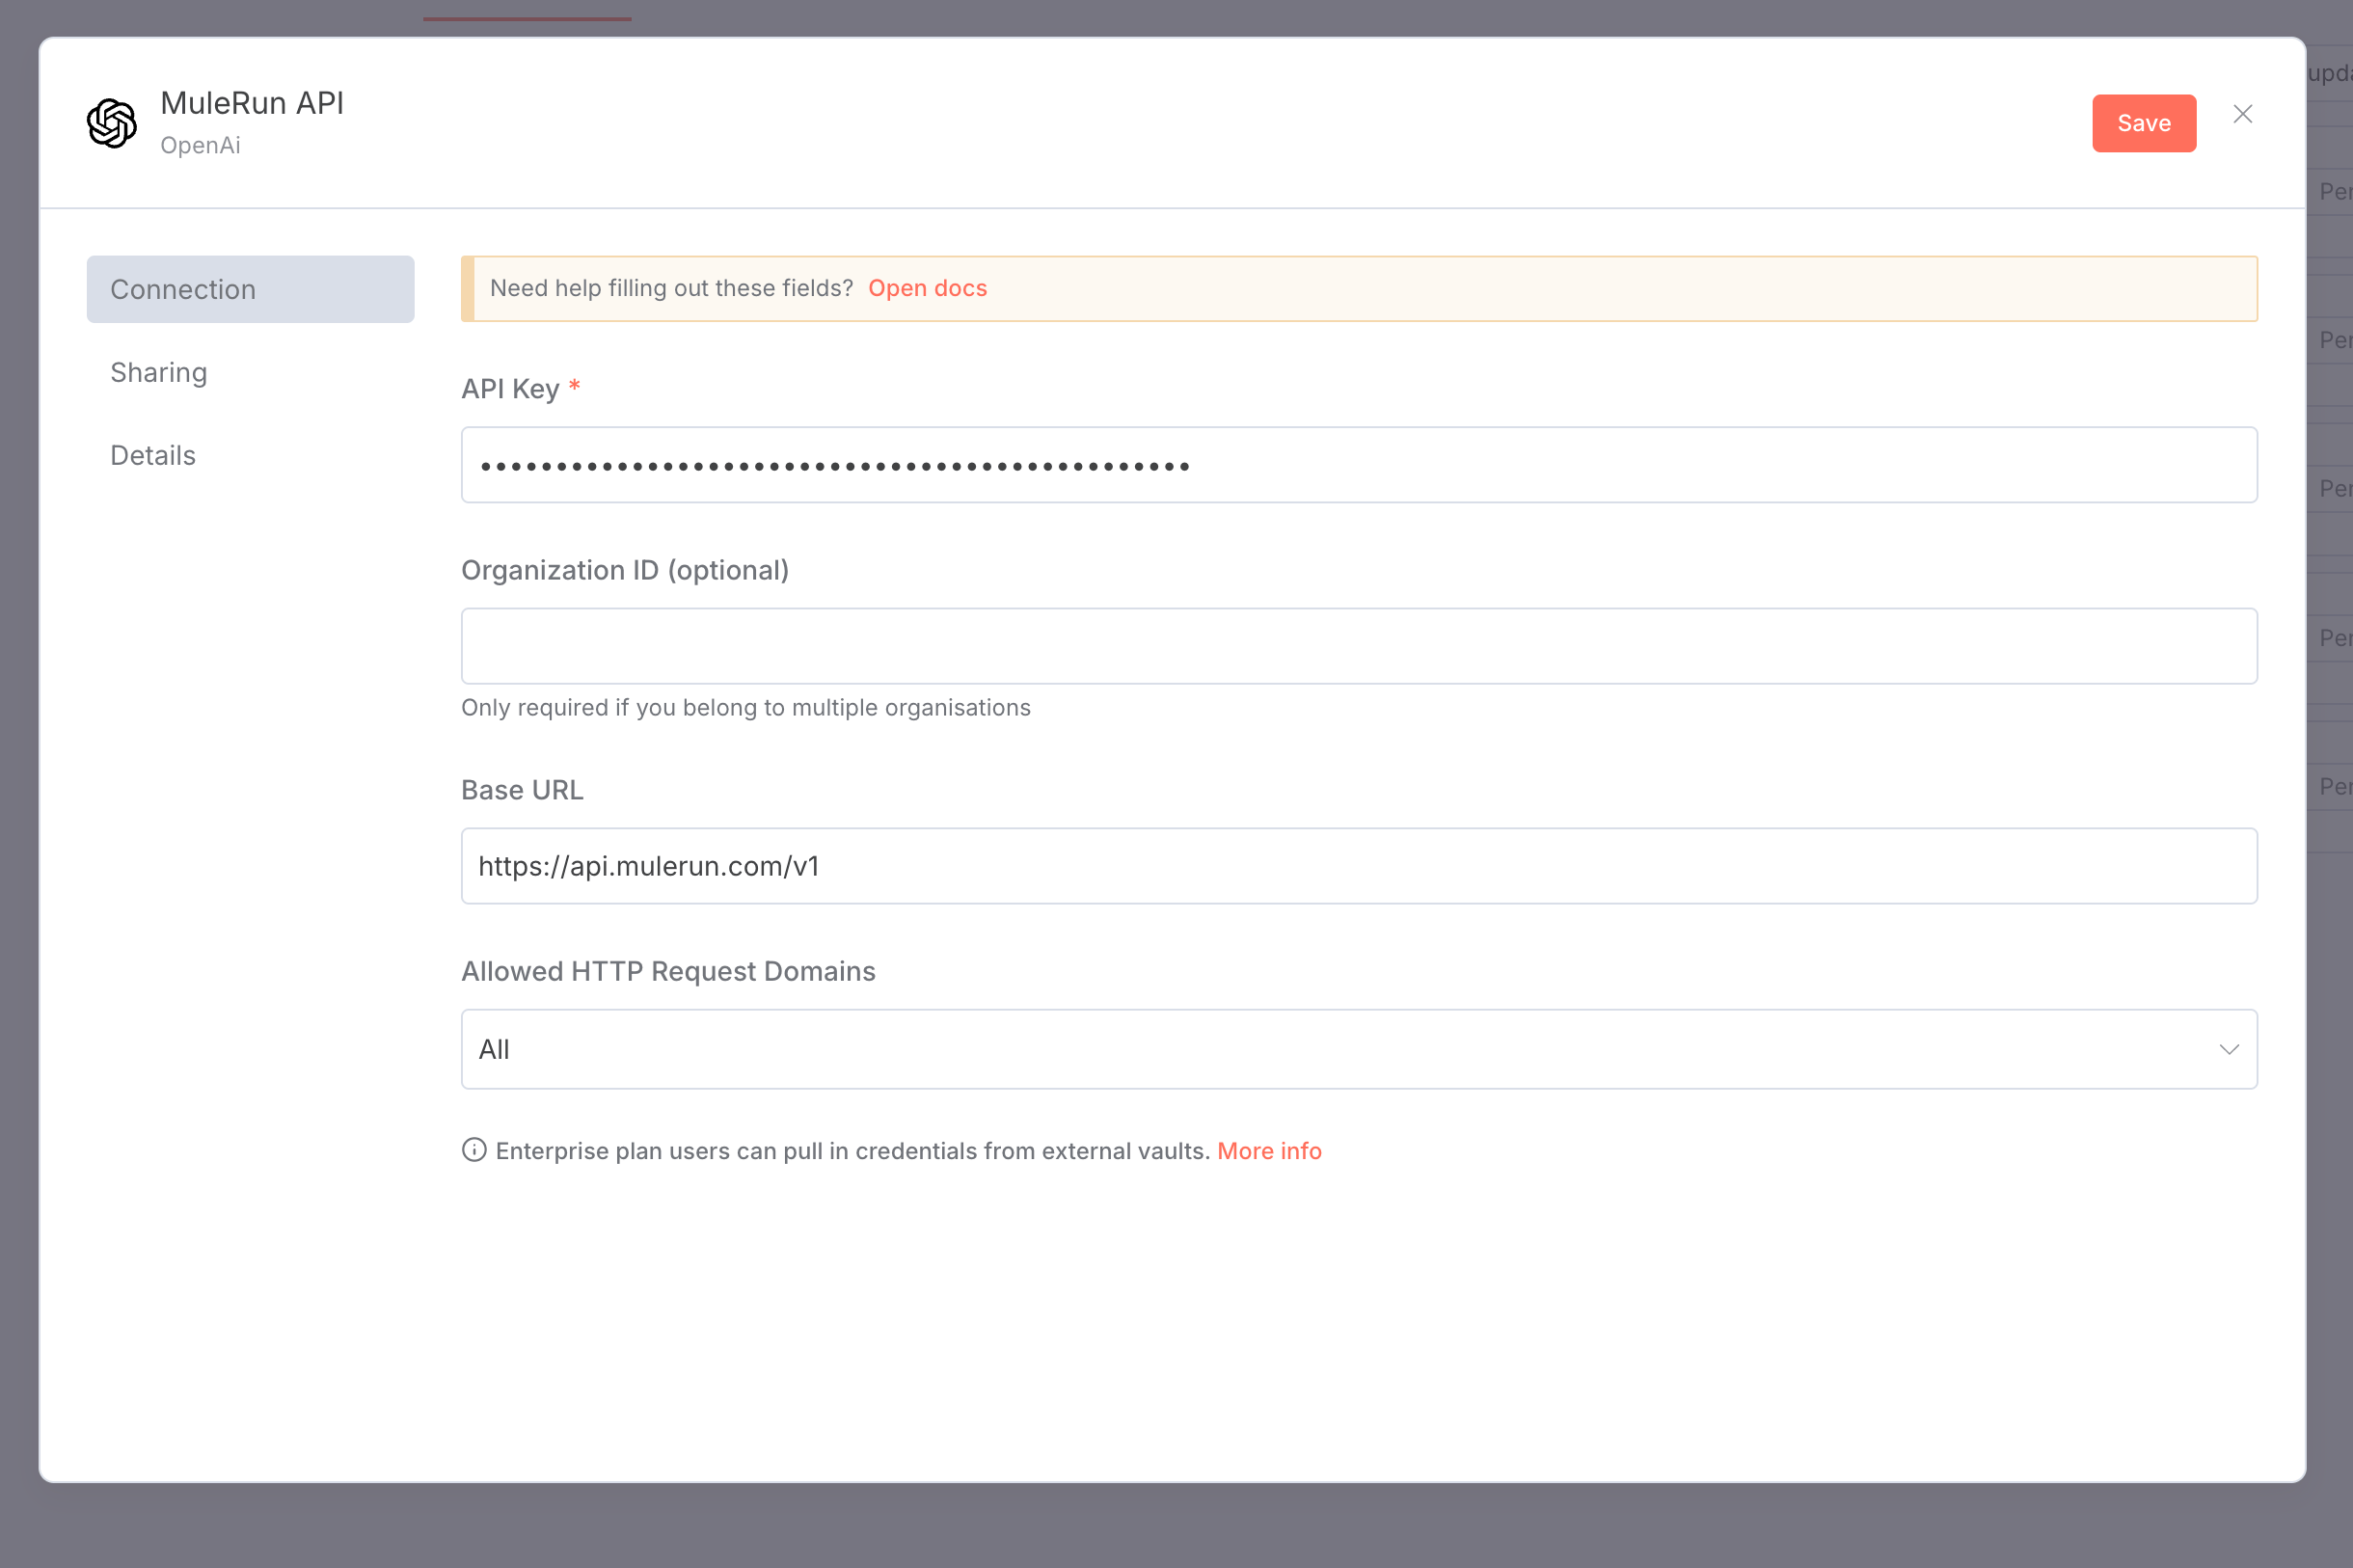 In n8n, create an OpenAI-style credential:
- API Key: your MuleRun API Key
- Base URL:
https://api.mulerun.com/v1
 Next, in the model node’s Credentials, select what you just created and set Model ID to
 gemini-2.5-flash-image-preview. You’ll find supported IDs in this list.
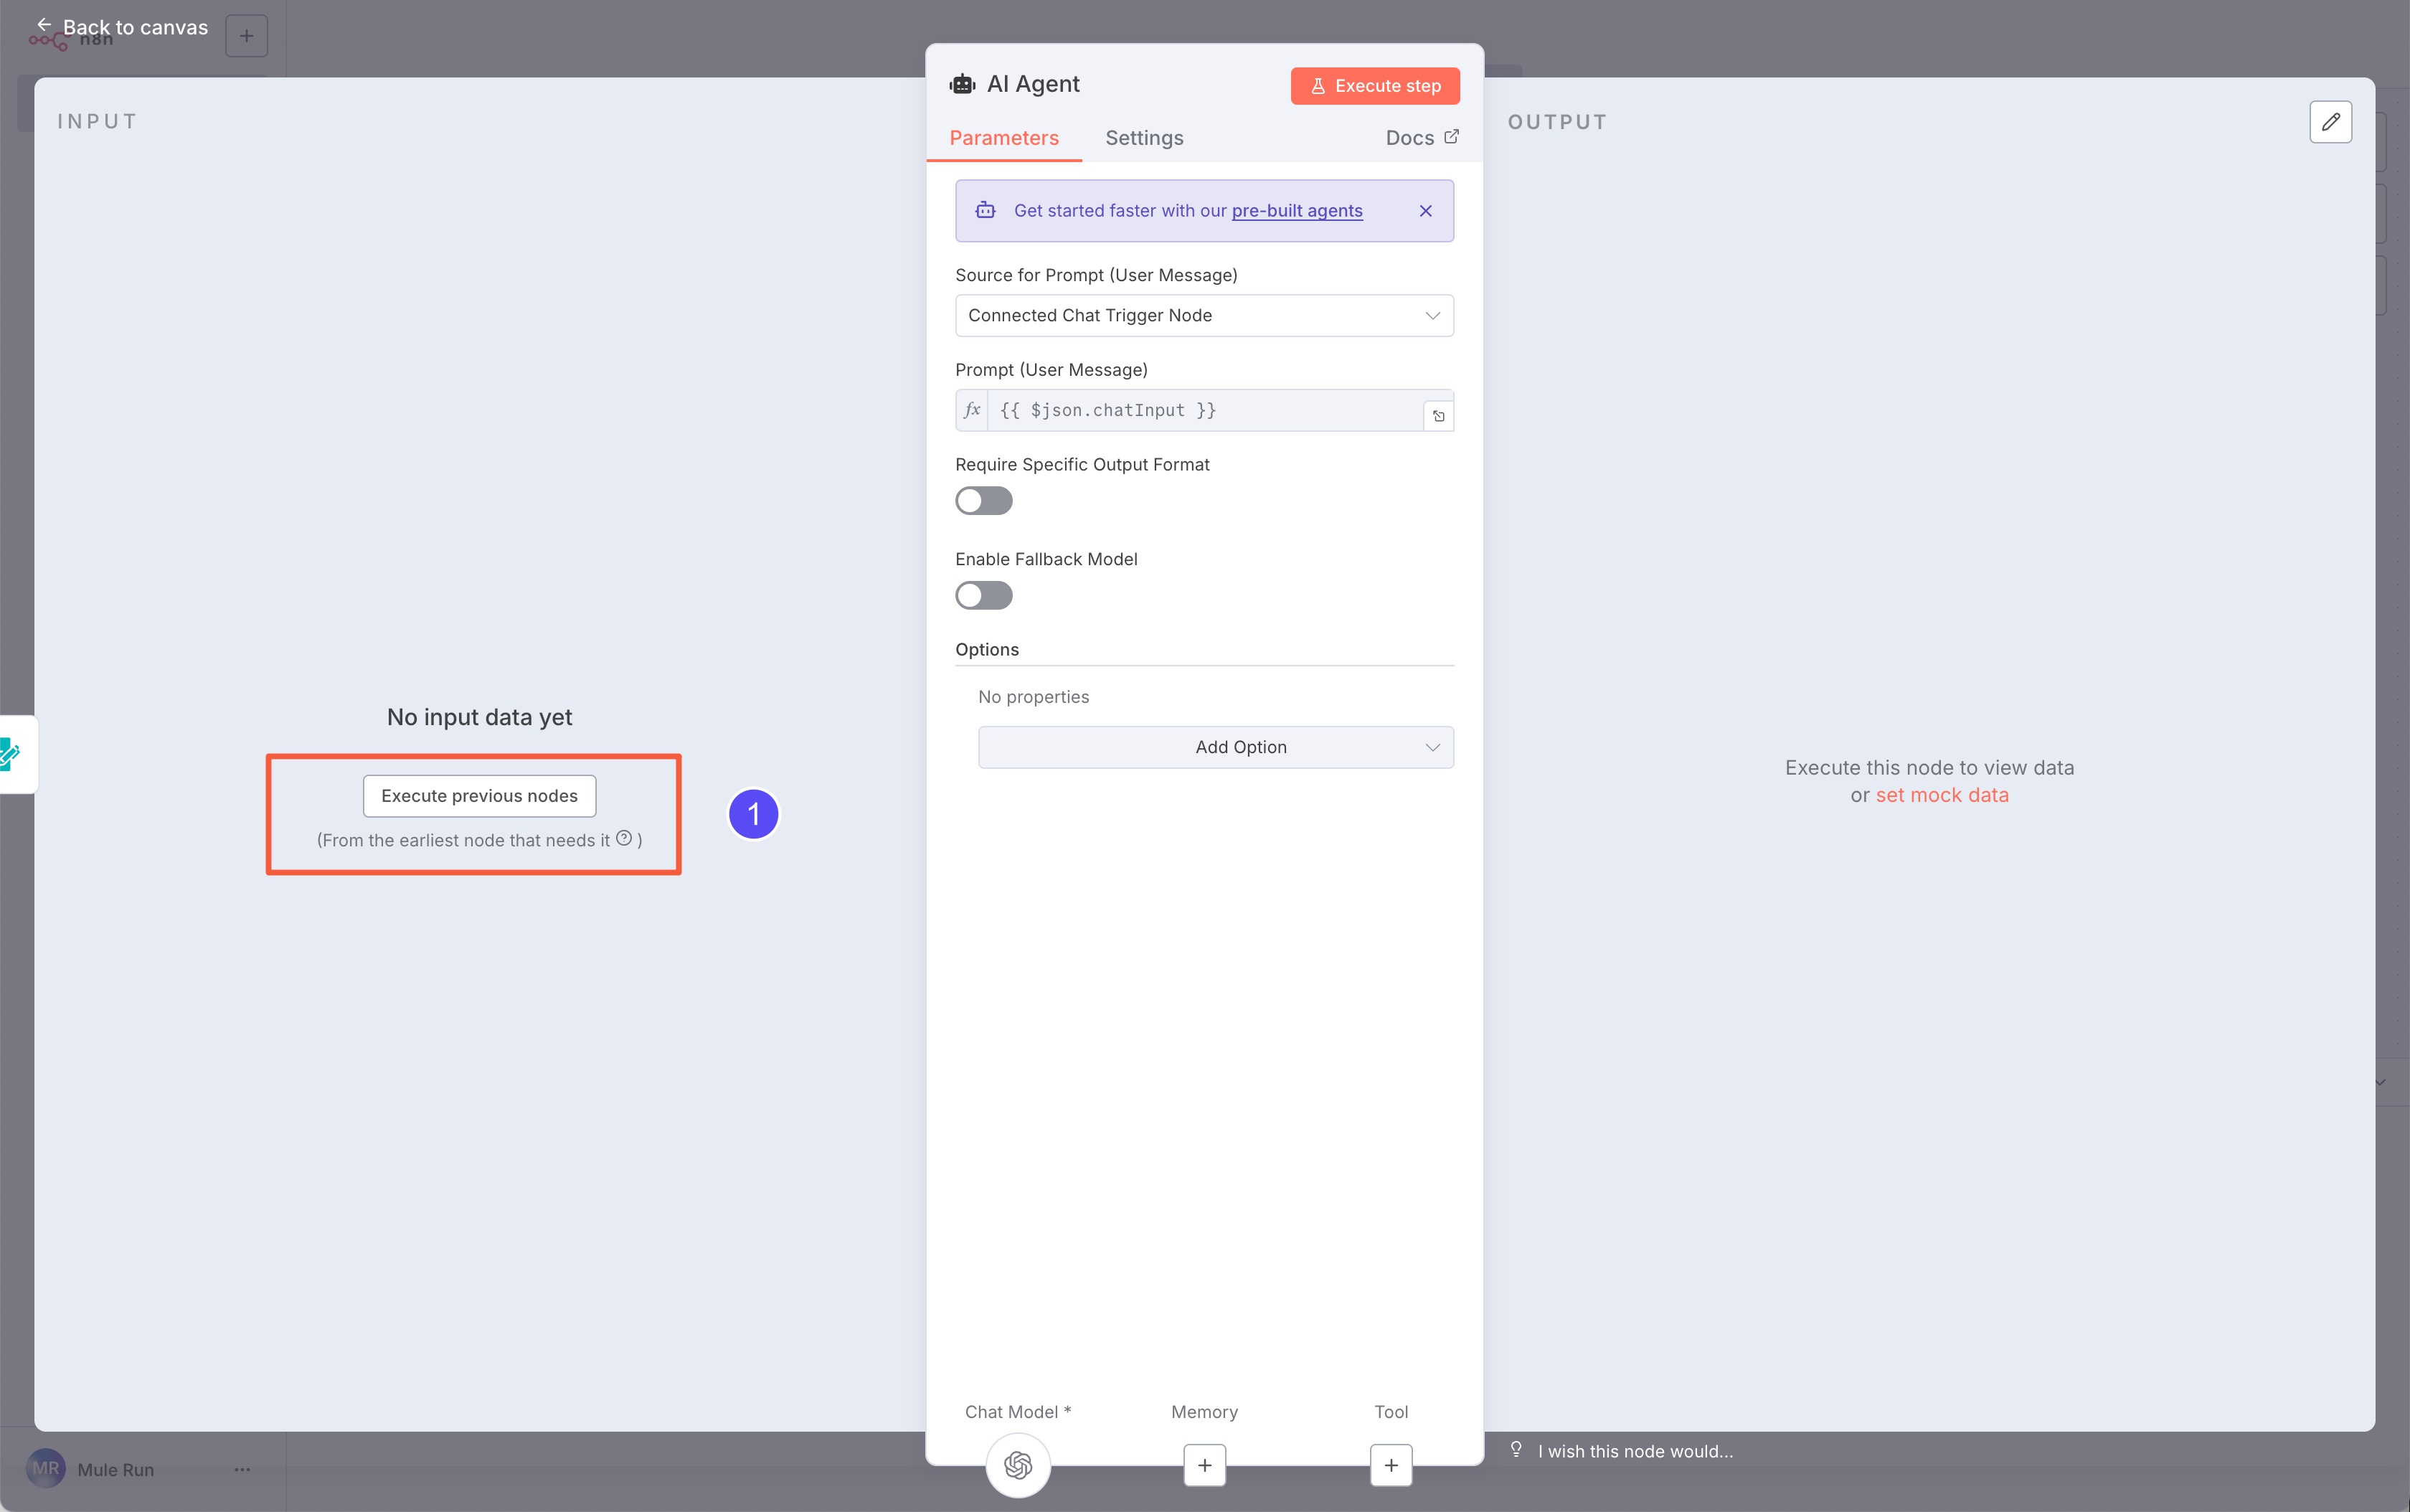 Back in the AI Agent node, click Execute previous nodes to fetch structured sample input.
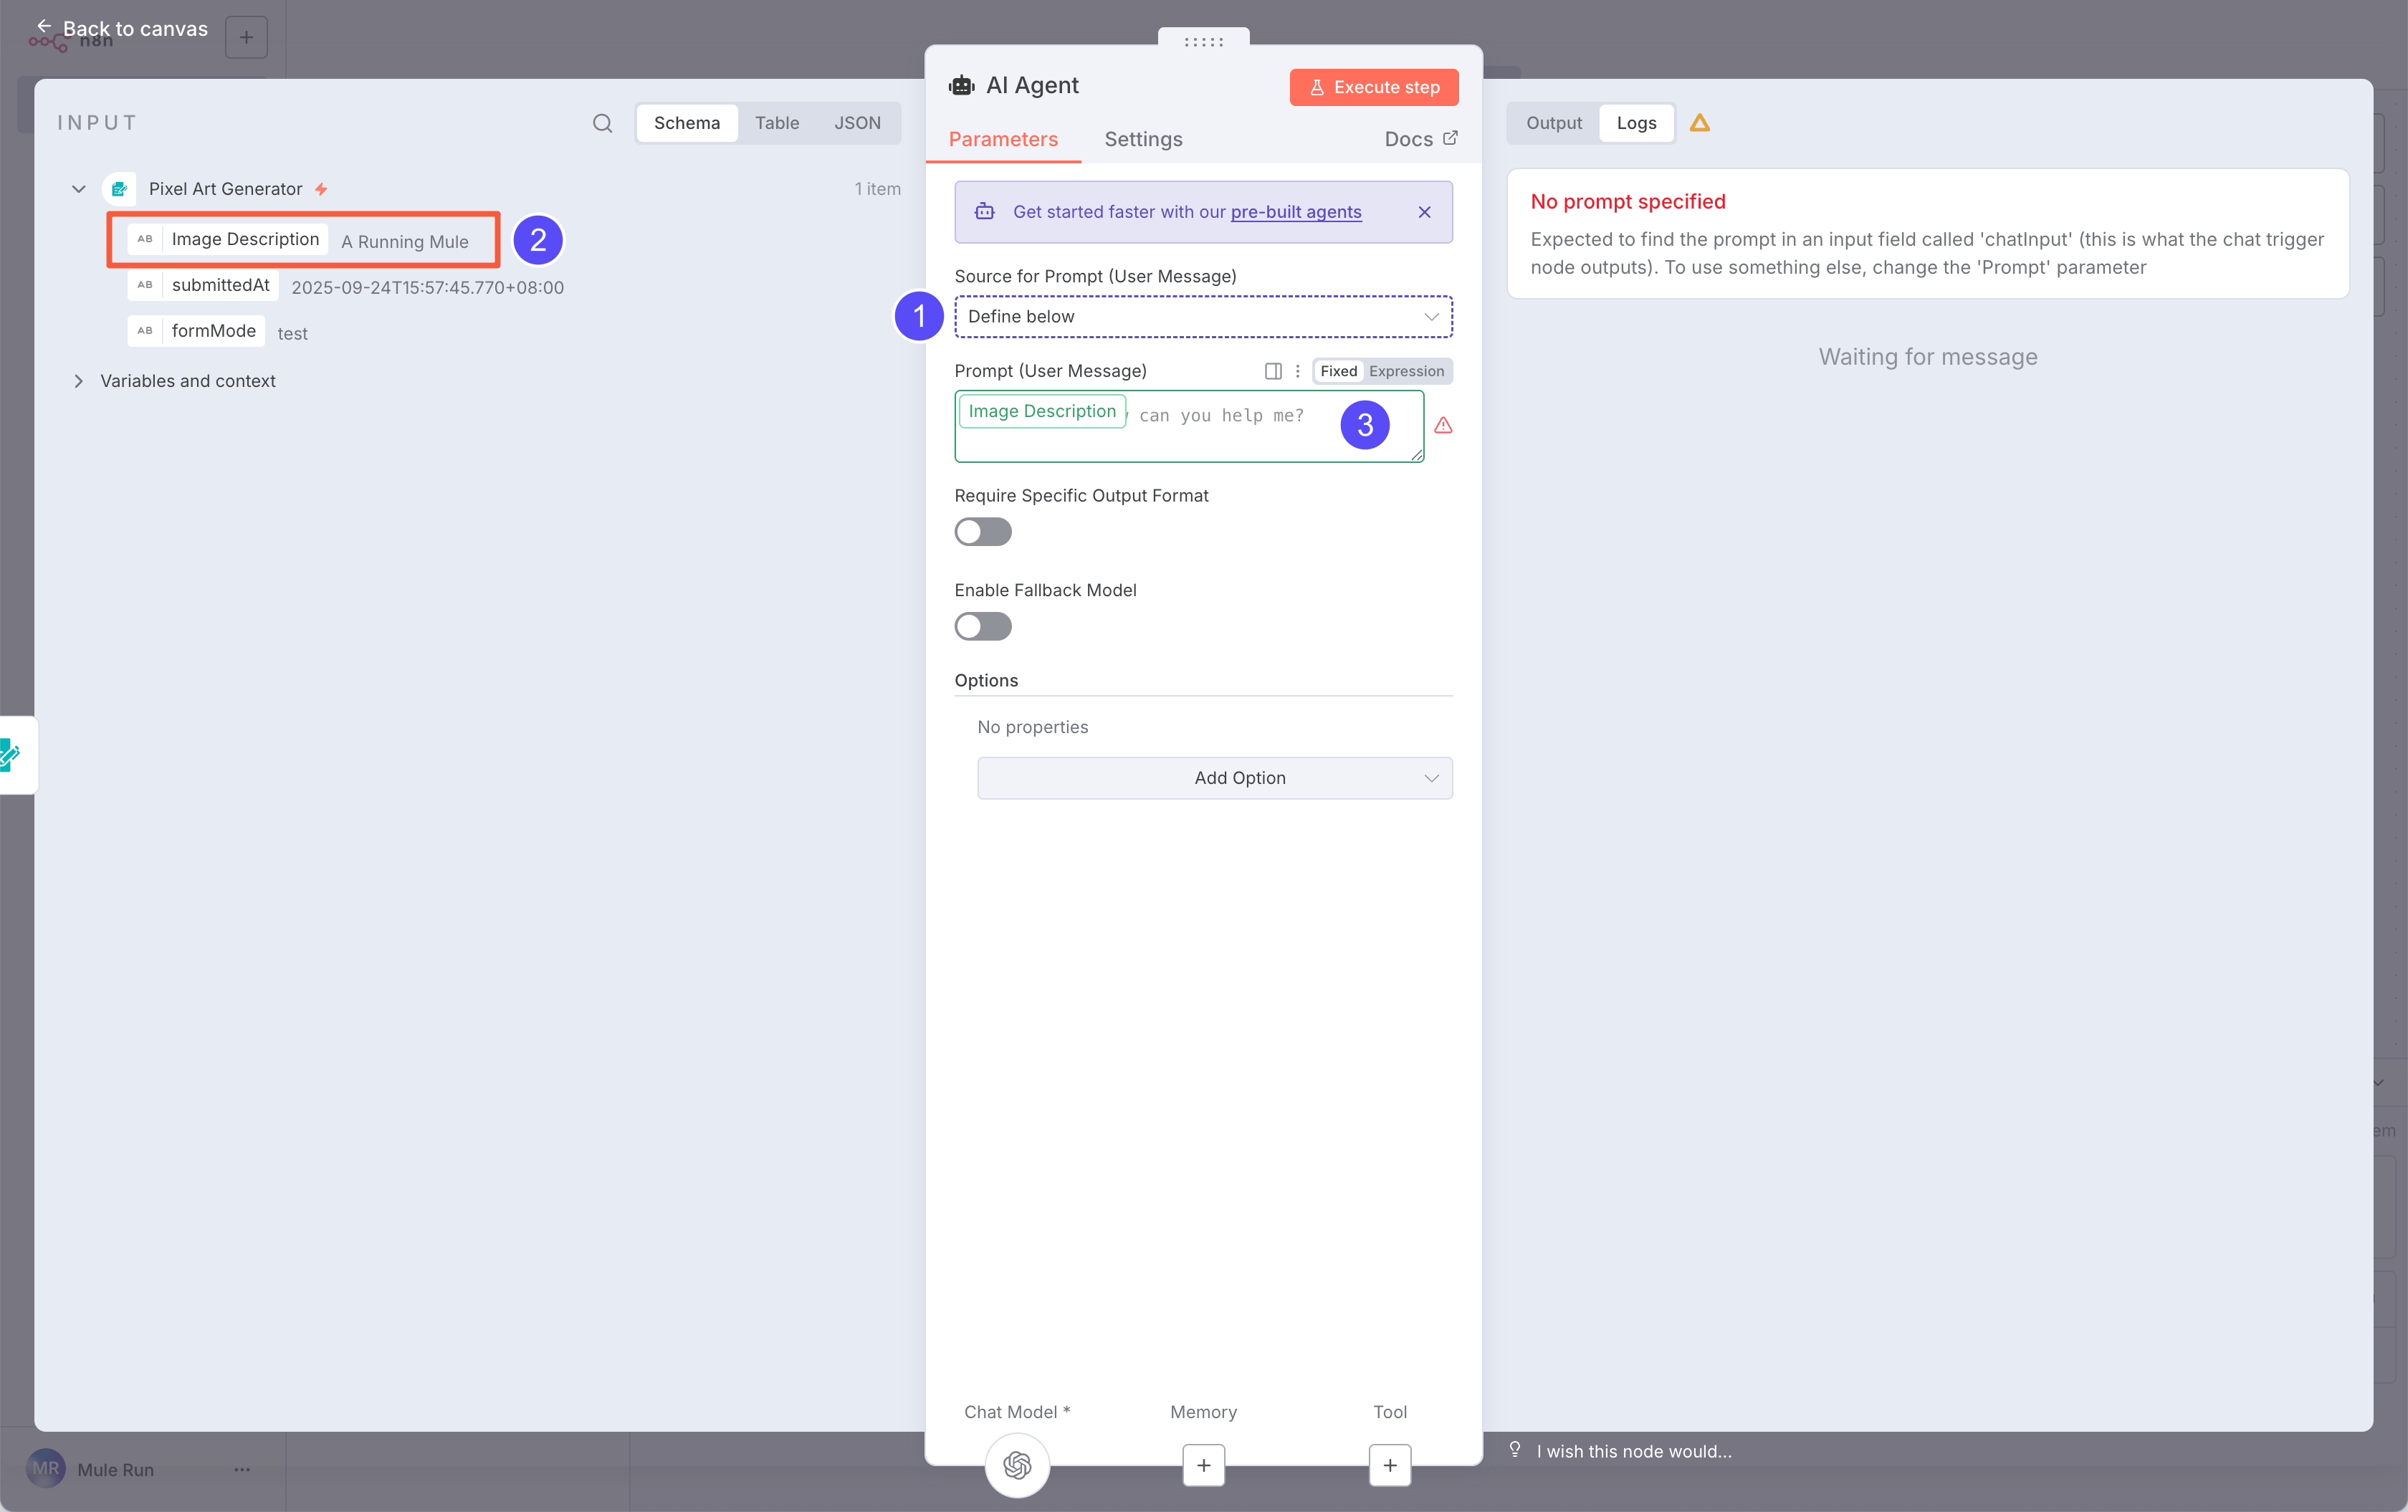 After filling the form, you’ll see the input data on the left. Since we’re using a Form Input, set Source for Prompt to Define below, so we can map fields manually.
Drag the
After filling the form, you’ll see the input data on the left. Since we’re using a Form Input, set Source for Prompt to Define below, so we can map fields manually.
Drag the Image Description (from Input) onto the Prompt field.
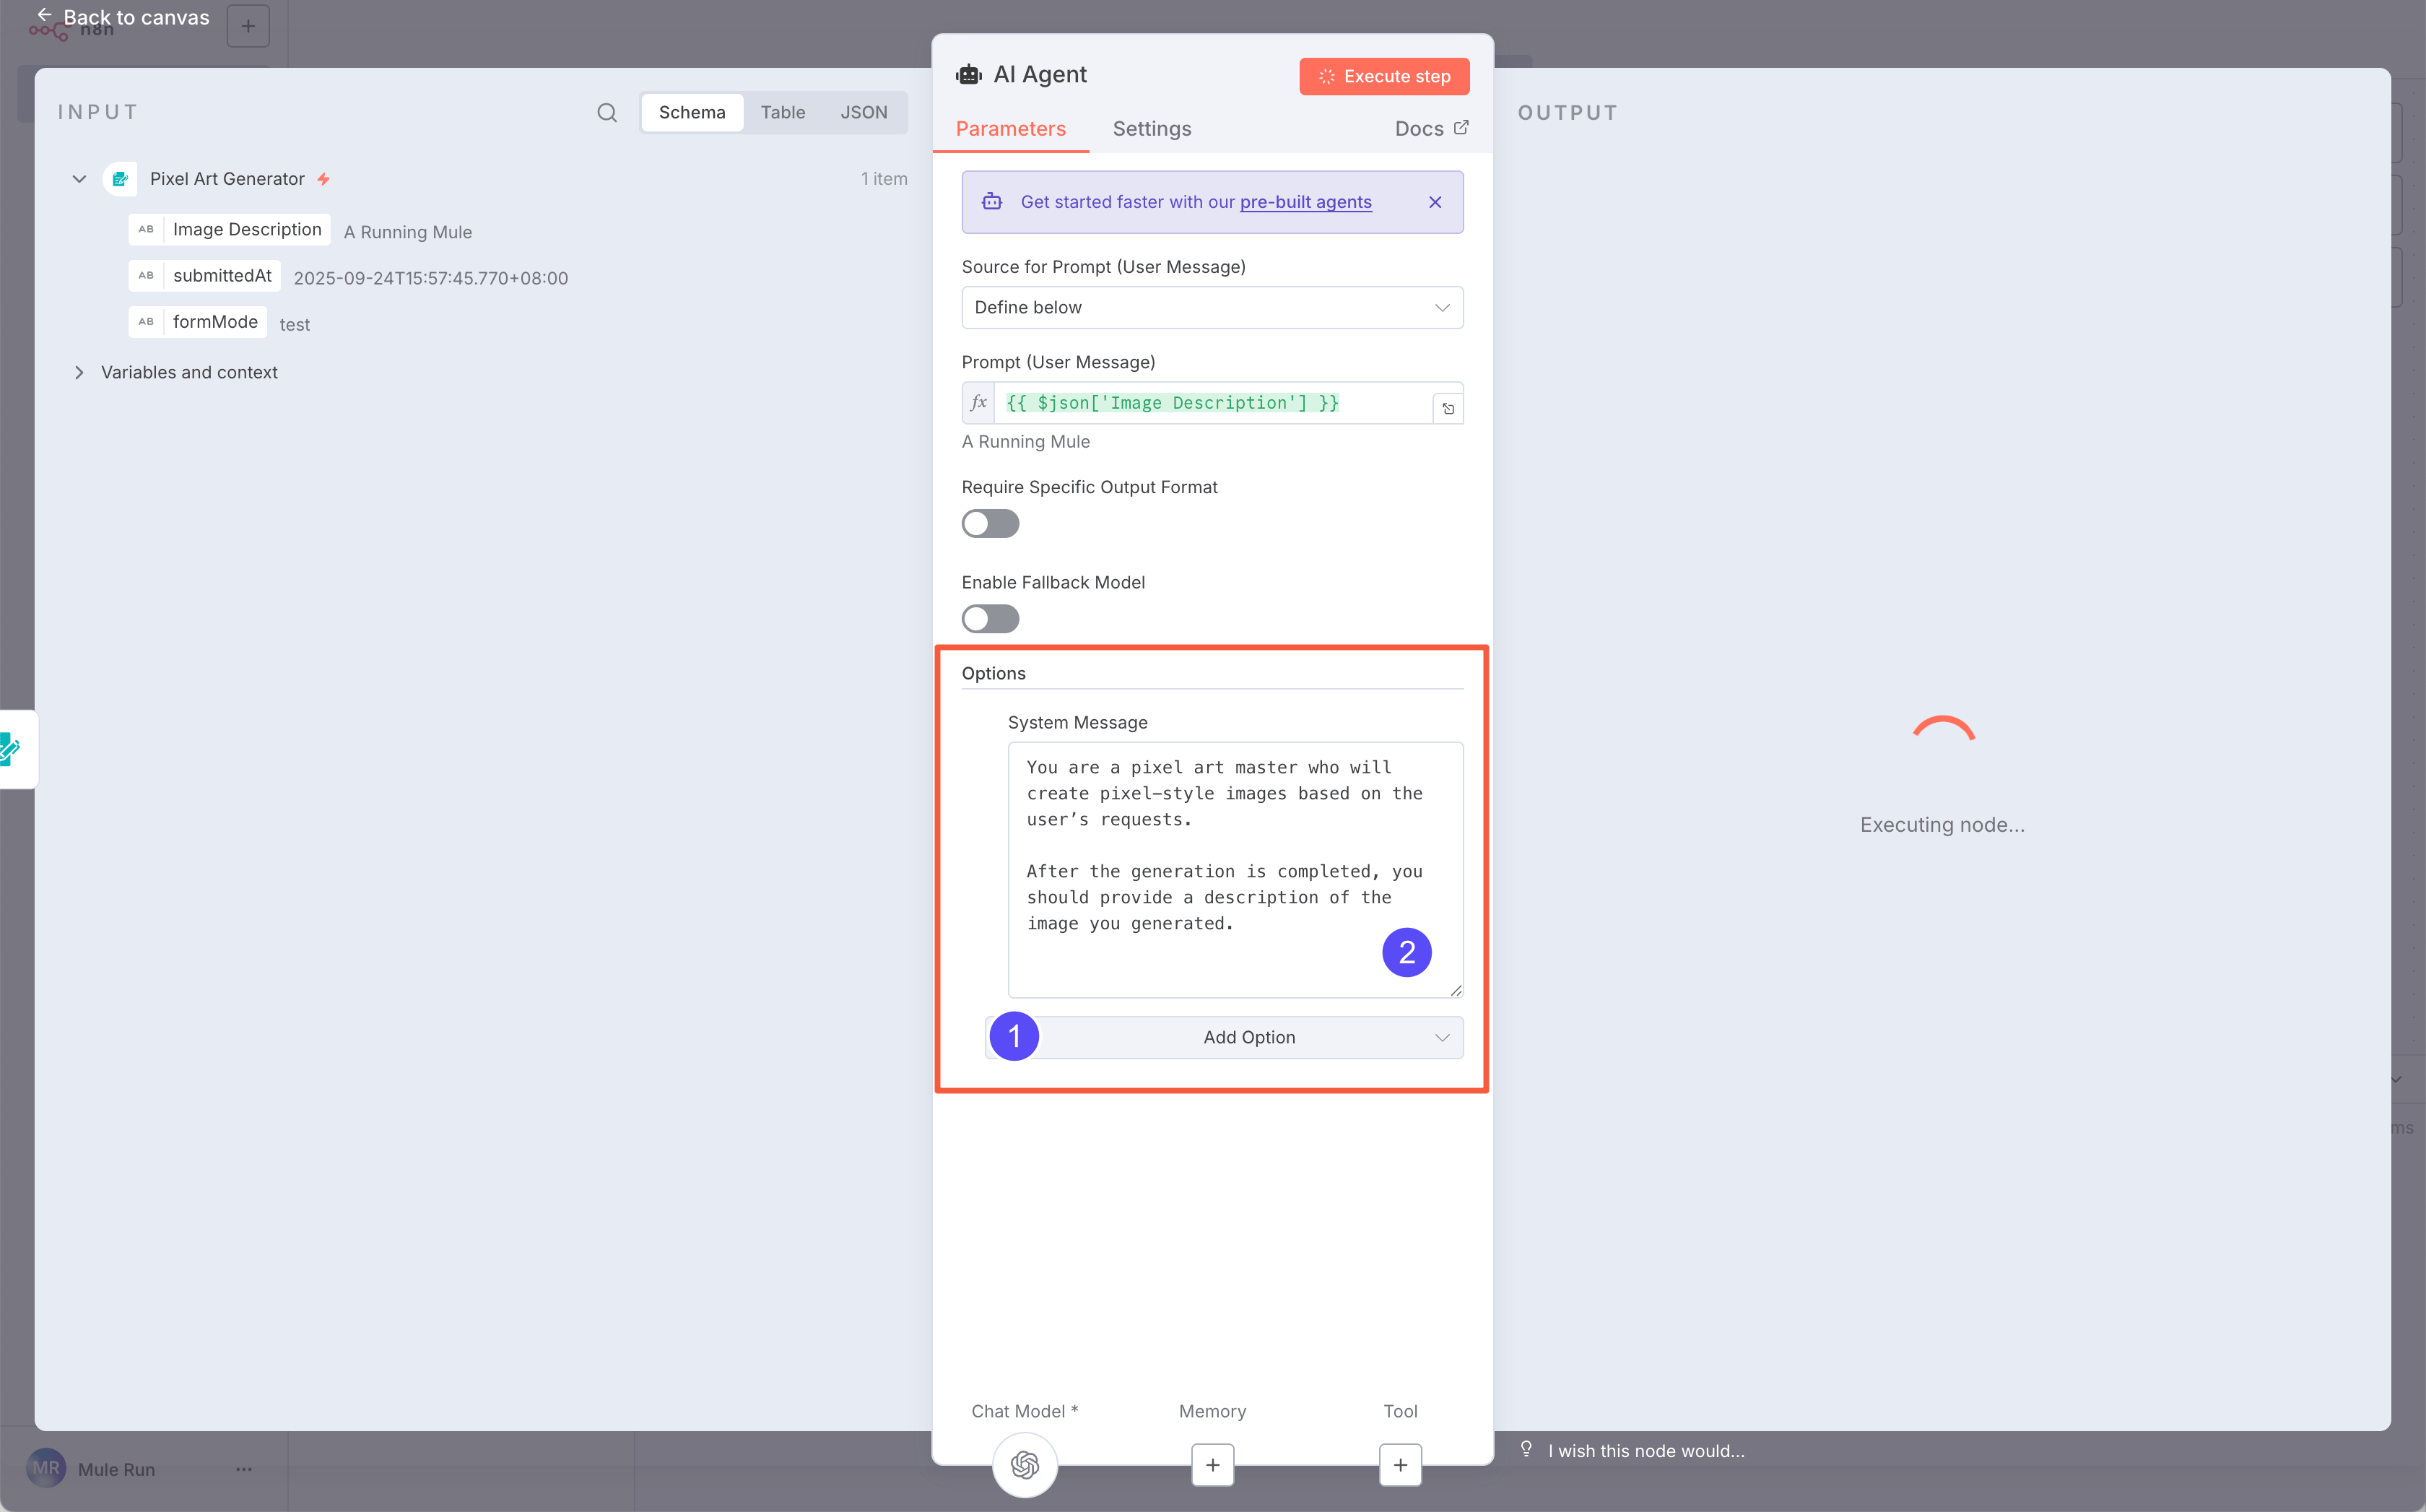 Now, add a System Prompt for the AI Agent:
You are a pixel art master who will create pixel-style images based on the user’s requests.

After the generation is completed, you should provide a description of the image you generated.
The System Prompt defines the rules the AI follows. The User Prompt comes from the user’s input.
The model returns results, but we need to format them. We only want the generated description and image file.
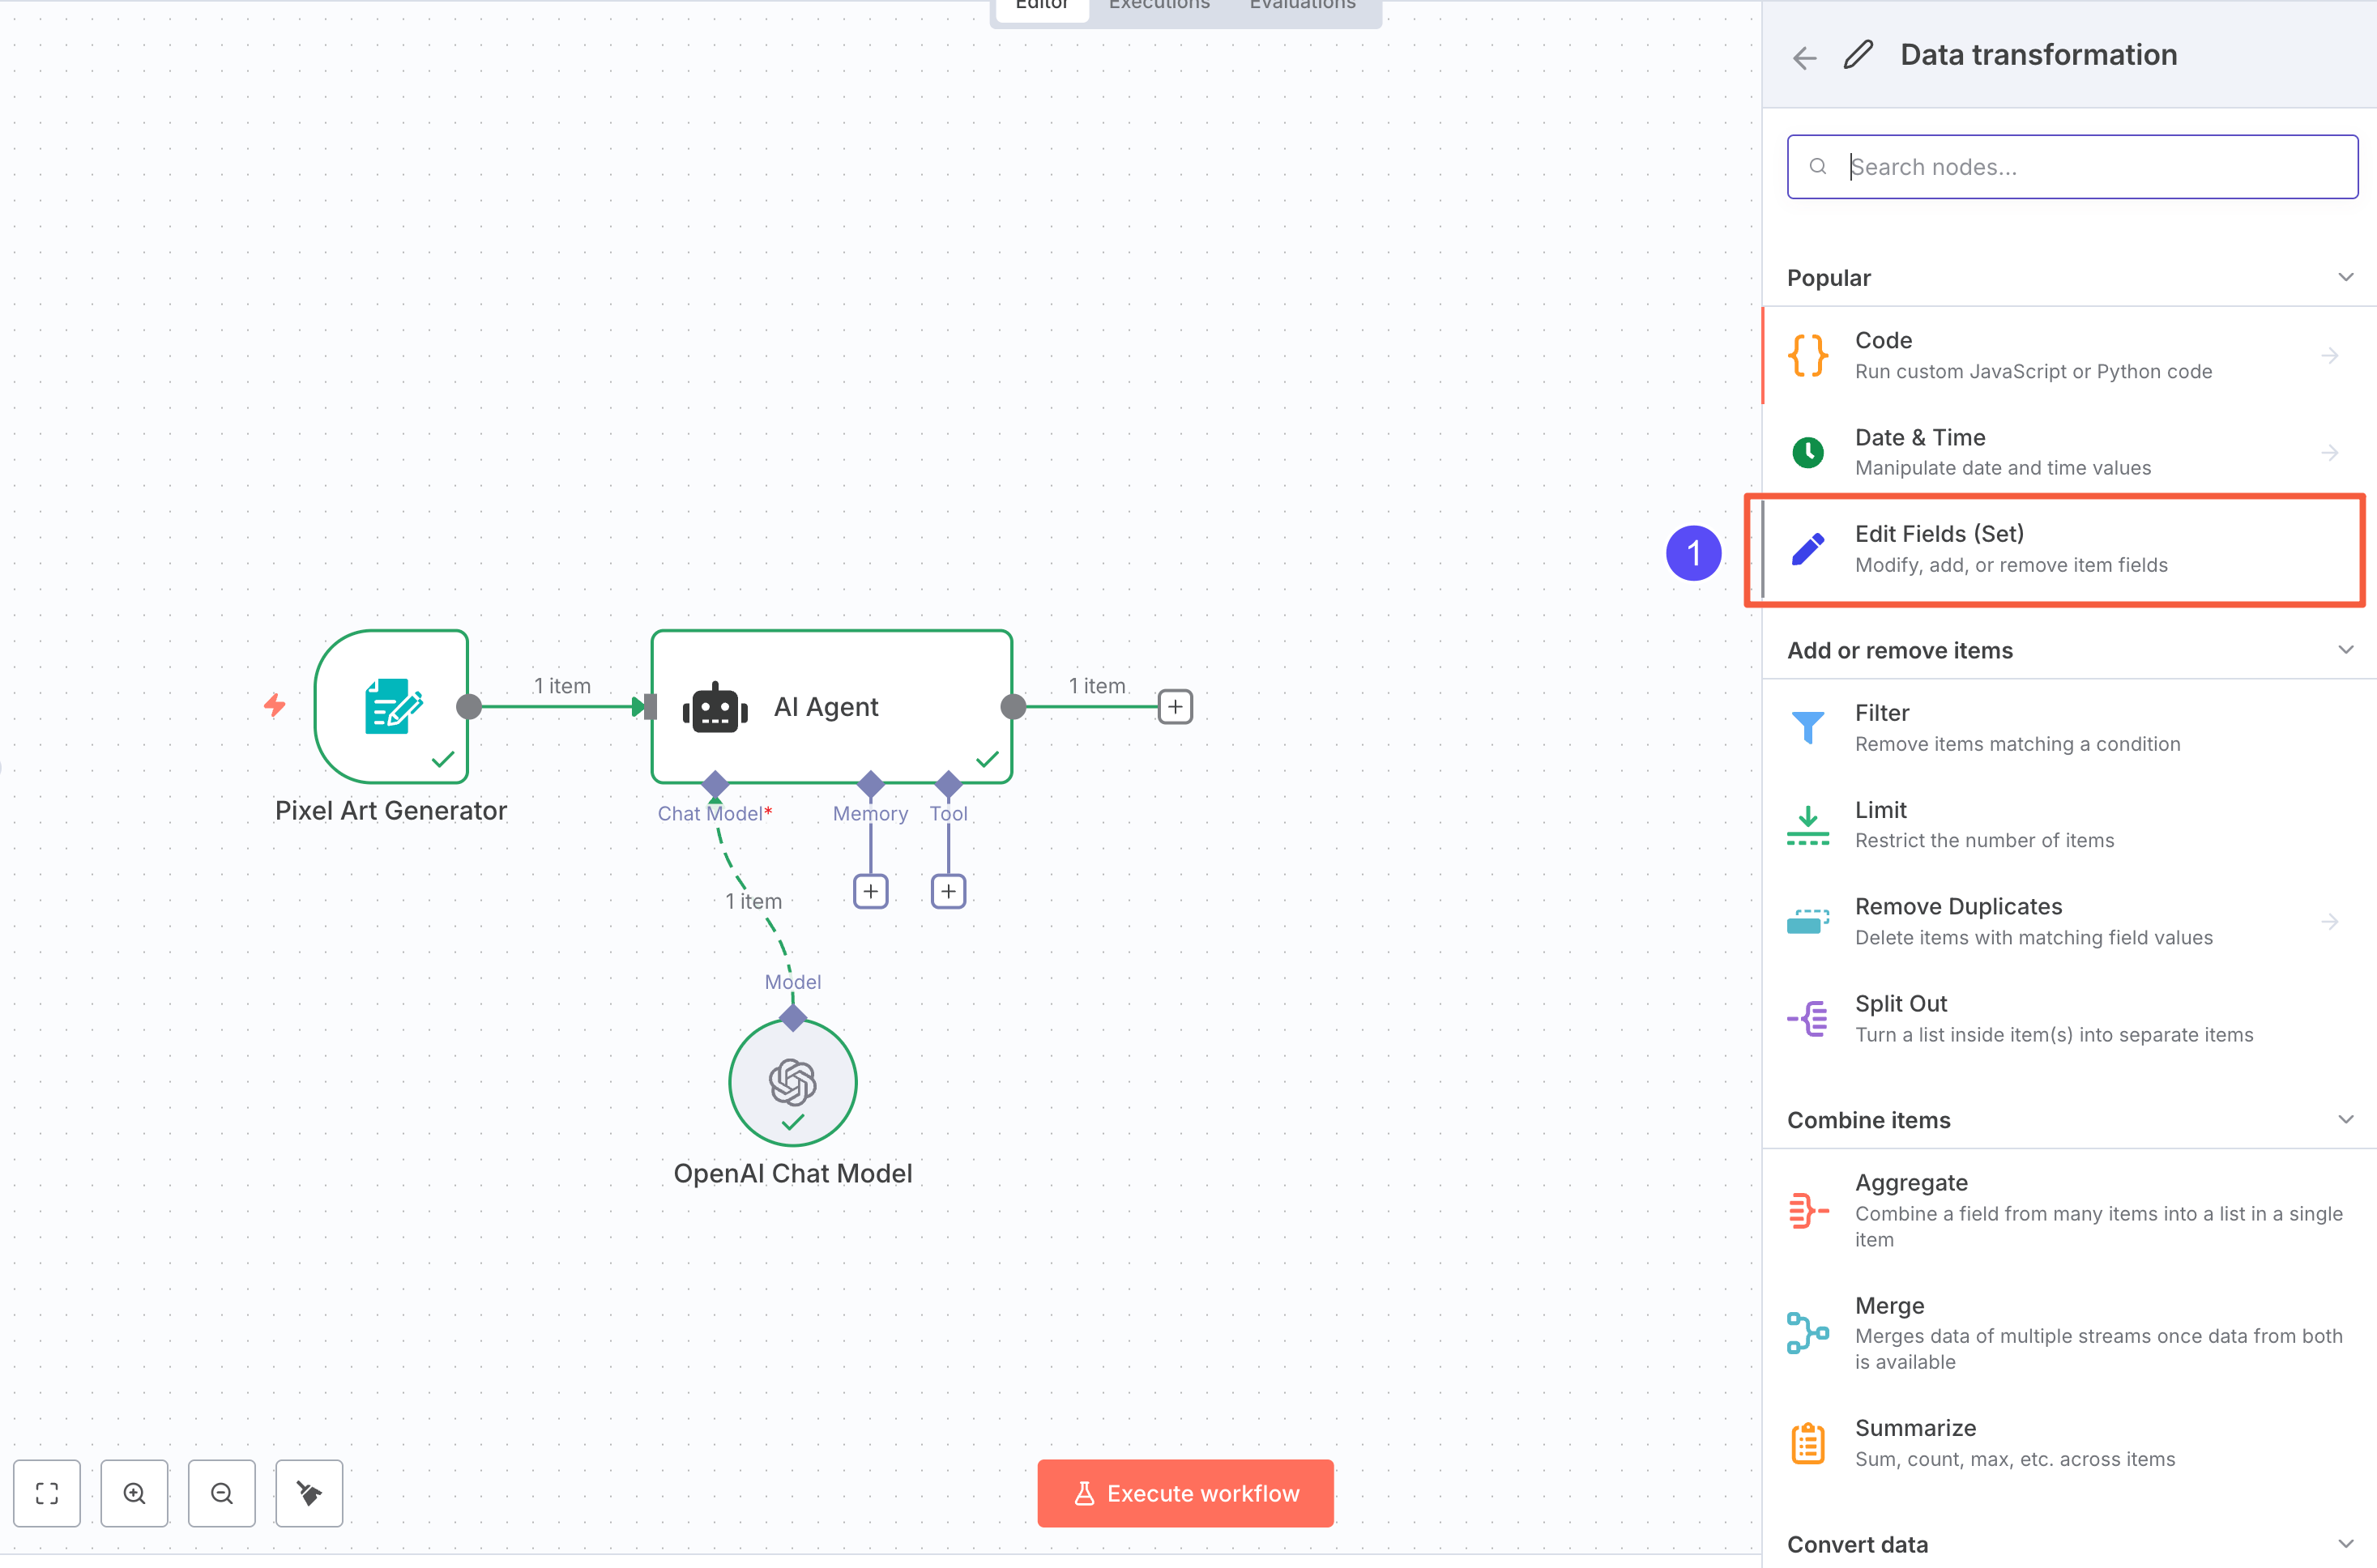 Add two Edit Fields (Set) nodes: one for the image, one for the text.
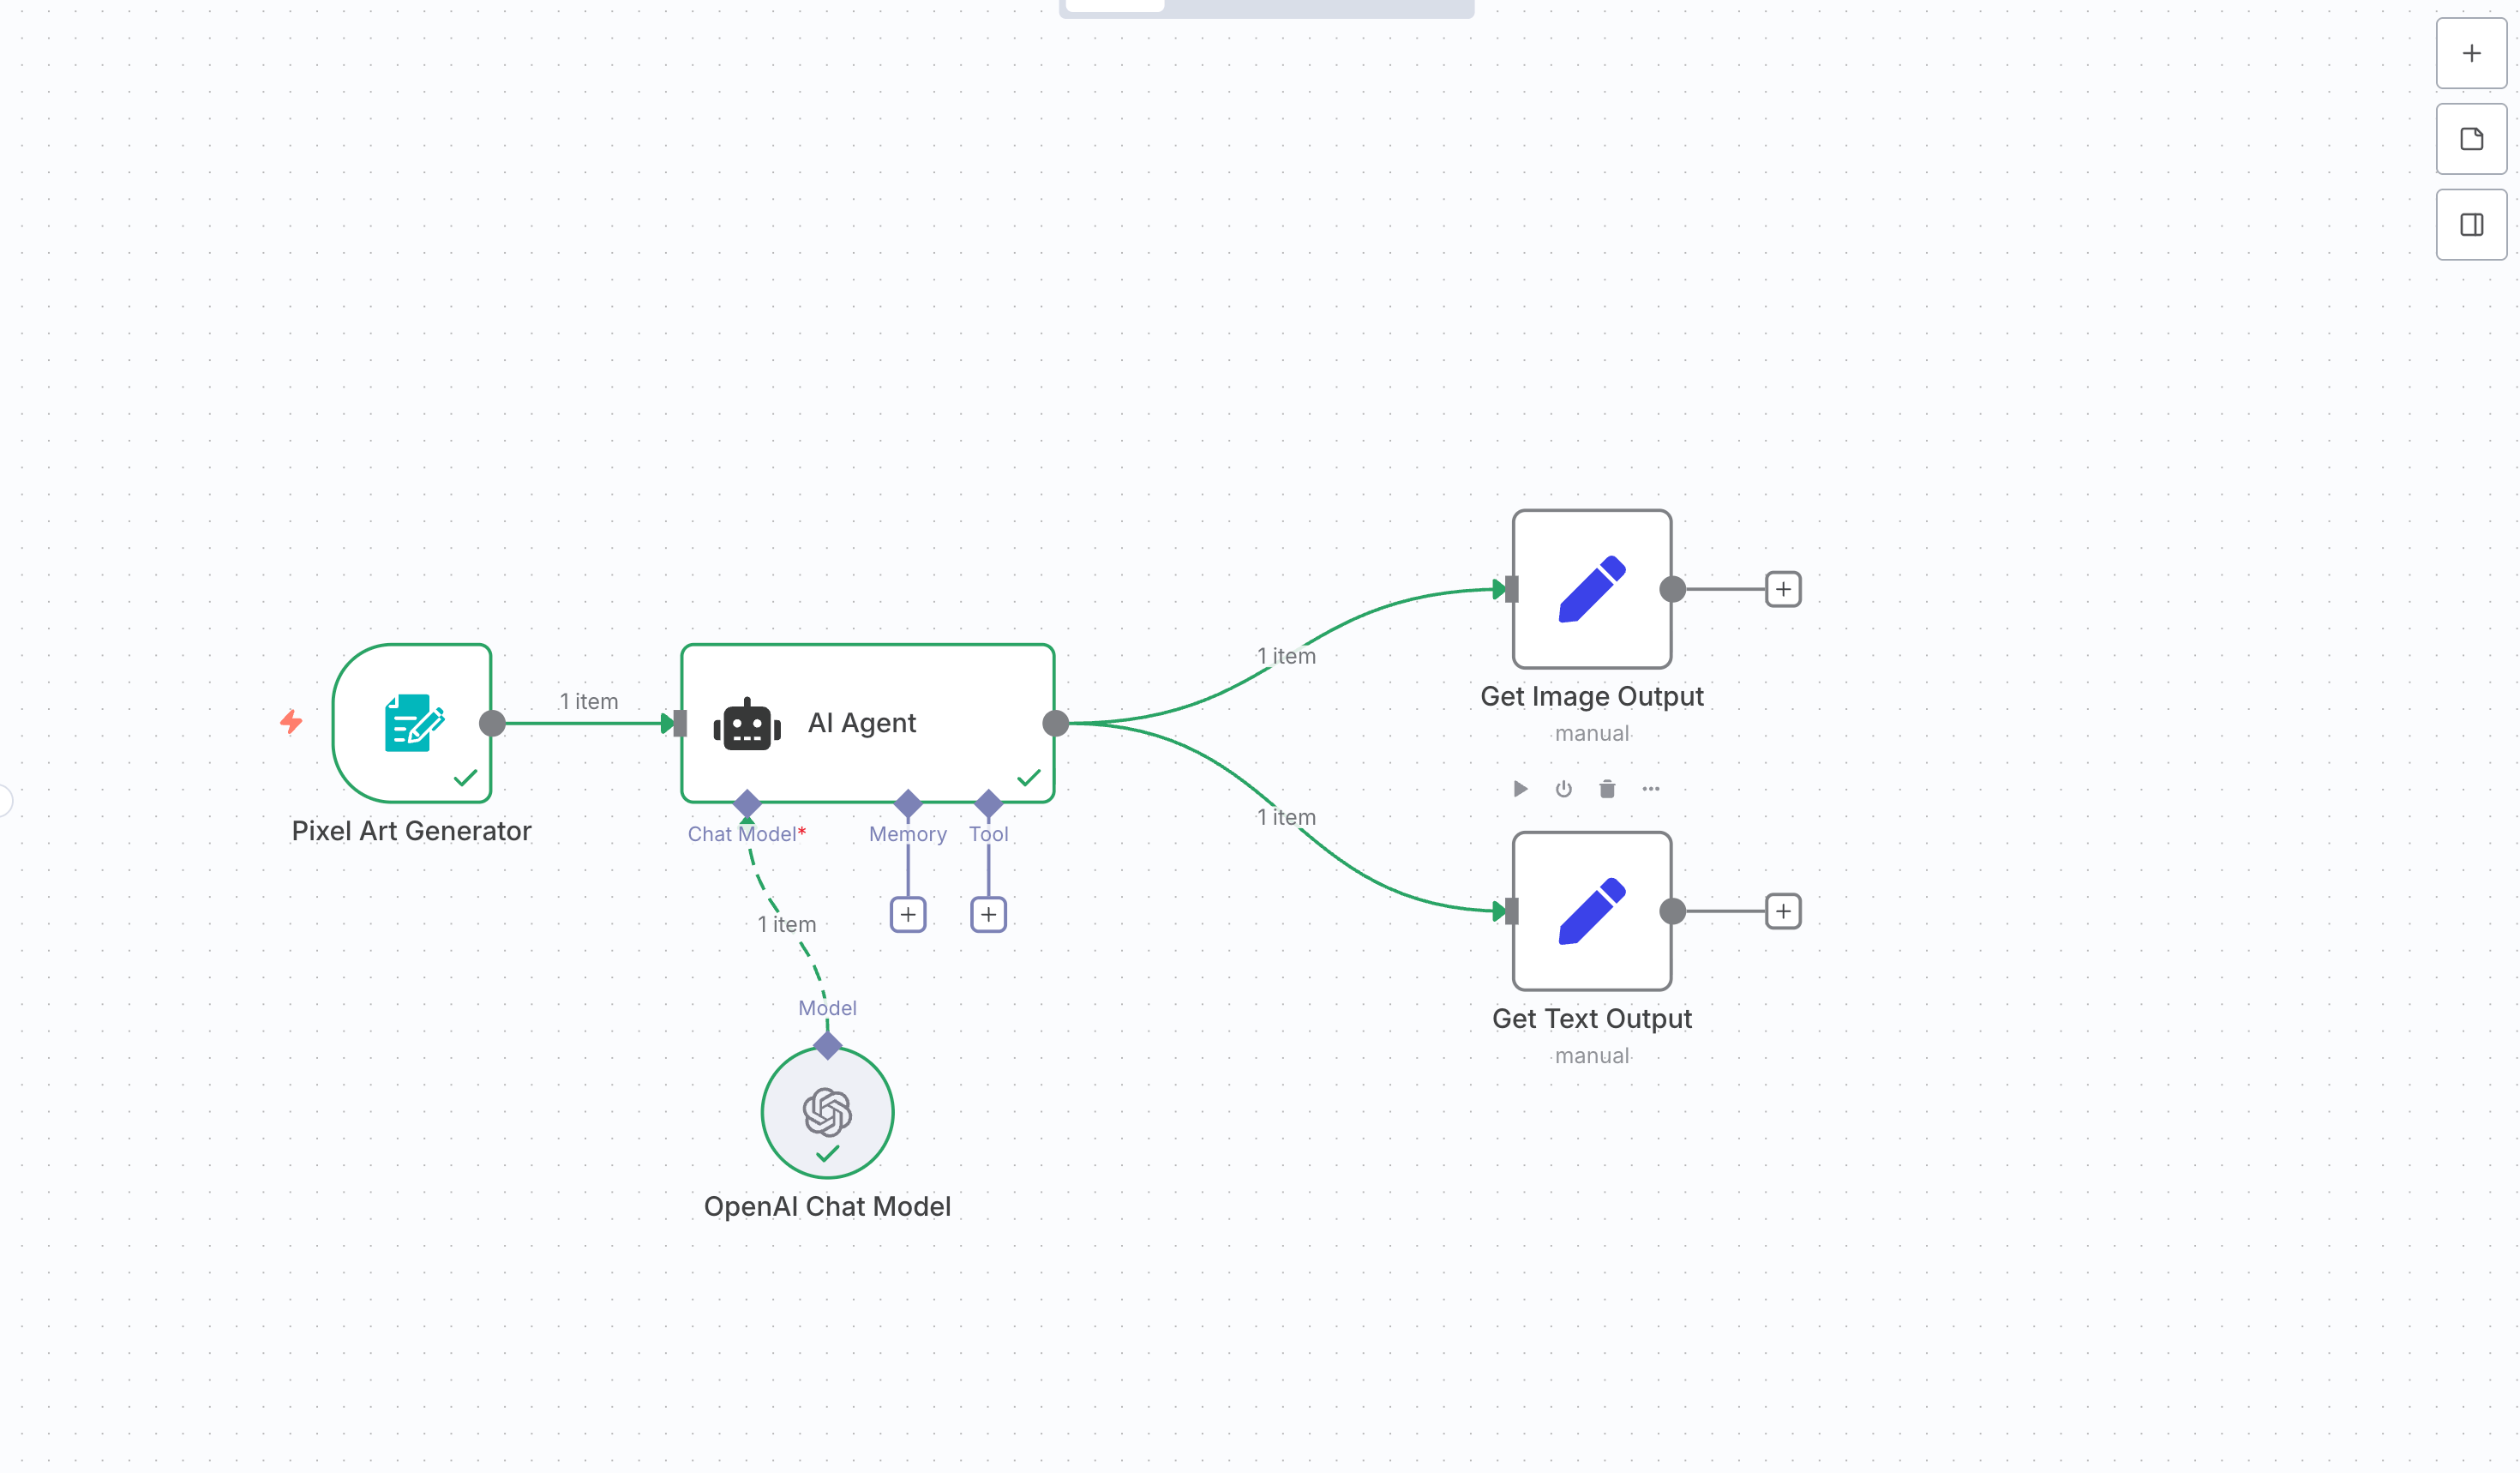 Connect both from the AI Agent output. Rename them to avoid confusion.
Pro Tip: If you’re comfortable with JavaScript in n8n, you can handle both in one node.
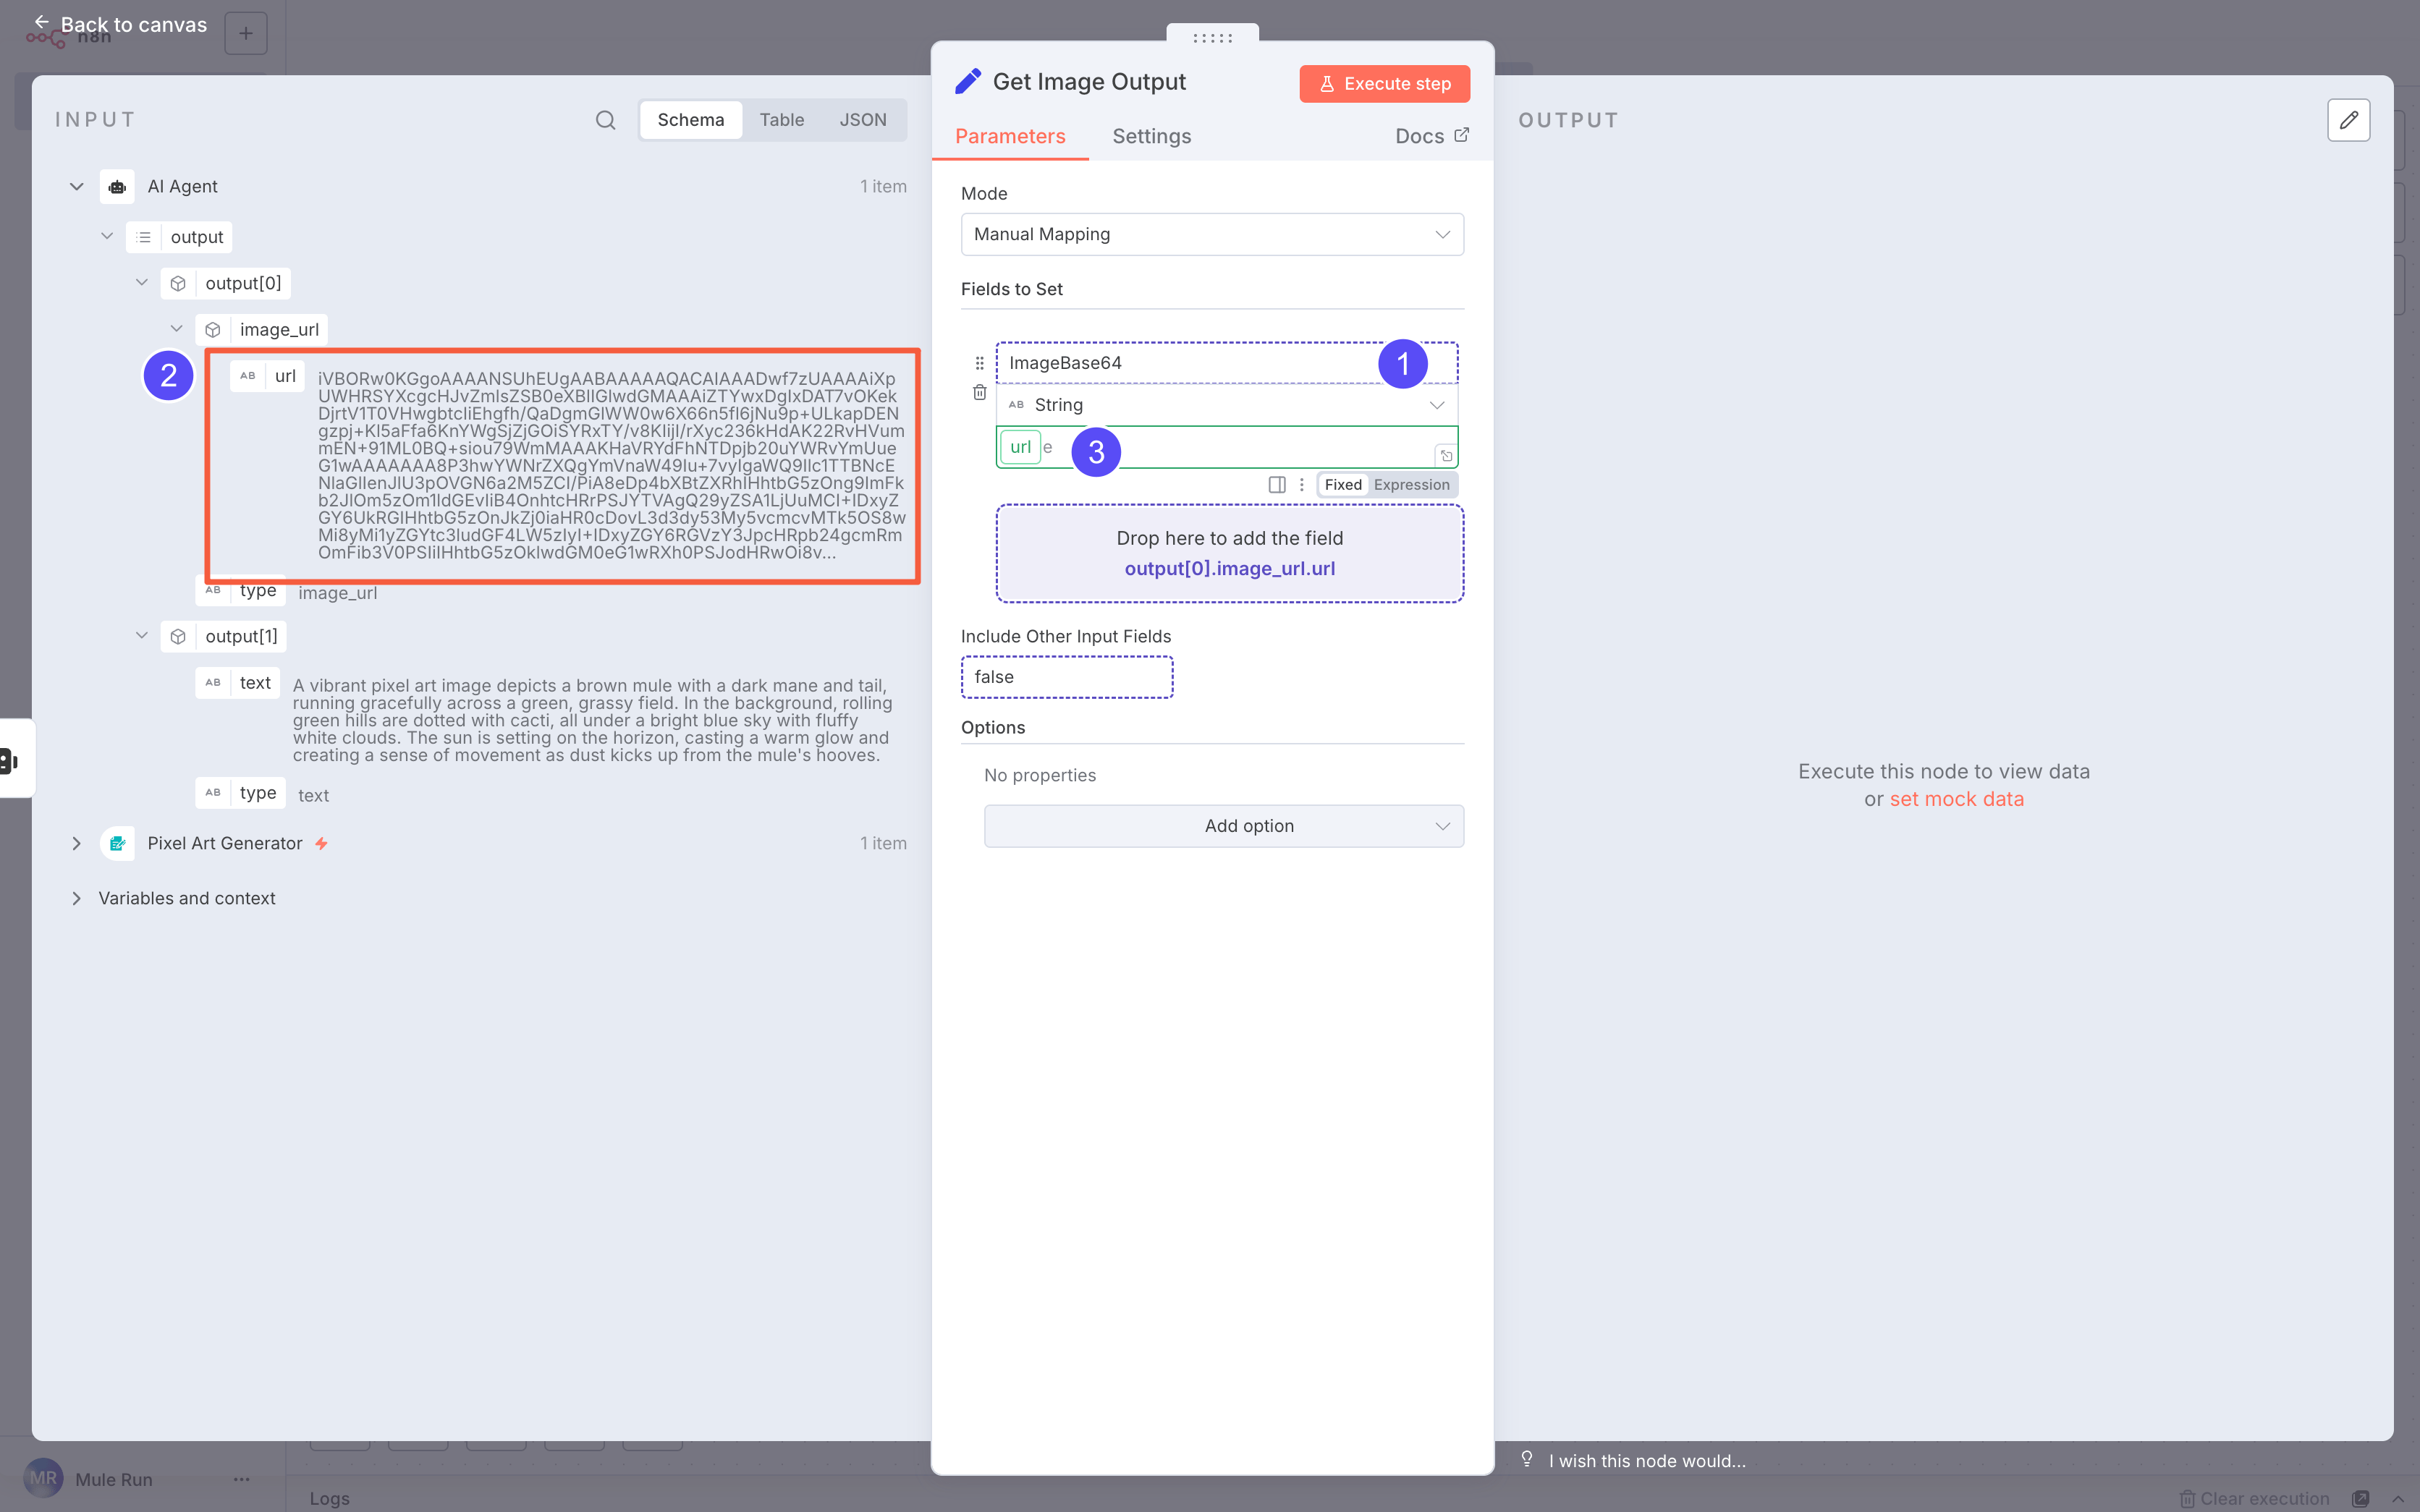 In the Image Output node:
- Create a field named
ImageBase64
- Drag the image URL into it
Pro Tip: You can use JSON expressions like:
{{$json.output.find(o => o.type === 'image_url')?.image_url?.url}}
This avoids errors if output order changes.
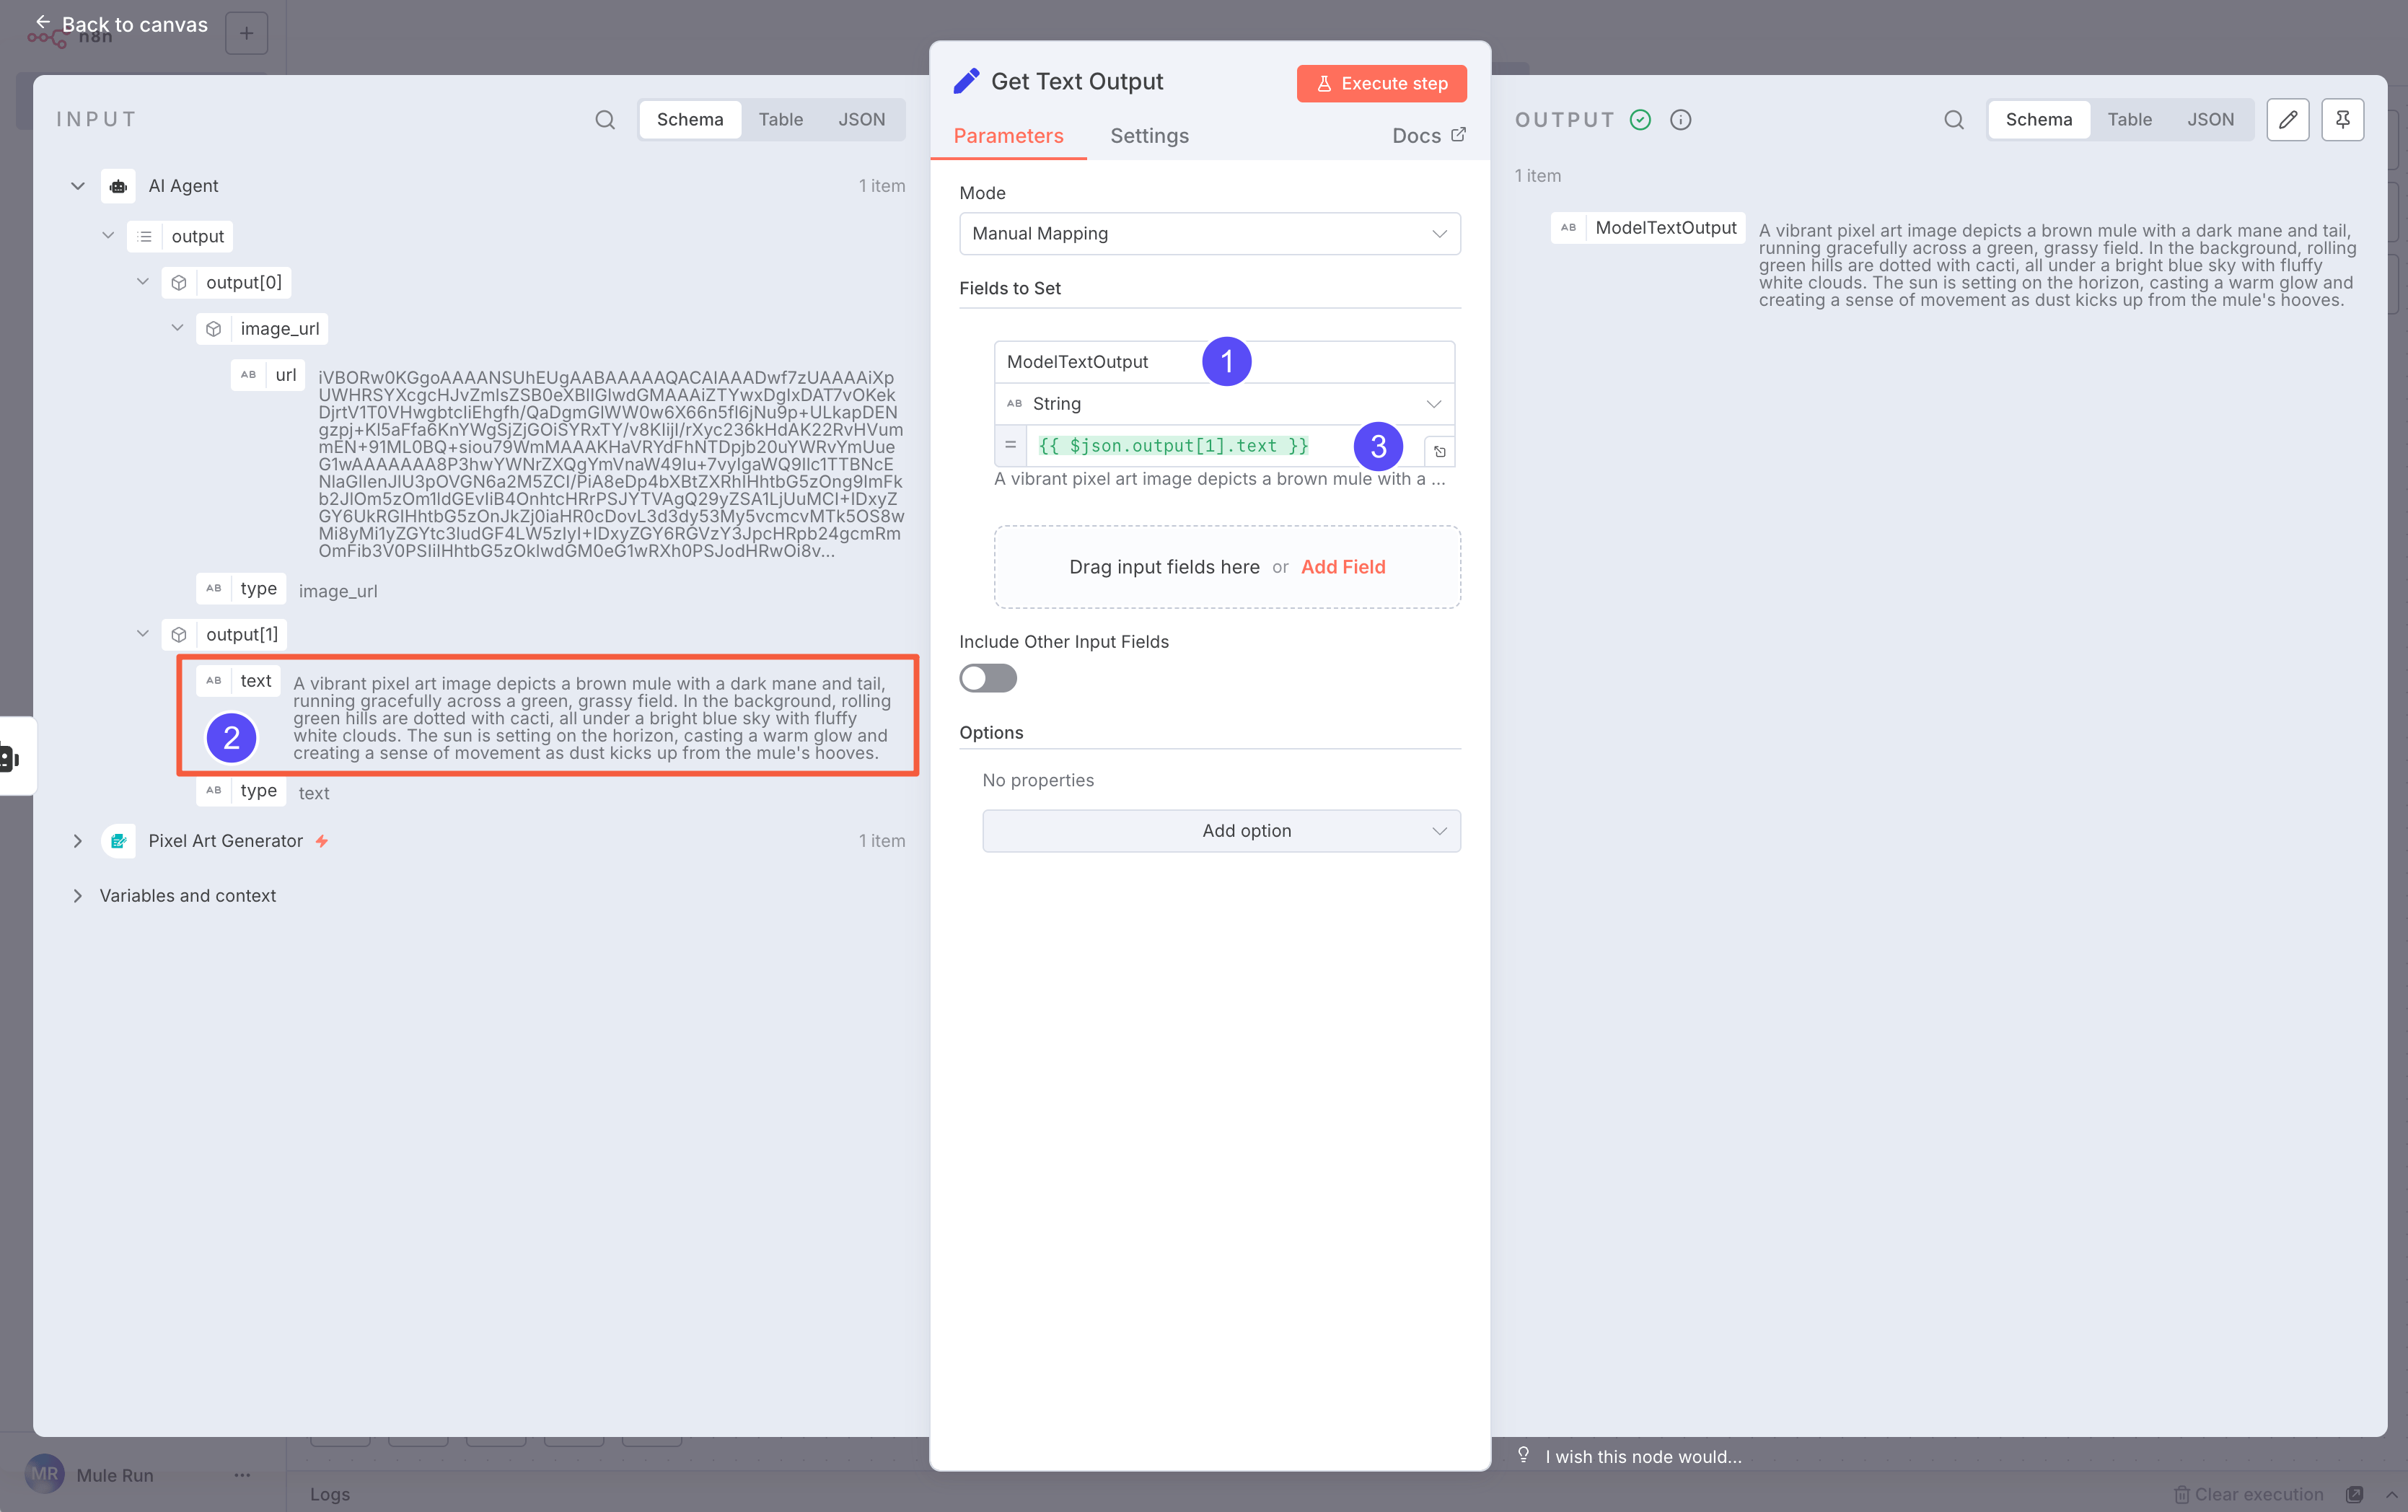 In the Text Output node:
- Create a field named
ModelTextOutput
- Drag the text field into it
Pro Tip: Use JSON expressions like:
{{$json.output.find(o => o.type === 'text')?.text}}
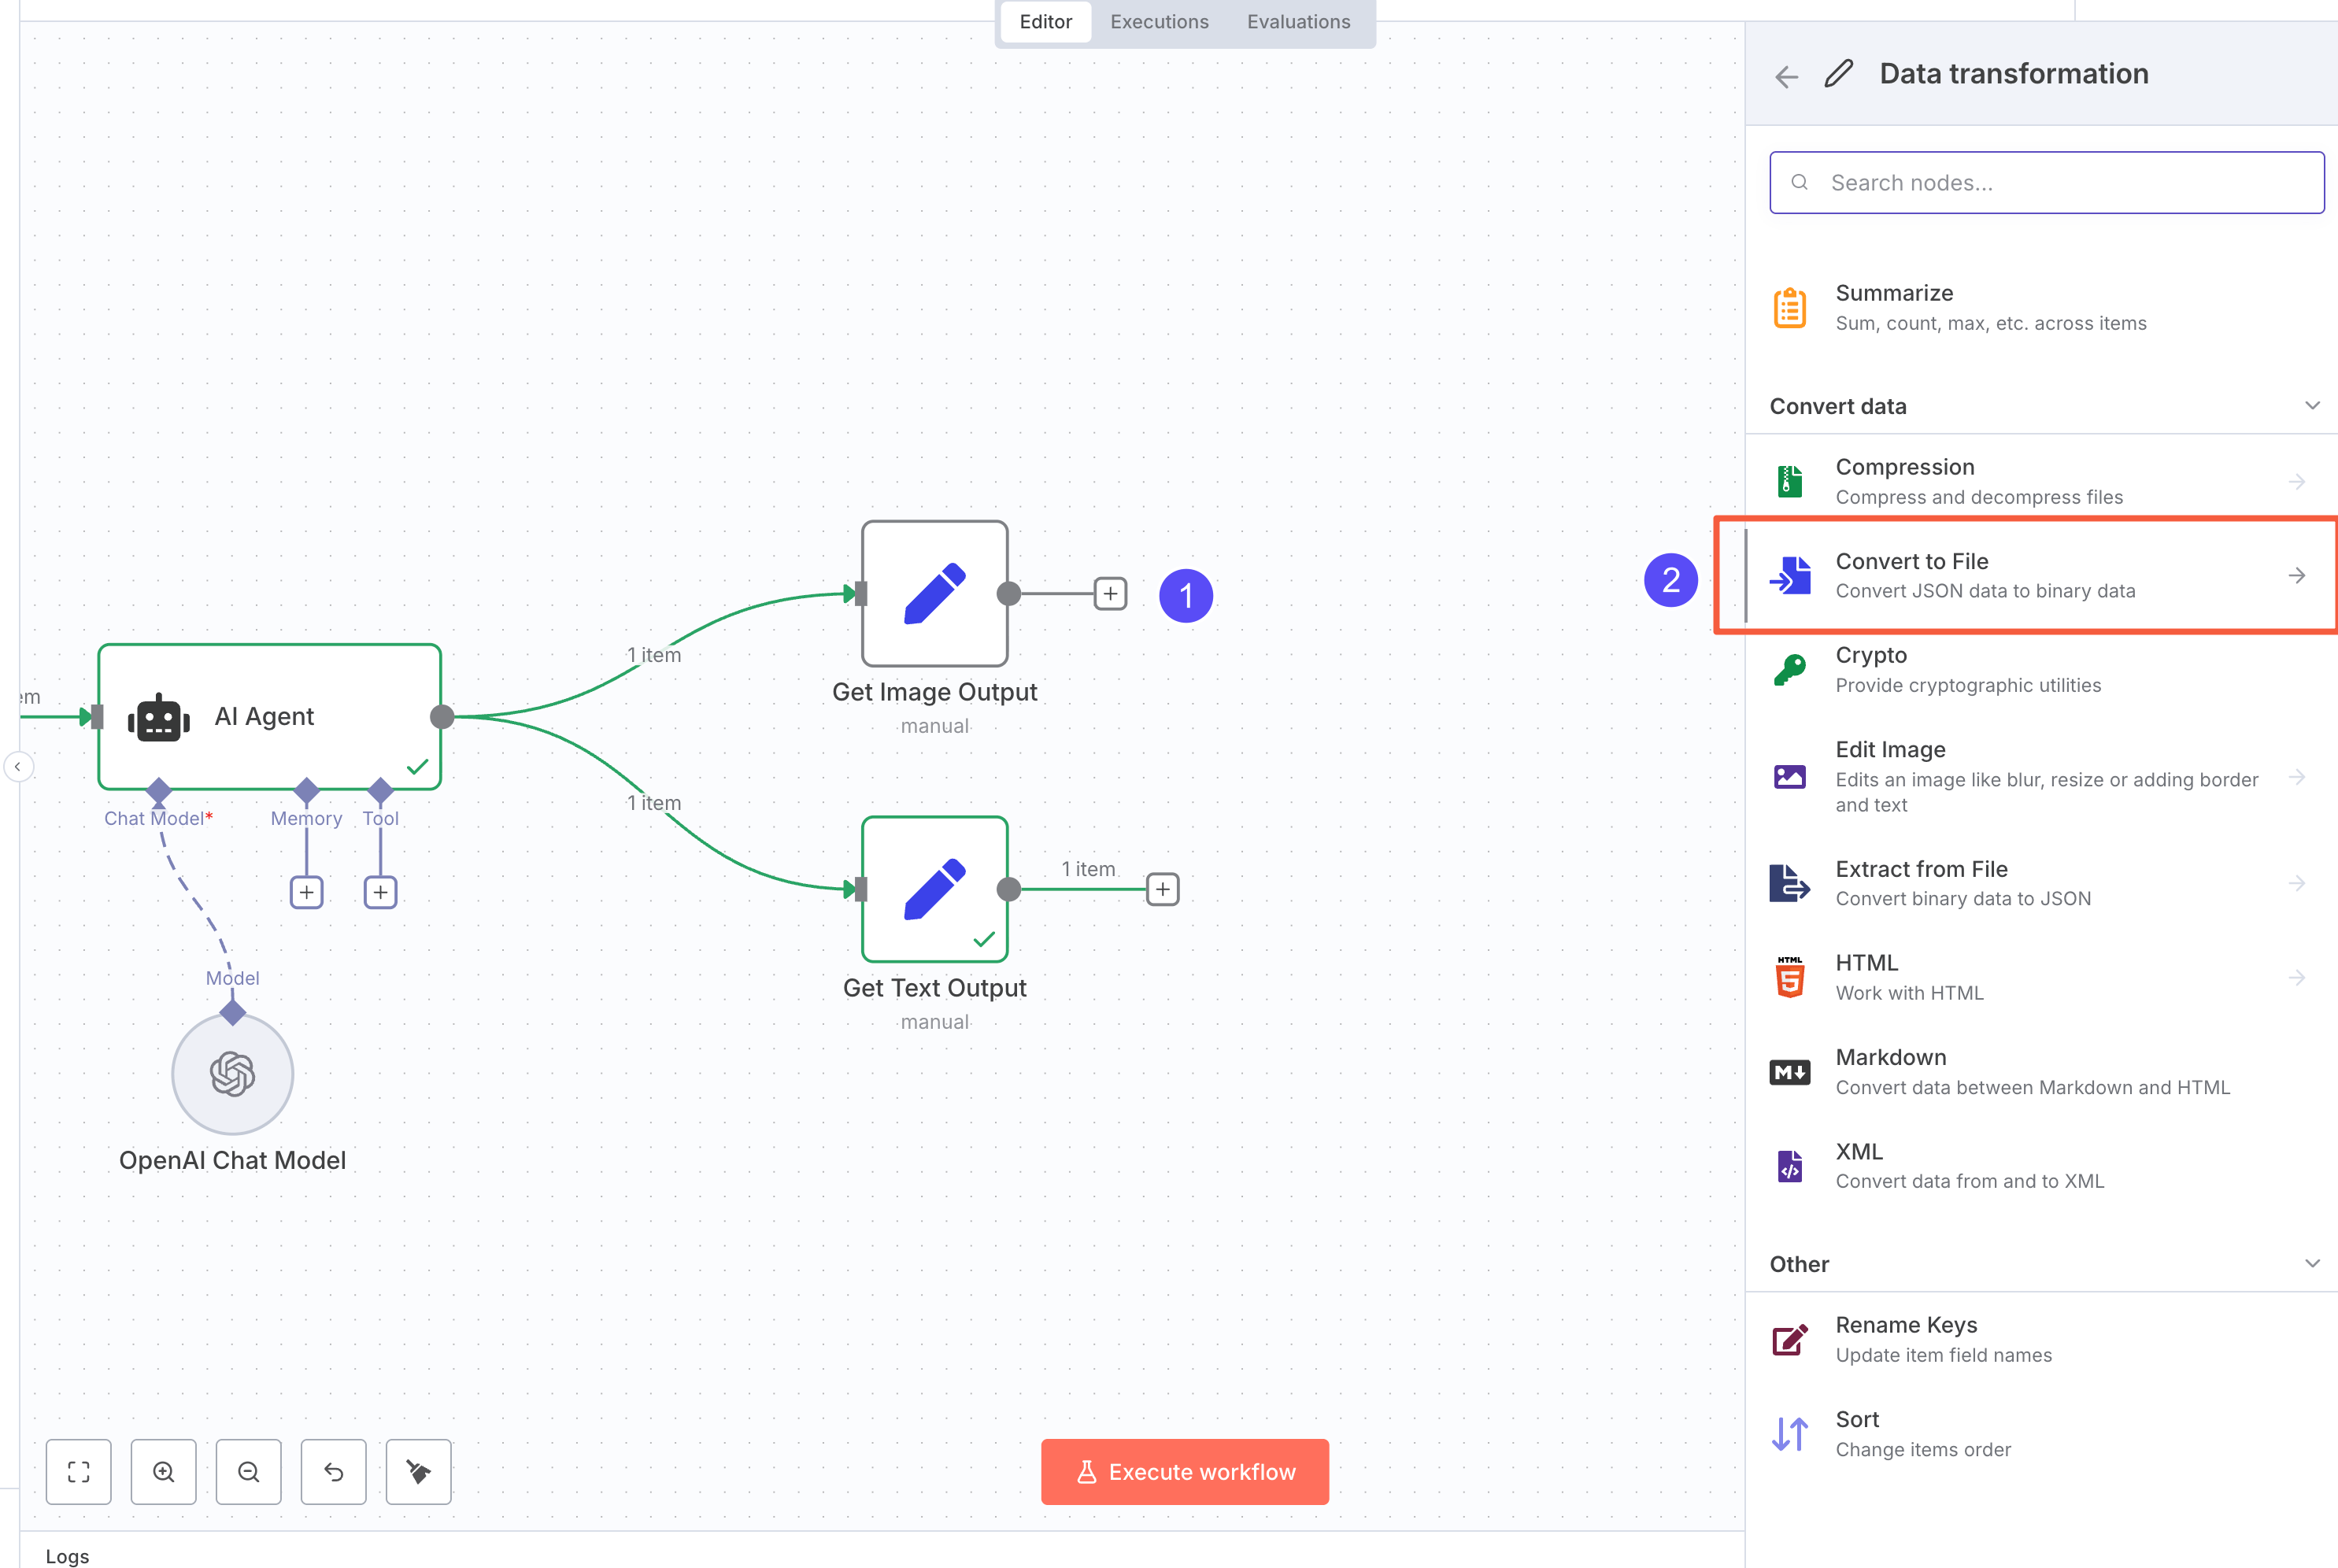 Next, add a Convert To File node after the Image Output. Choose Move Base64 string to file to turn the Base64 string into an image file.
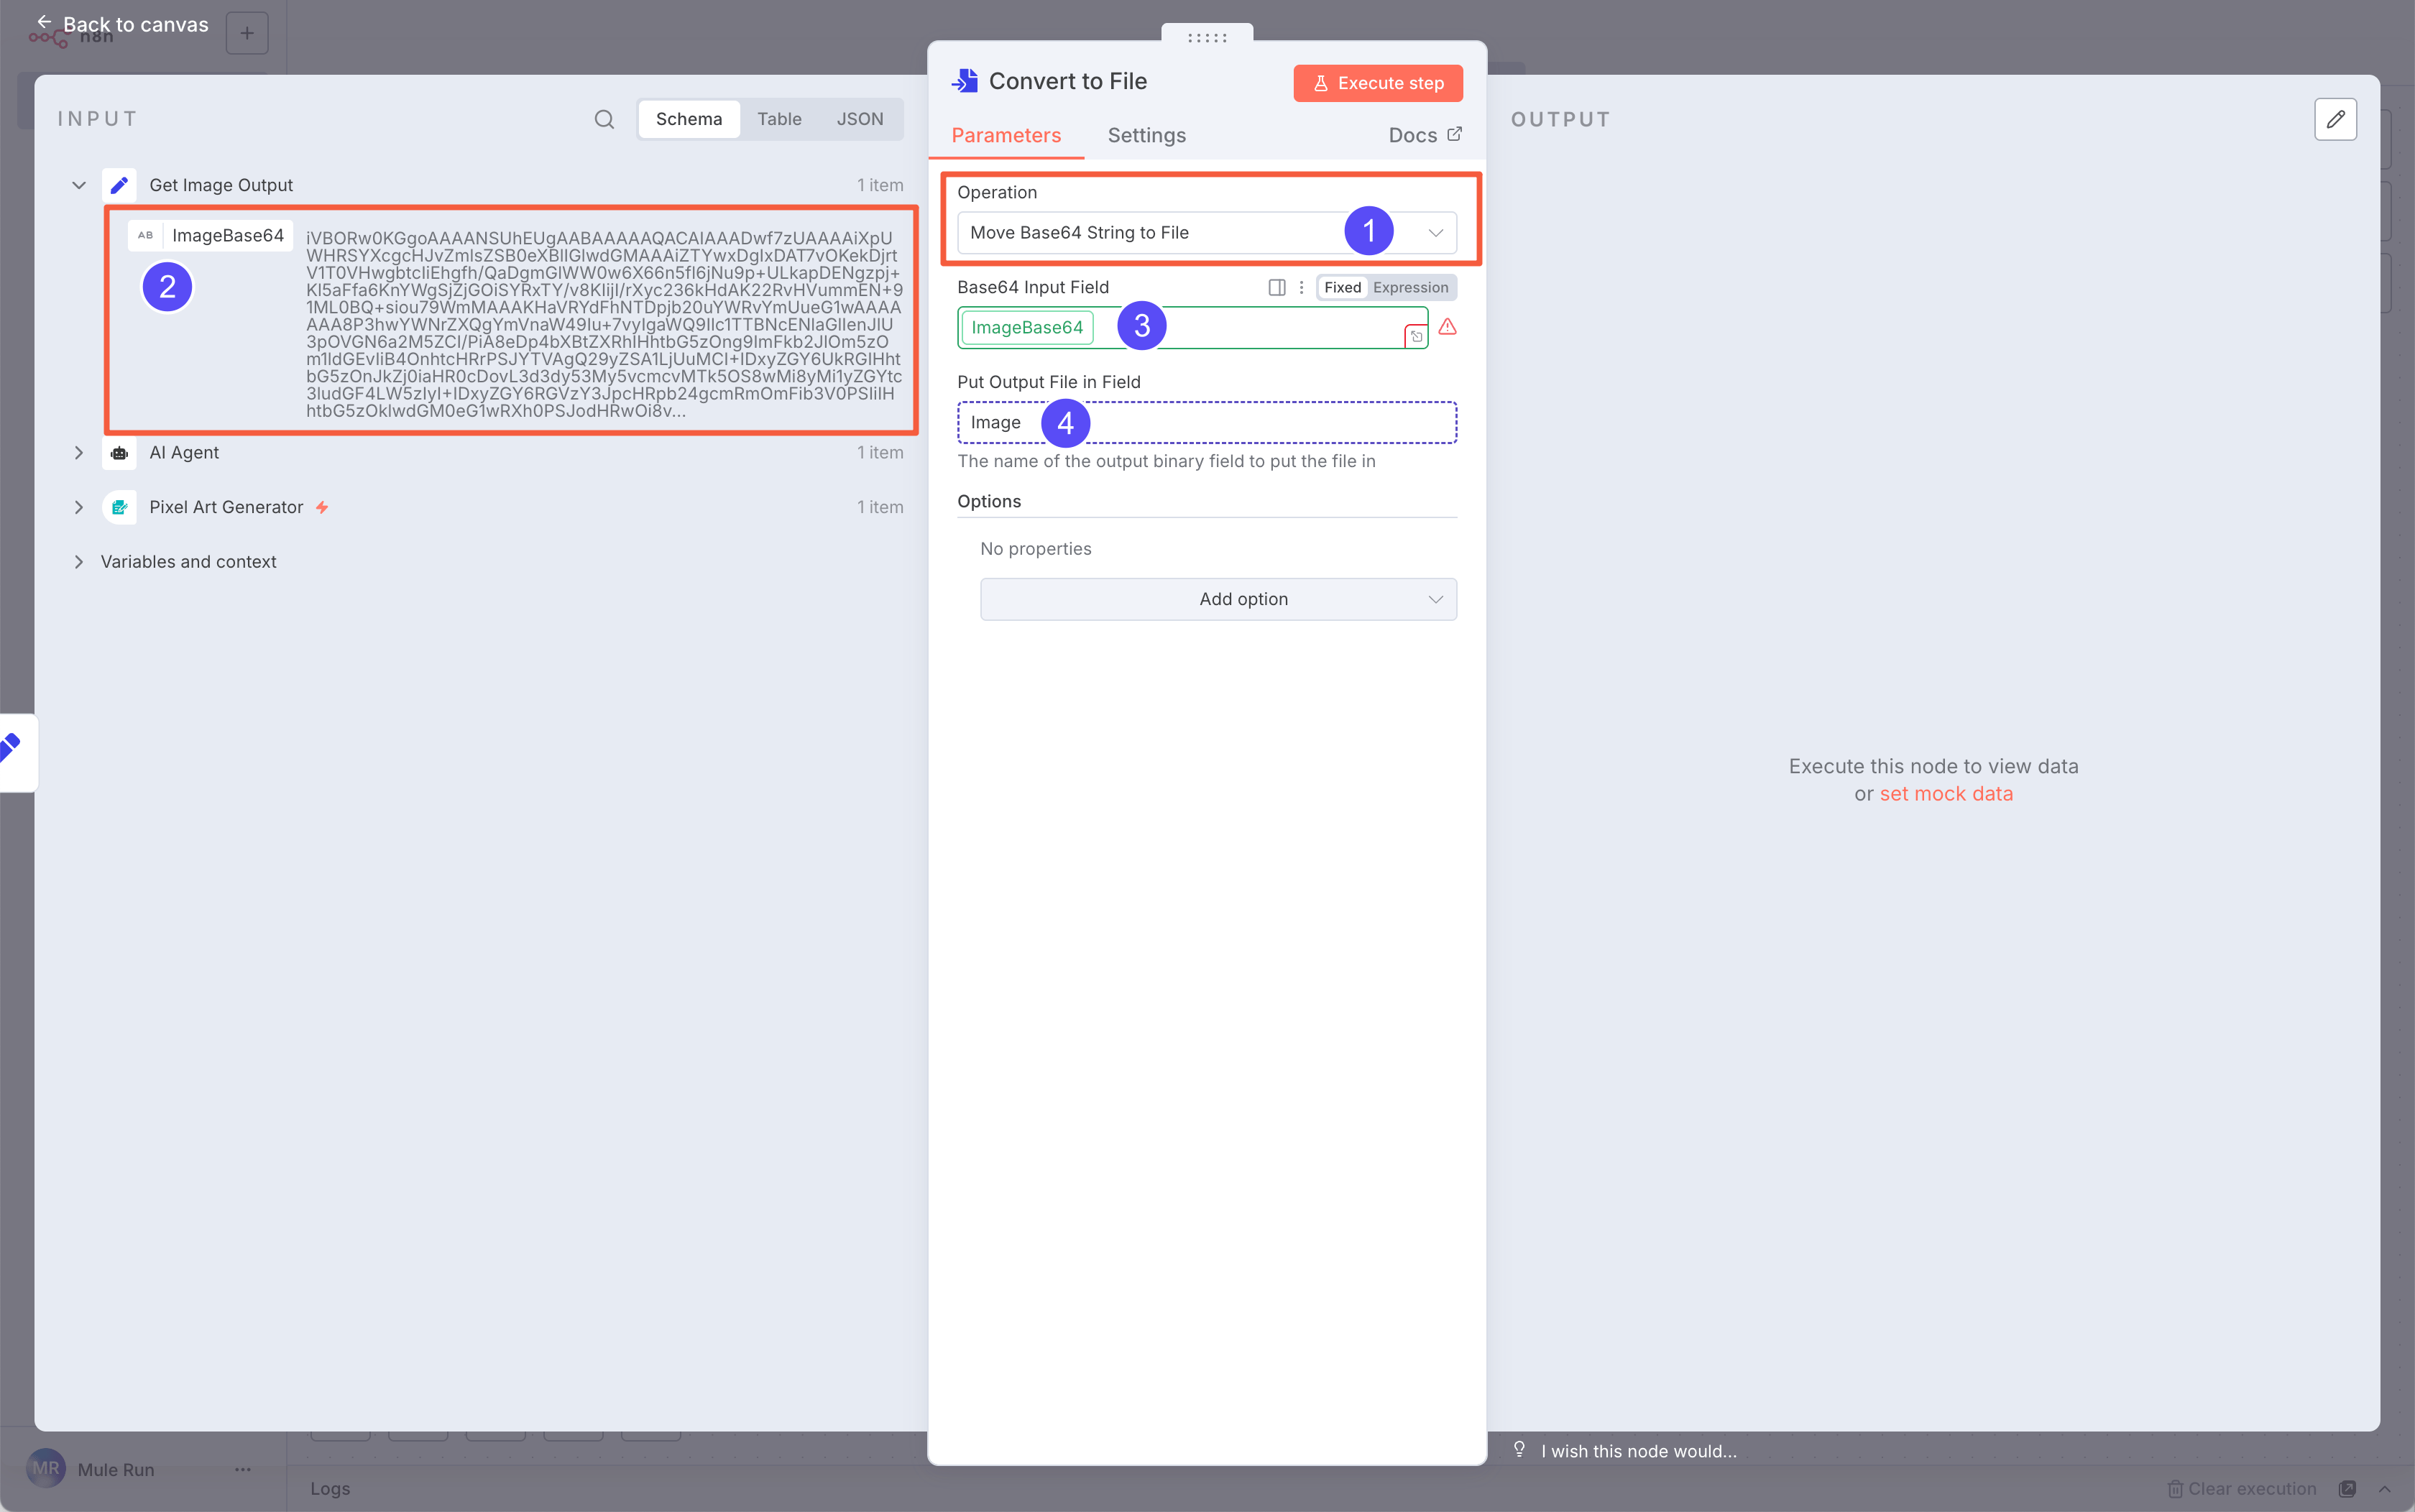 Set the input field to
 ImageBase64 and output it as a file named Image.
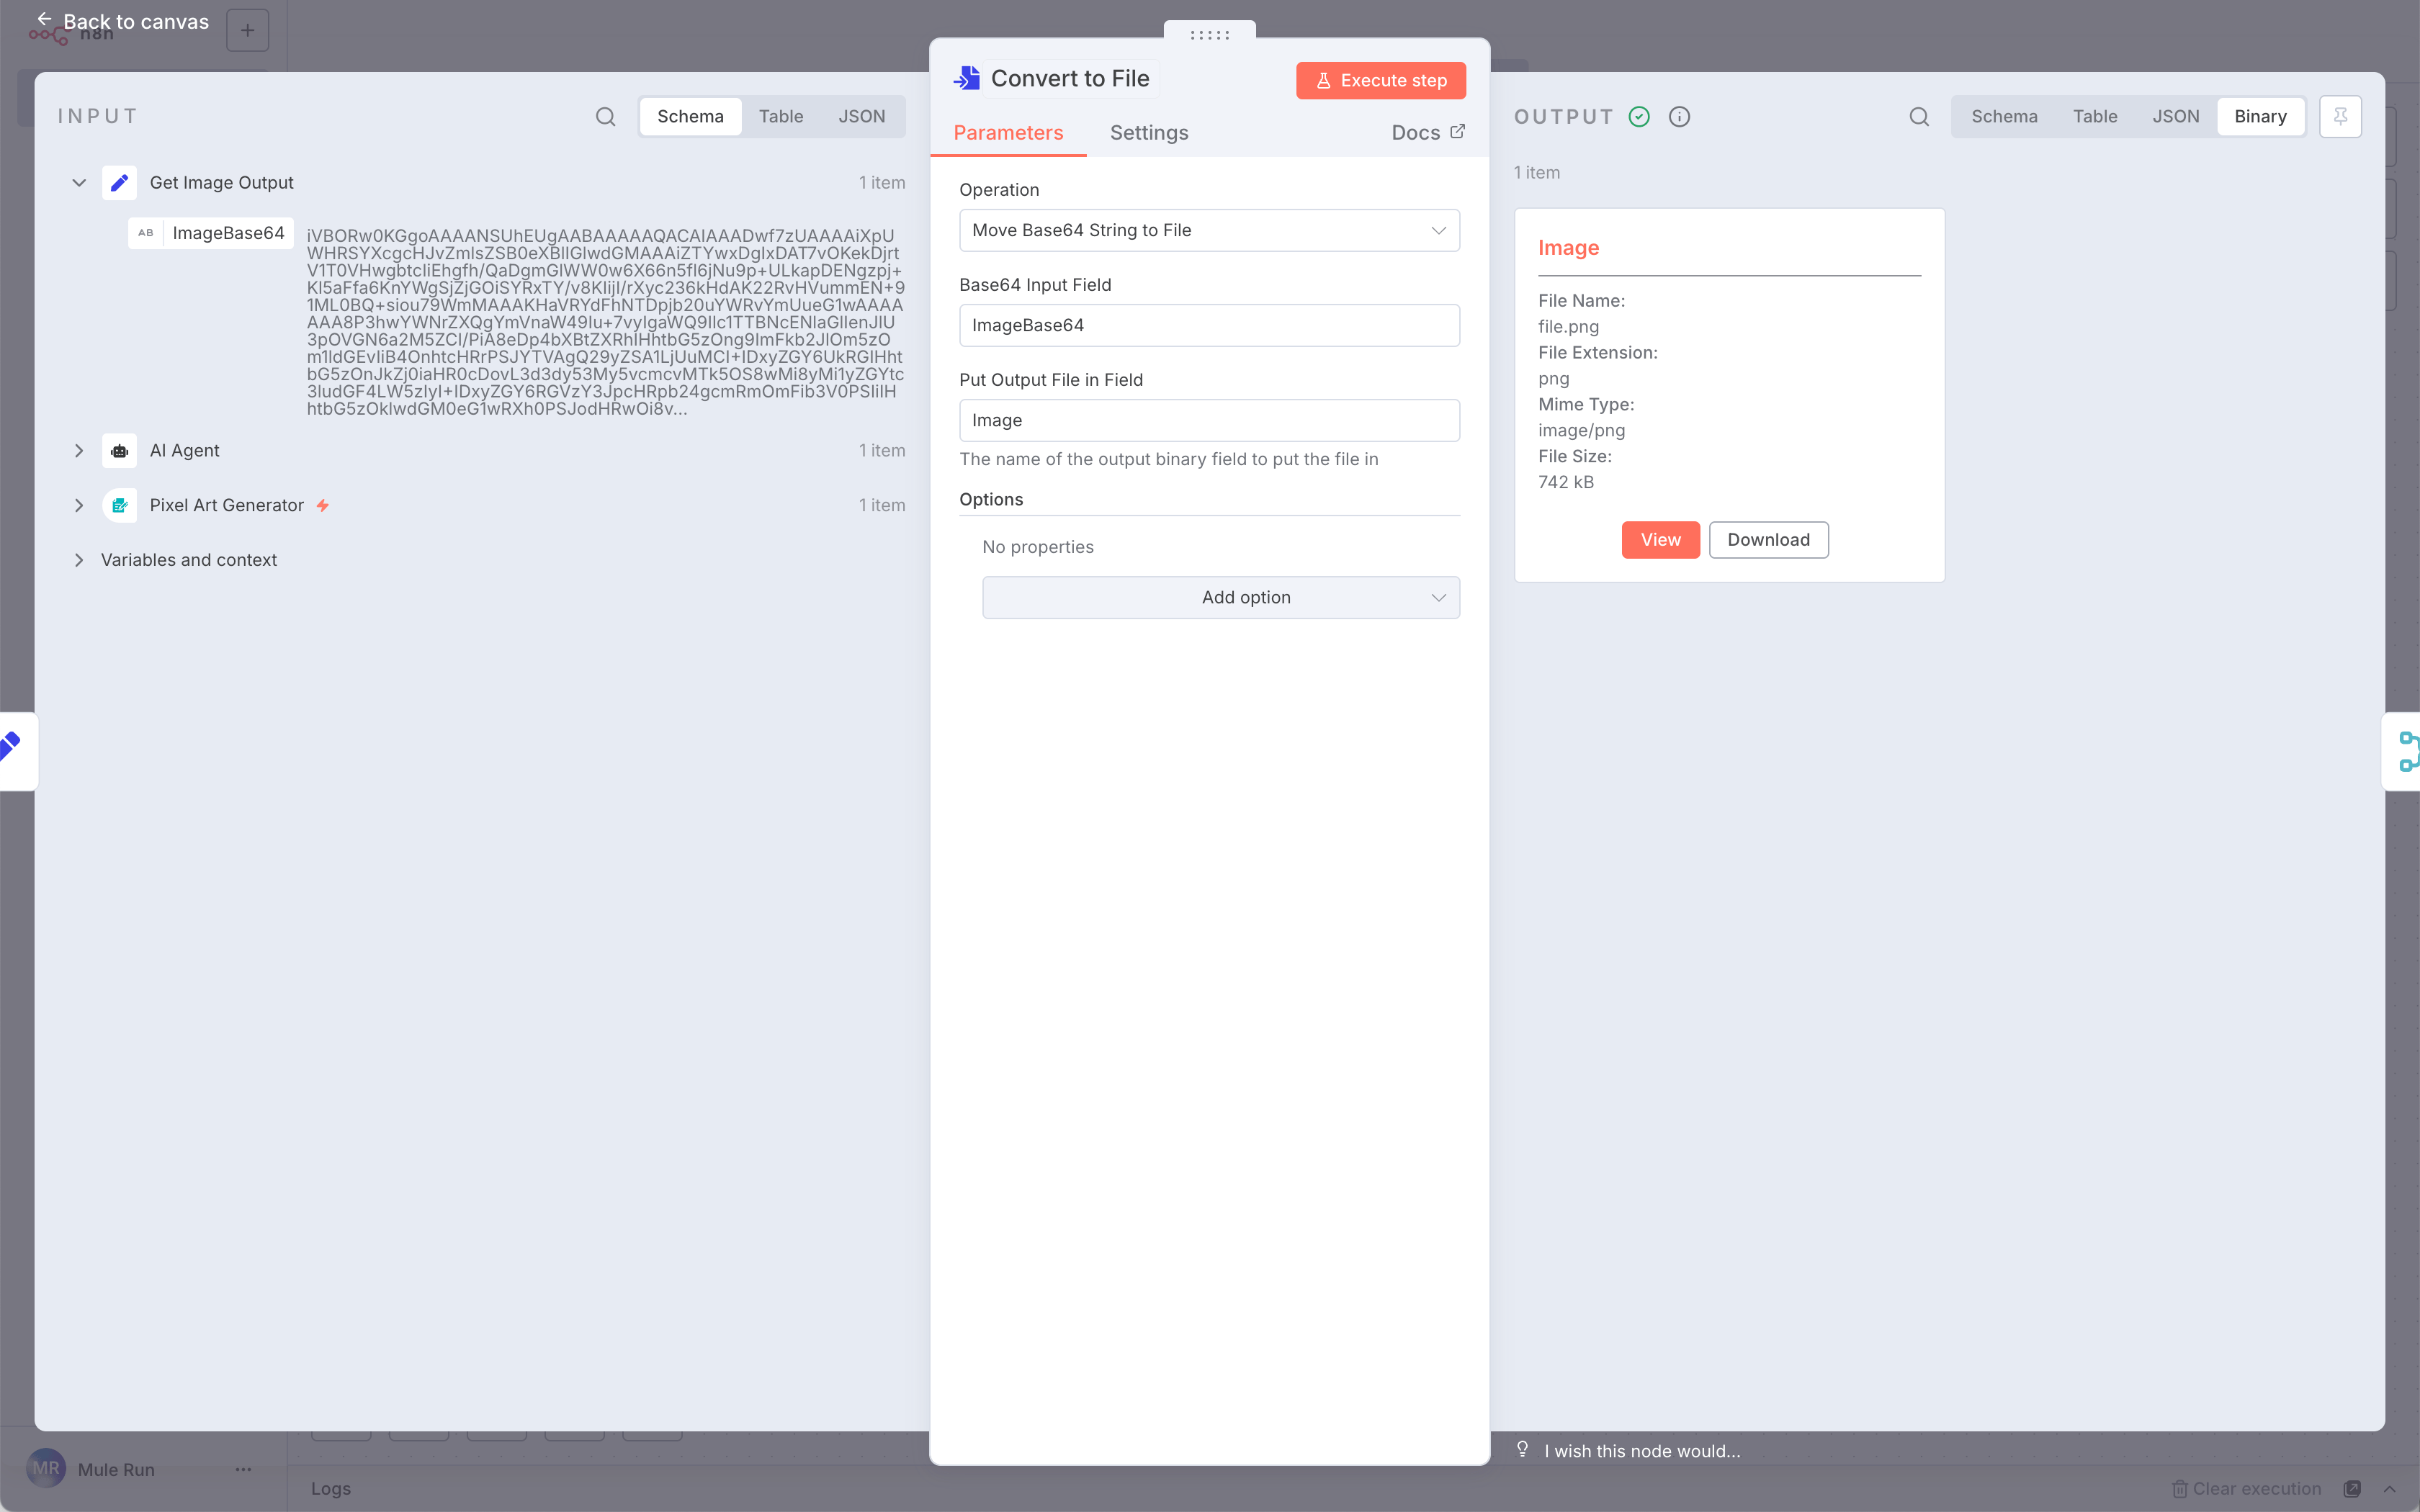 Click Execute step and check the Output. Switch to Binary mode if you don’t see the image.
 \
\
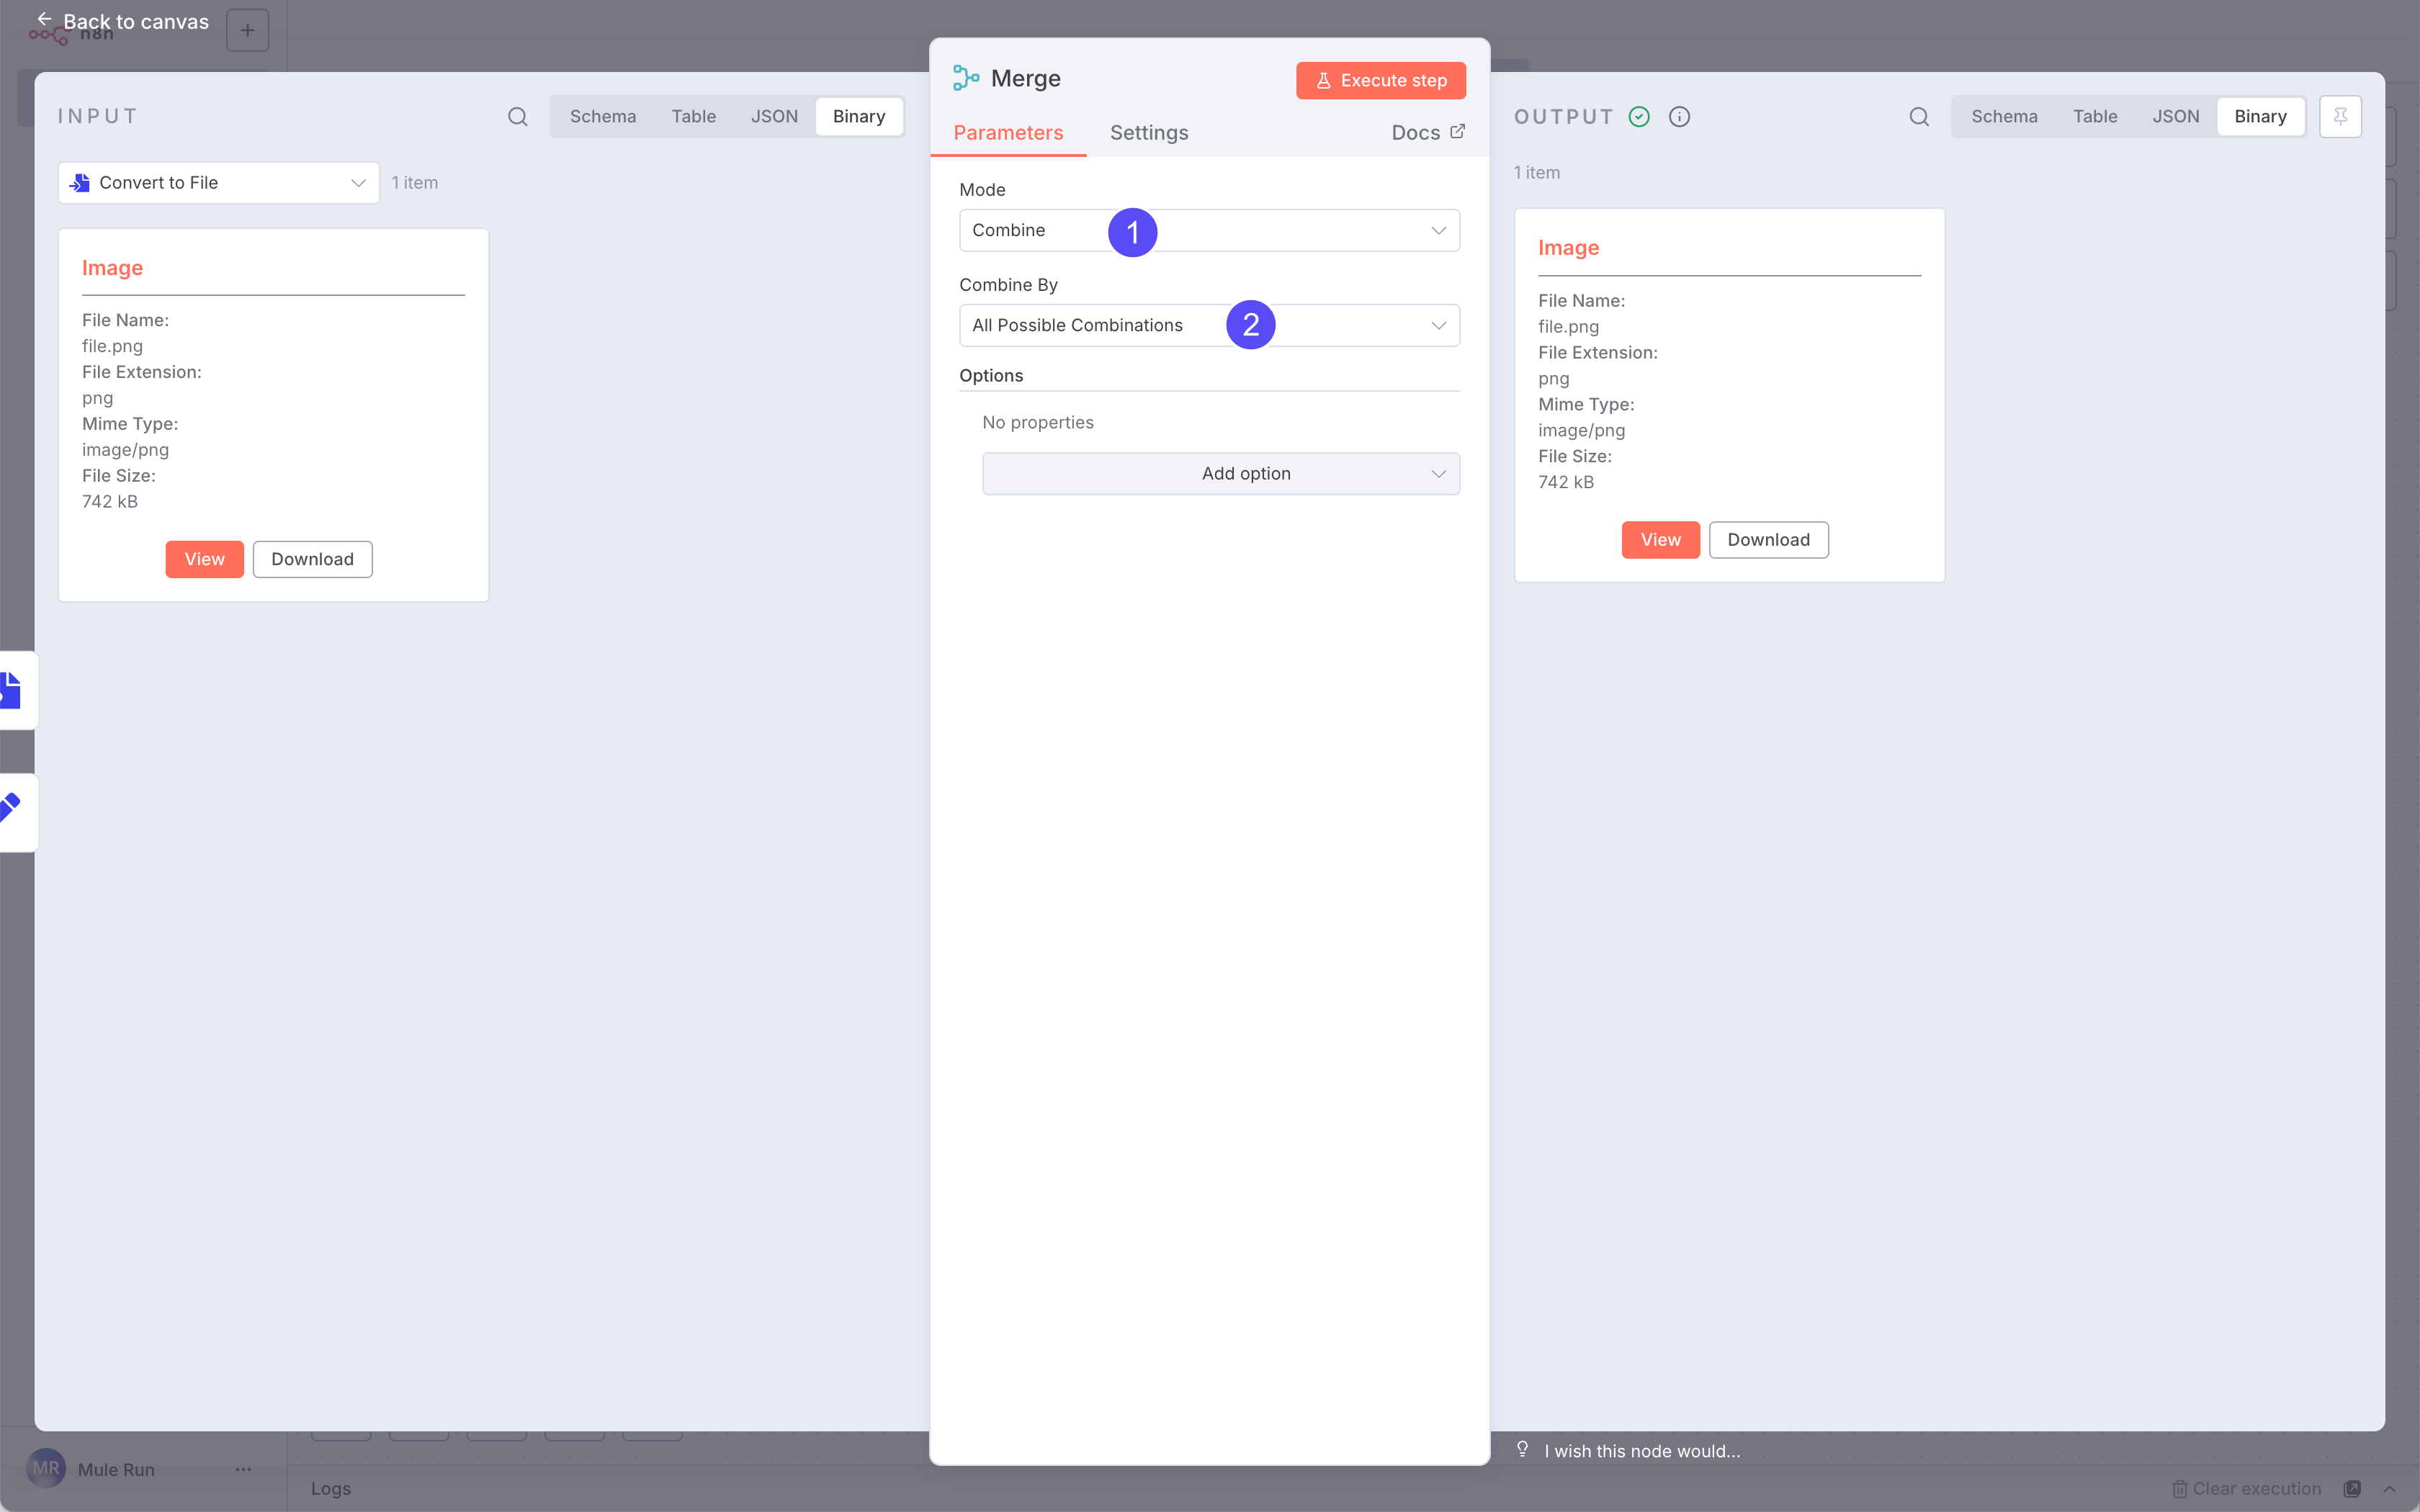 Finally, add a Merge node to combine the
 Image and ModelTextOutput.
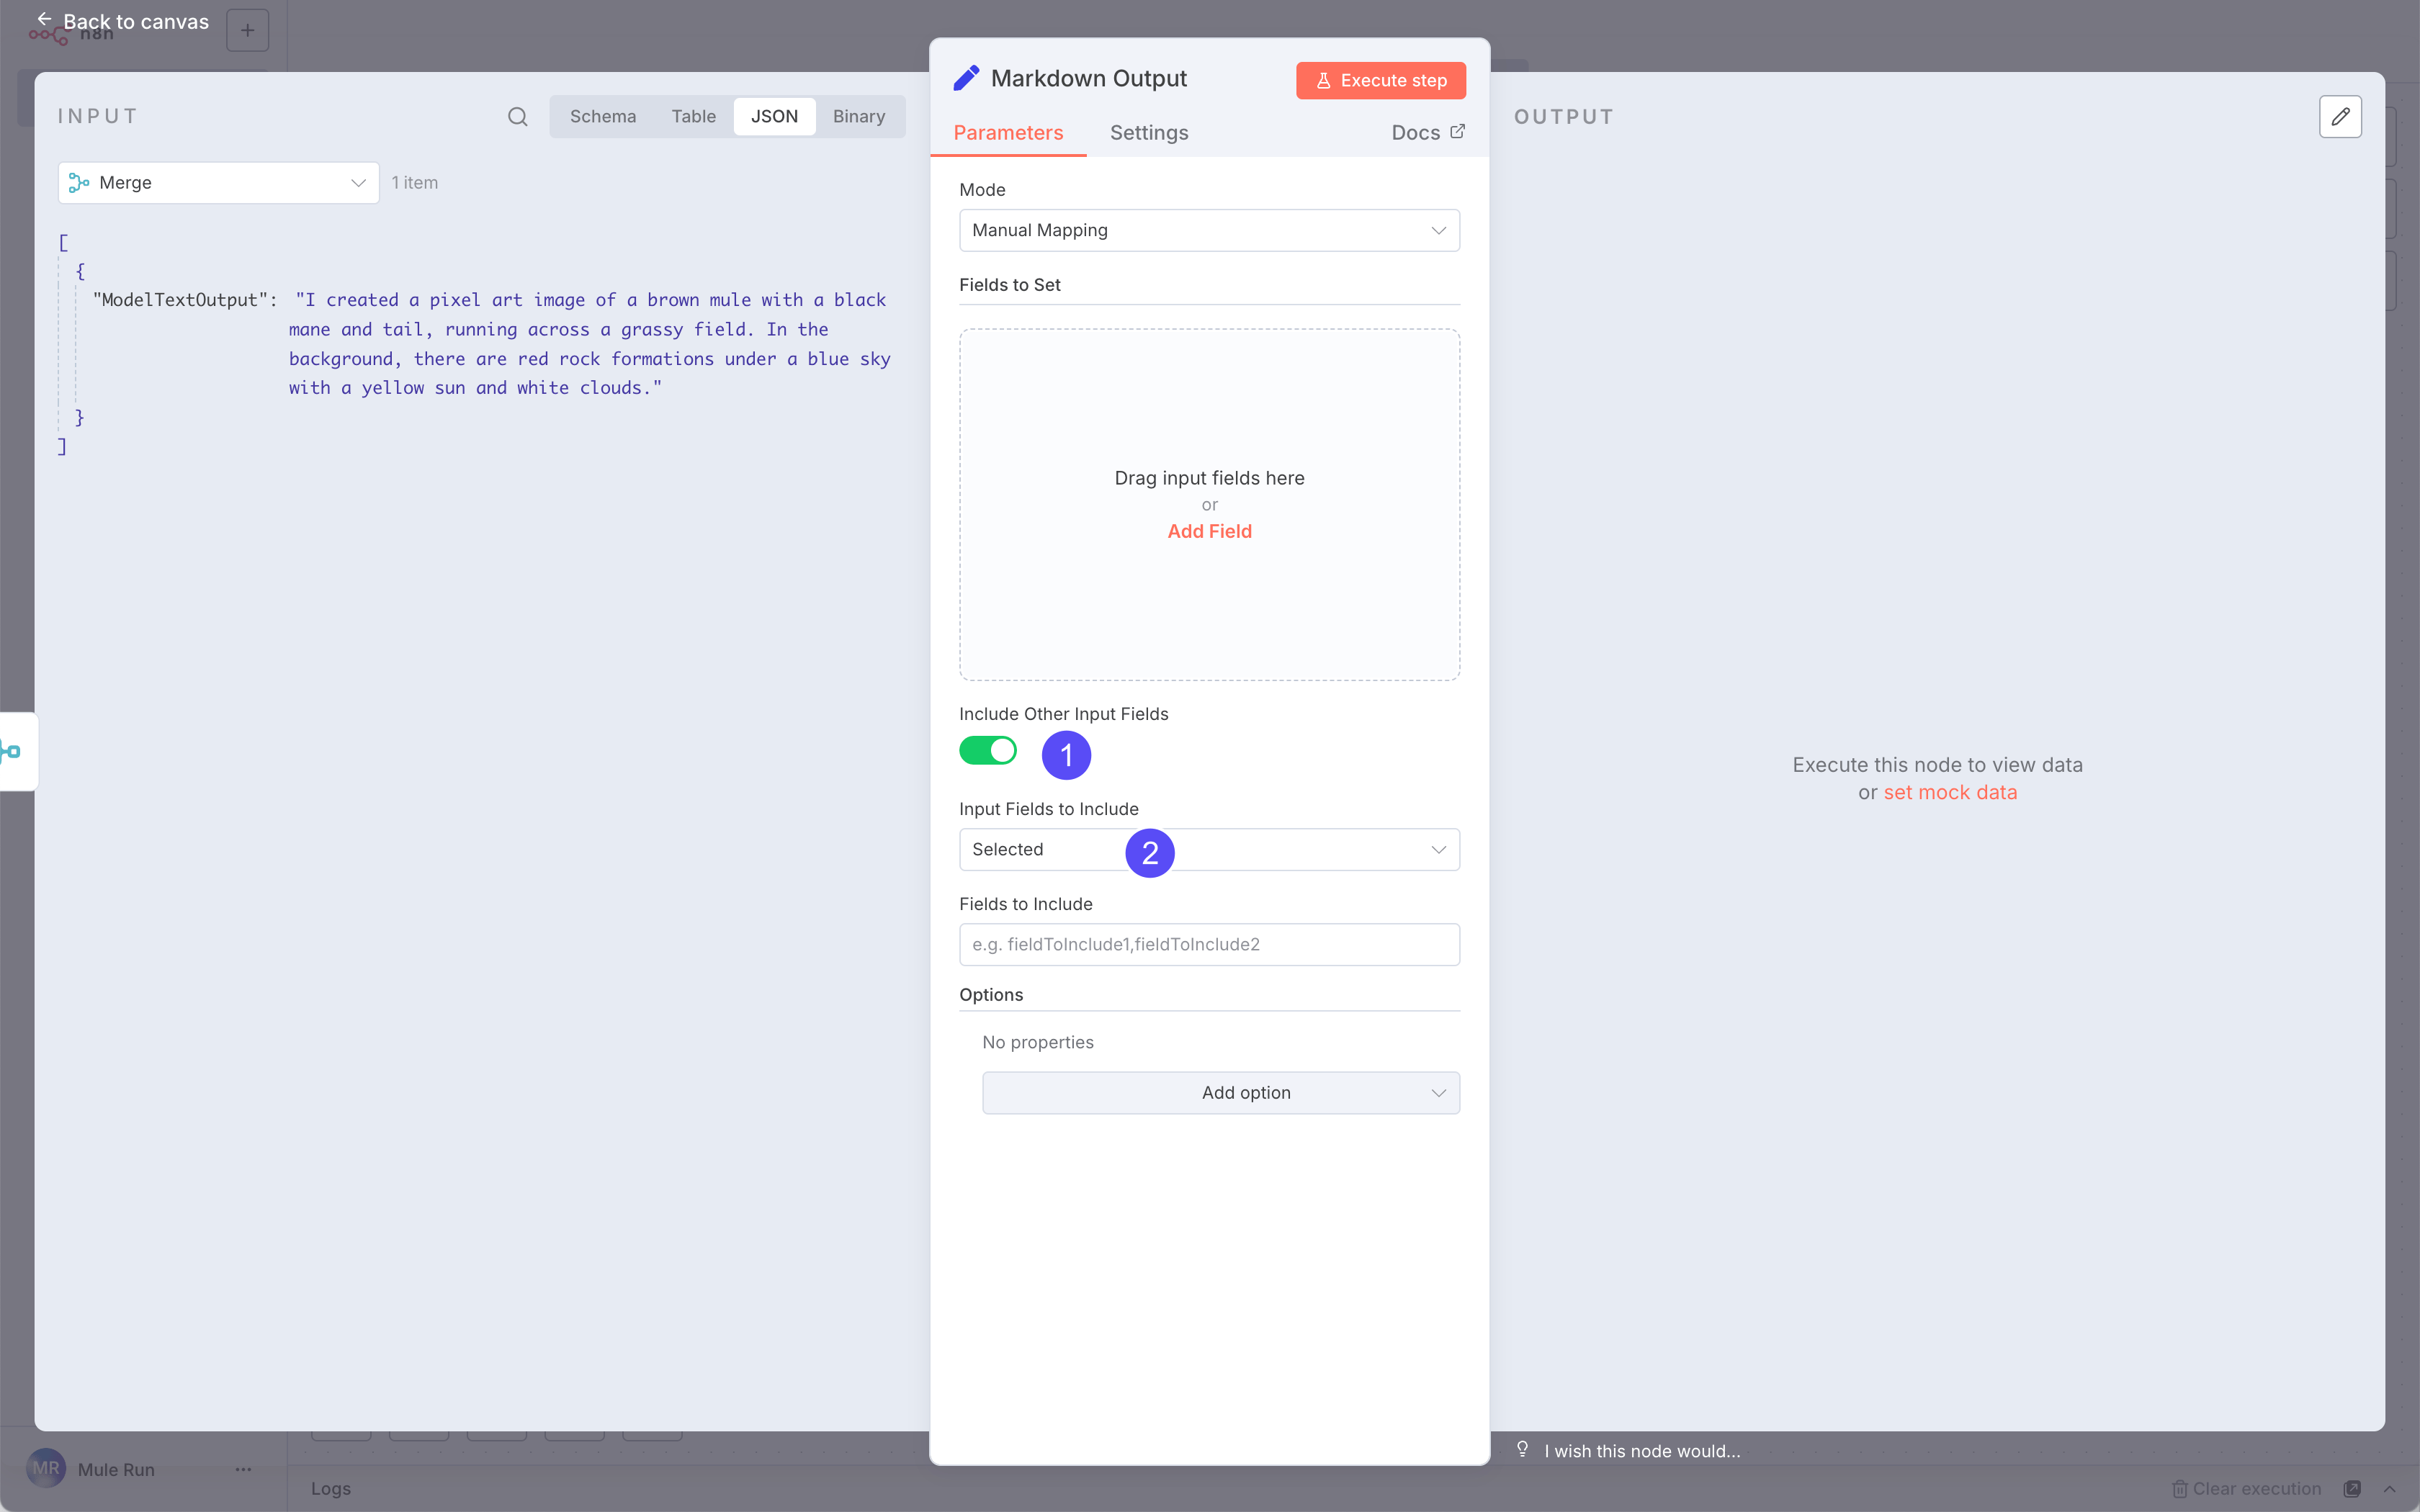
Step 5: Output Result
To display results properly in the Session page, output them in a specific JSON format:
- Images will render automatically
- Text must go into a
markdown_content field
See examples here.
We’ll use another Edit Fields (Set) node for this.
Pro Tip: If you know JavaScript in n8n, you can directly pull from previous nodes.
- Name:
markdown_content
- Value:
ModelTextOutput
The field name must be exactly markdown_content.
Step 6: Test Your Workflow
 Run Execute step to test.
The final output should be a JSON object containing:
Run Execute step to test.
The final output should be a JSON object containing:
- A
markdown_content field
- An image
If you want to find more mulerun-ready n8n workflows, check MuleRun n8n Examples
Step 7: Upload Your Agent to MuleRun
Click Download to export your workflow JSON.
Open Creator Studio and create a new Agent.

- Name your Agent
- Upload the JSON file
- Choose the correct n8n version
Then upload a cover image and description (see this guide).
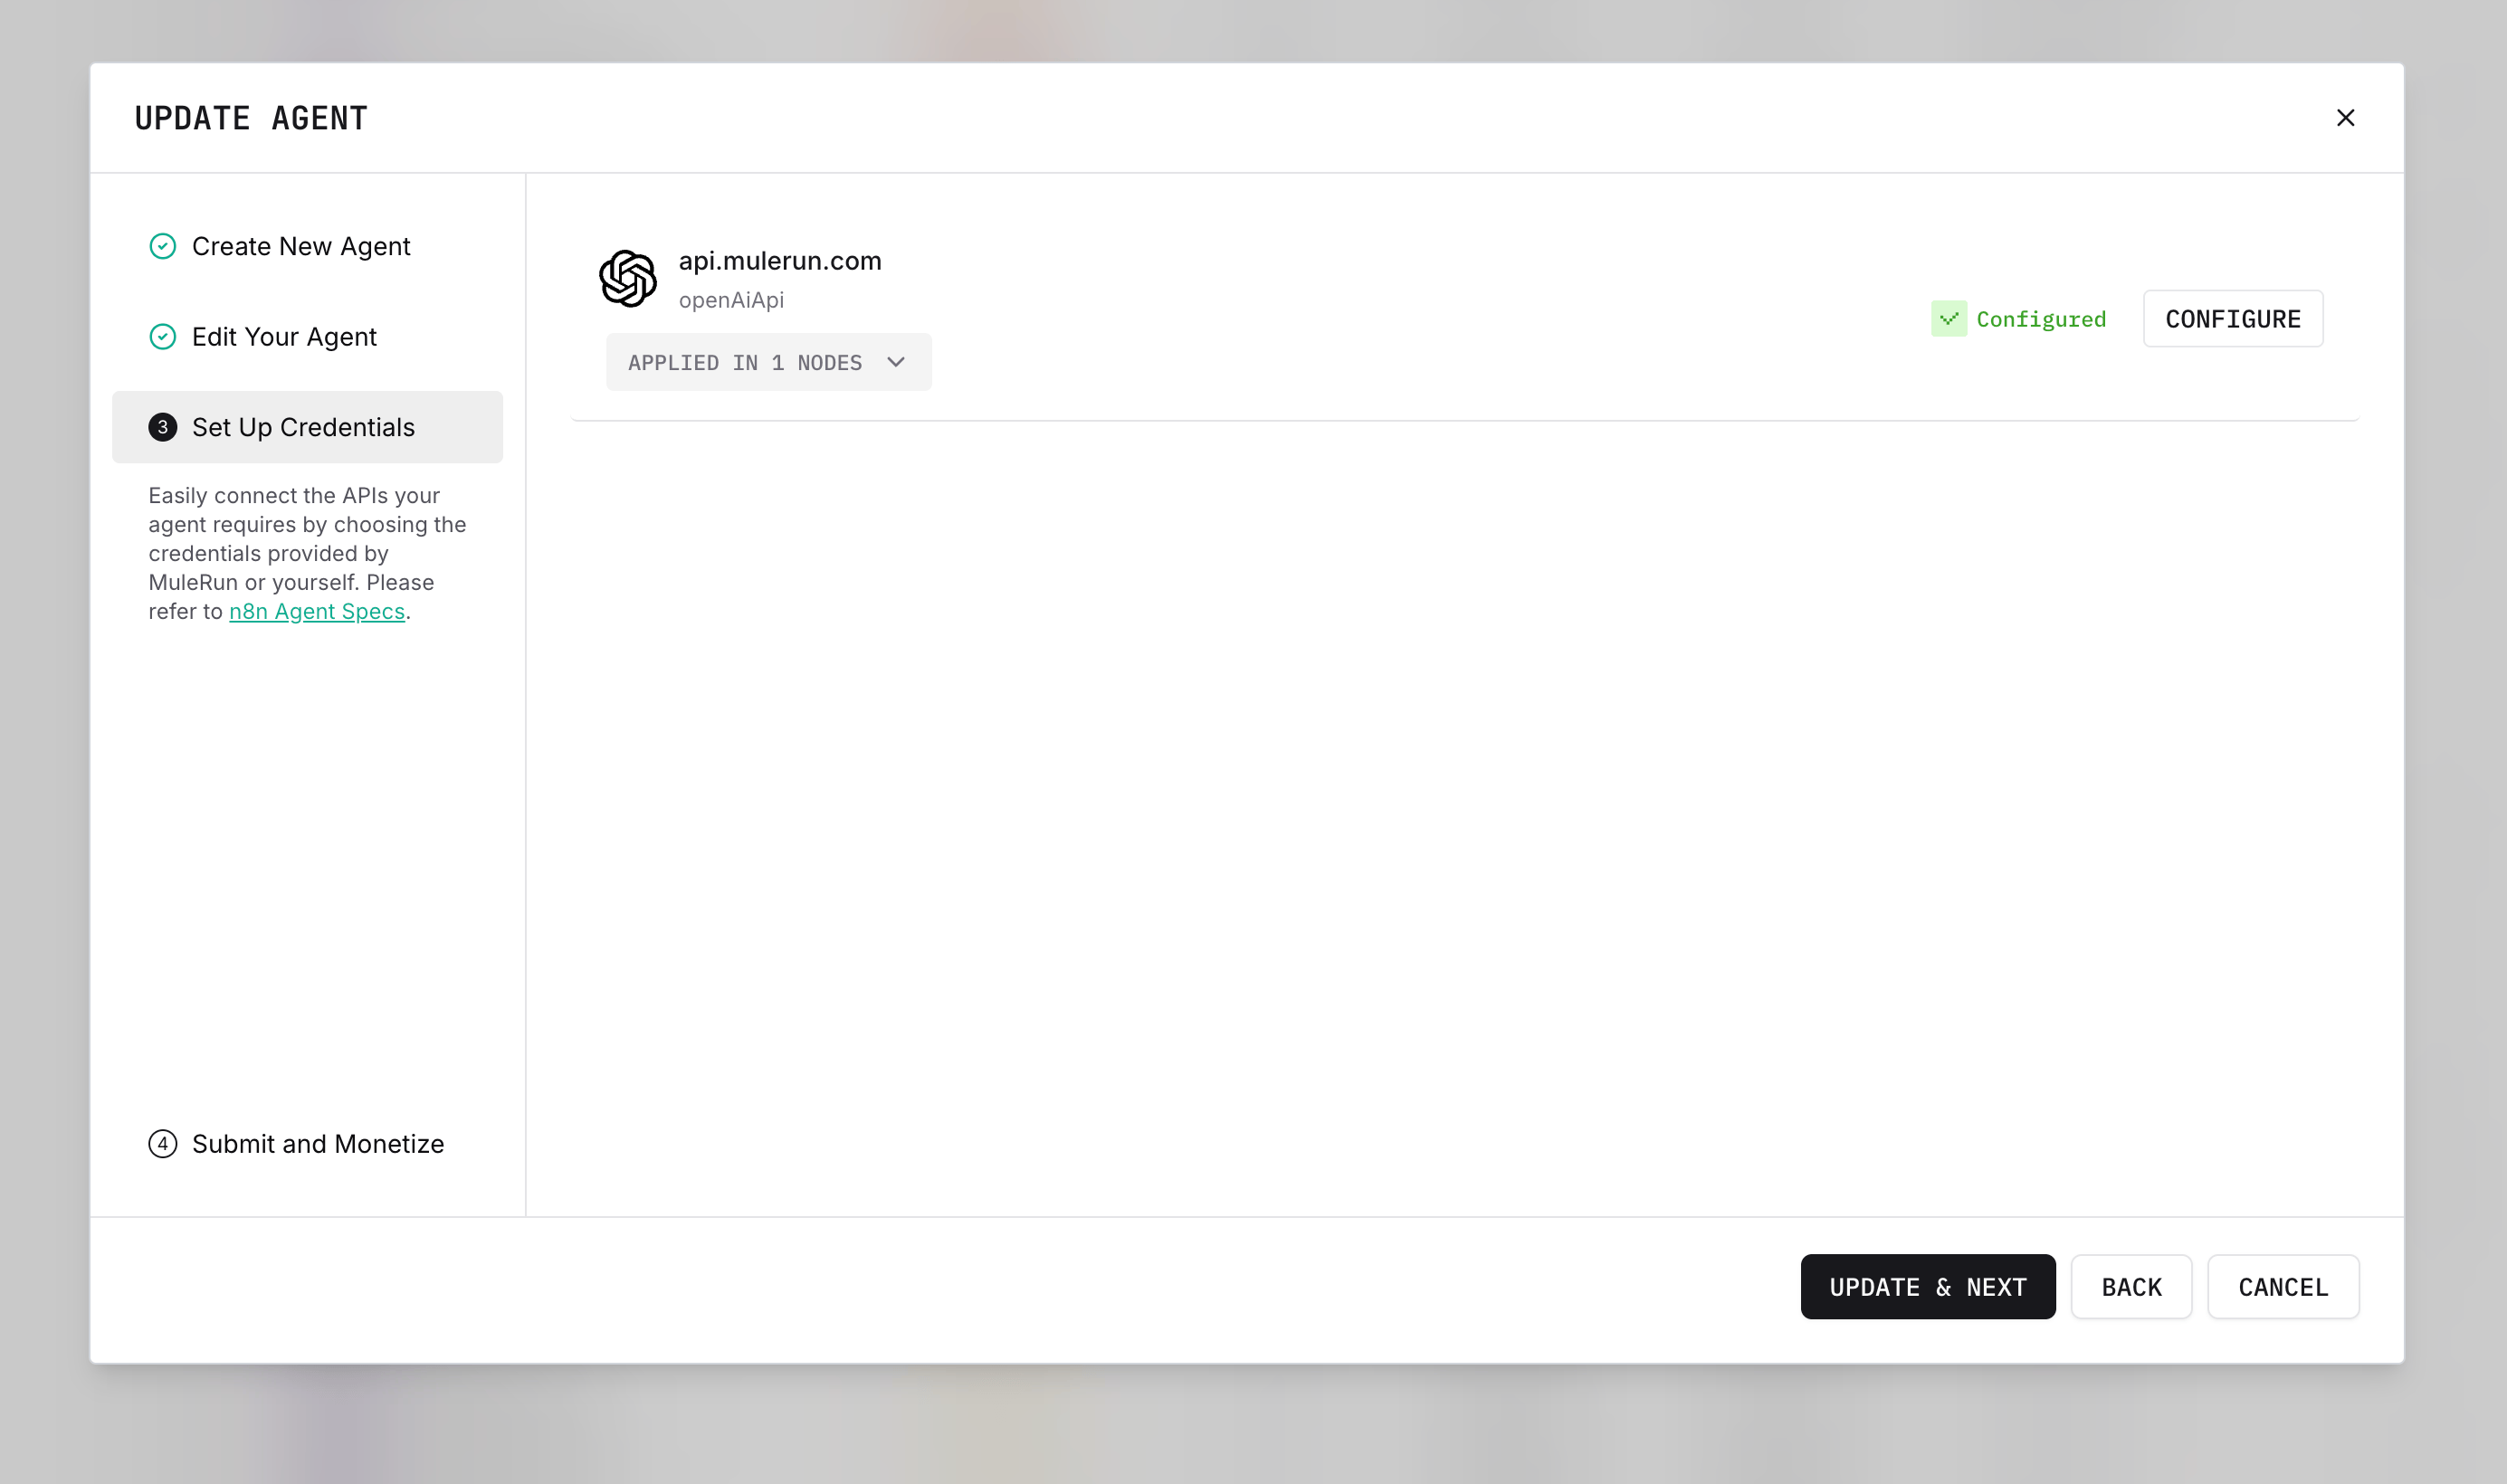 Configure all credentials in the n8n nodes. Make sure they are Configured.
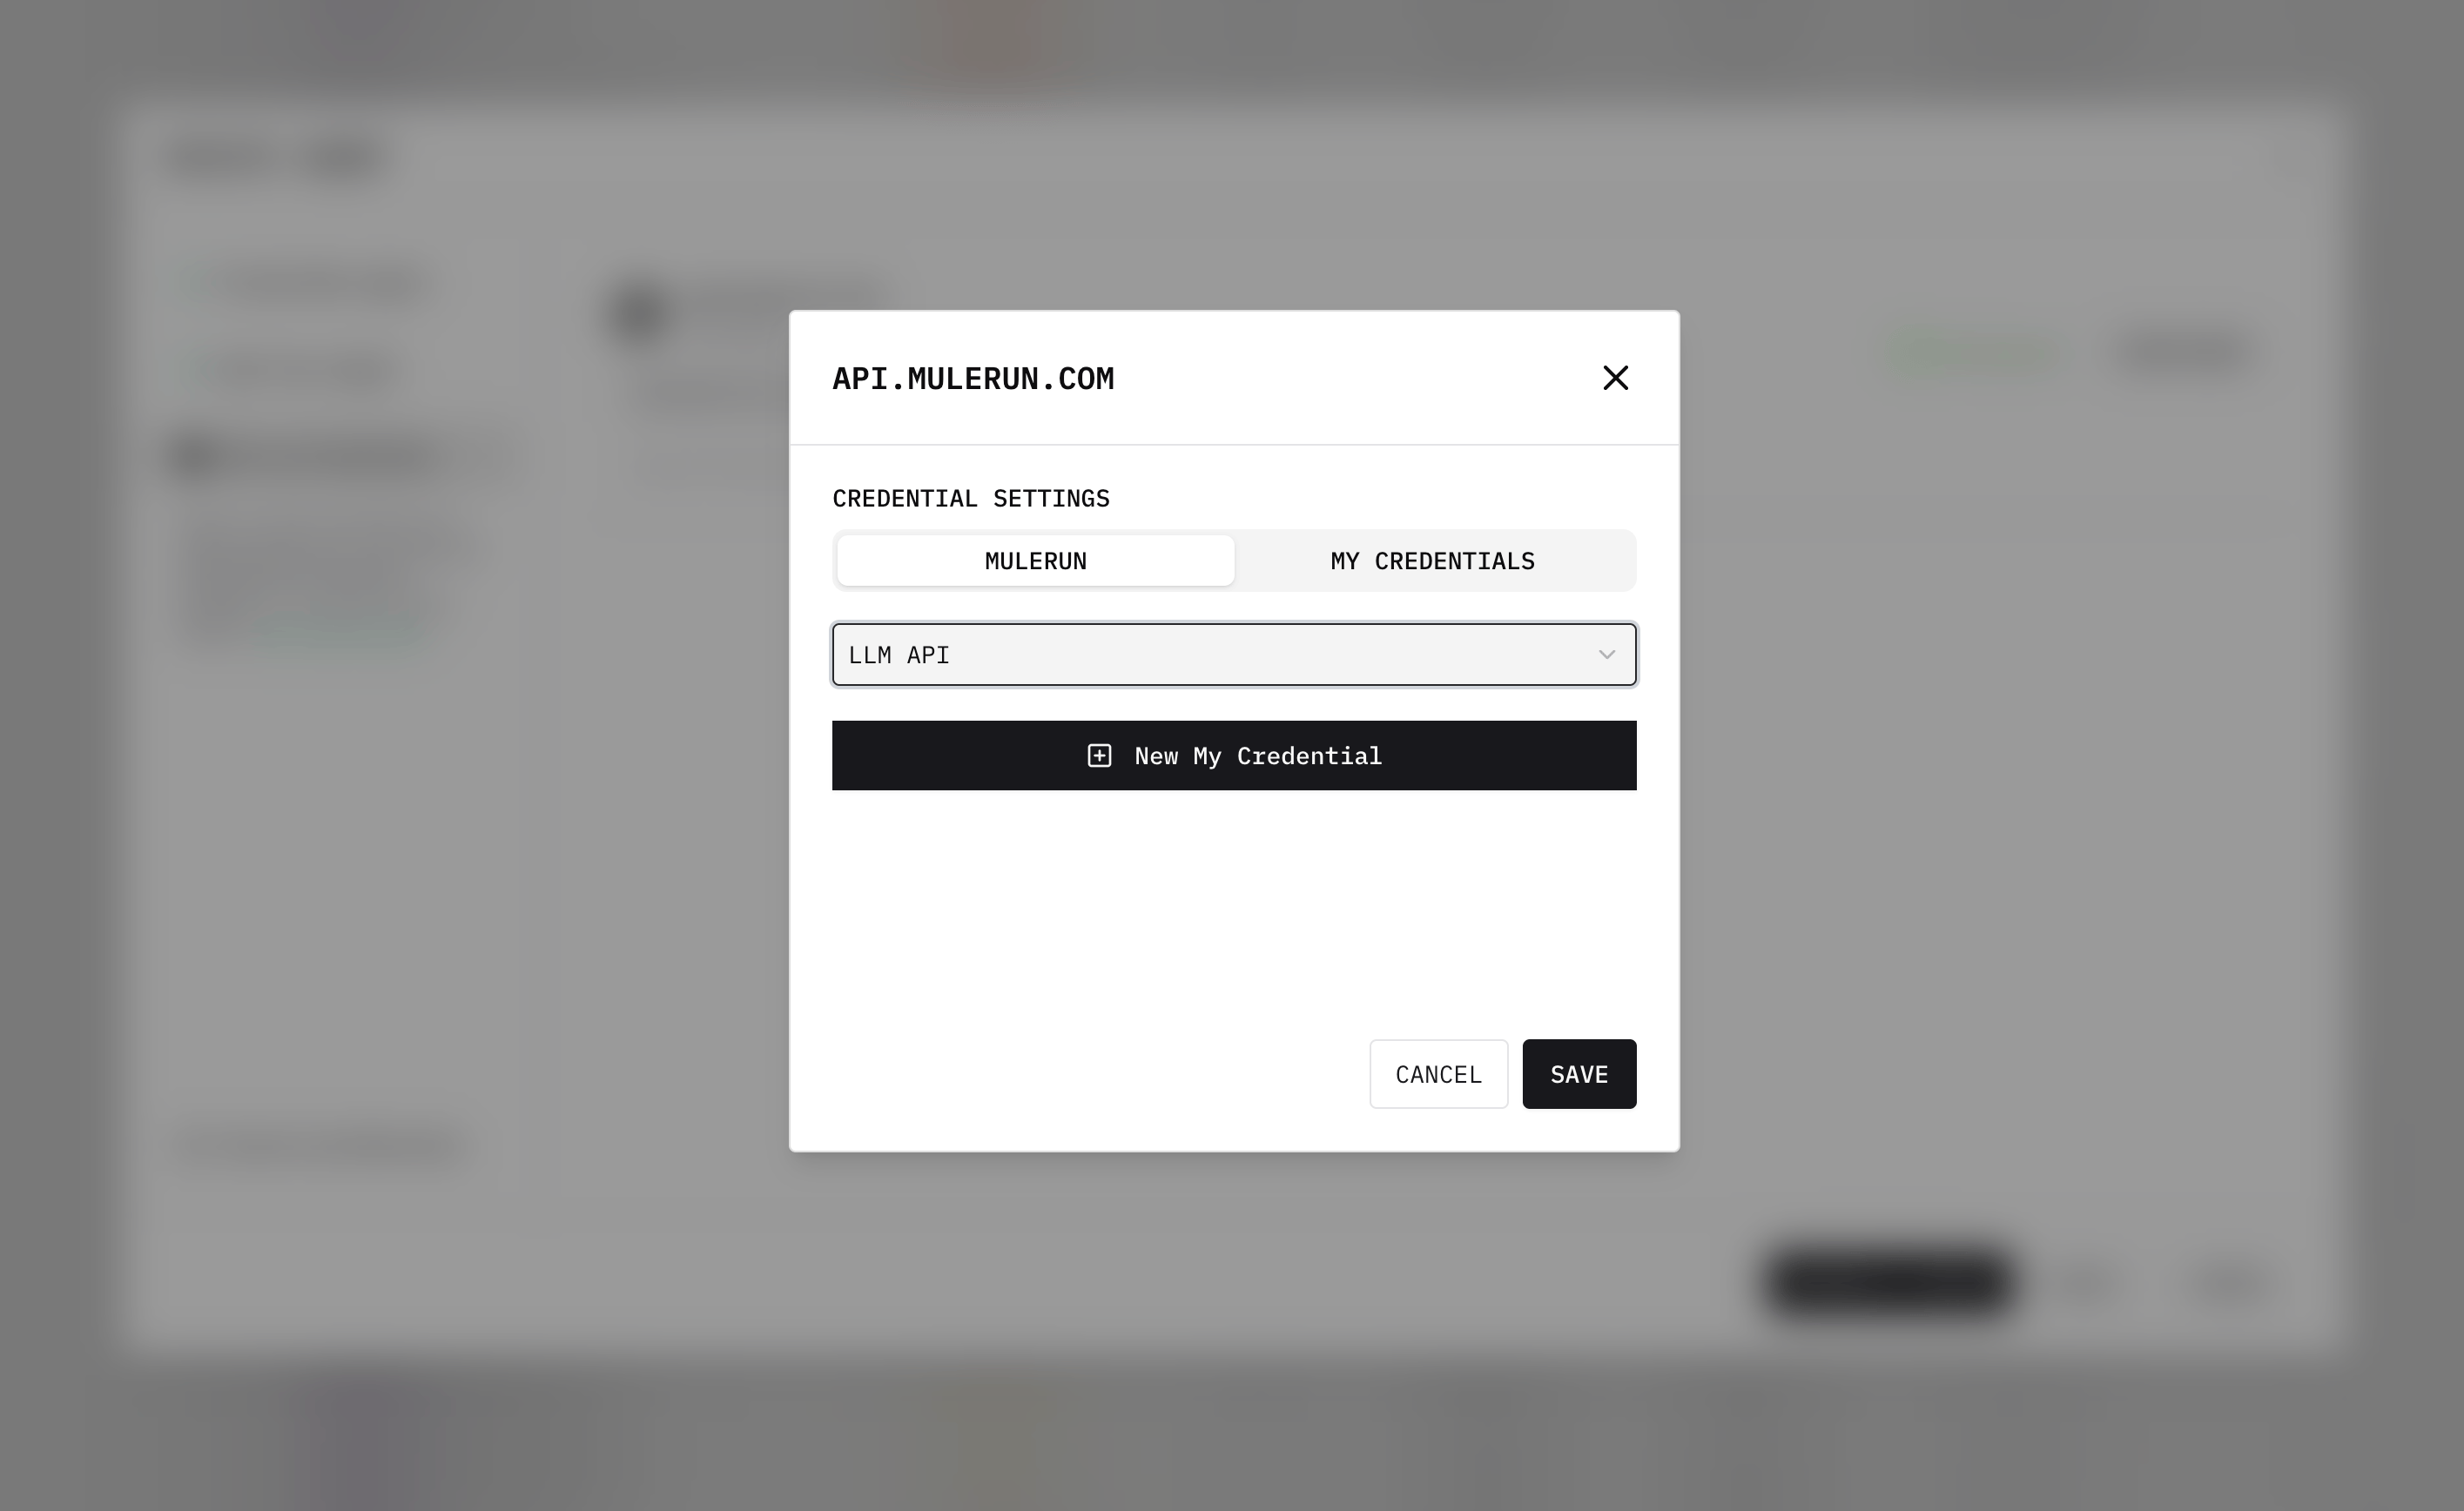 For LLM nodes, you can simply select MULERUN - LLM API, and credentials will auto-configure using your Creator Credits.
If you want to use models not supported by MuleRun, add additional credentials in n8n and configure separately.
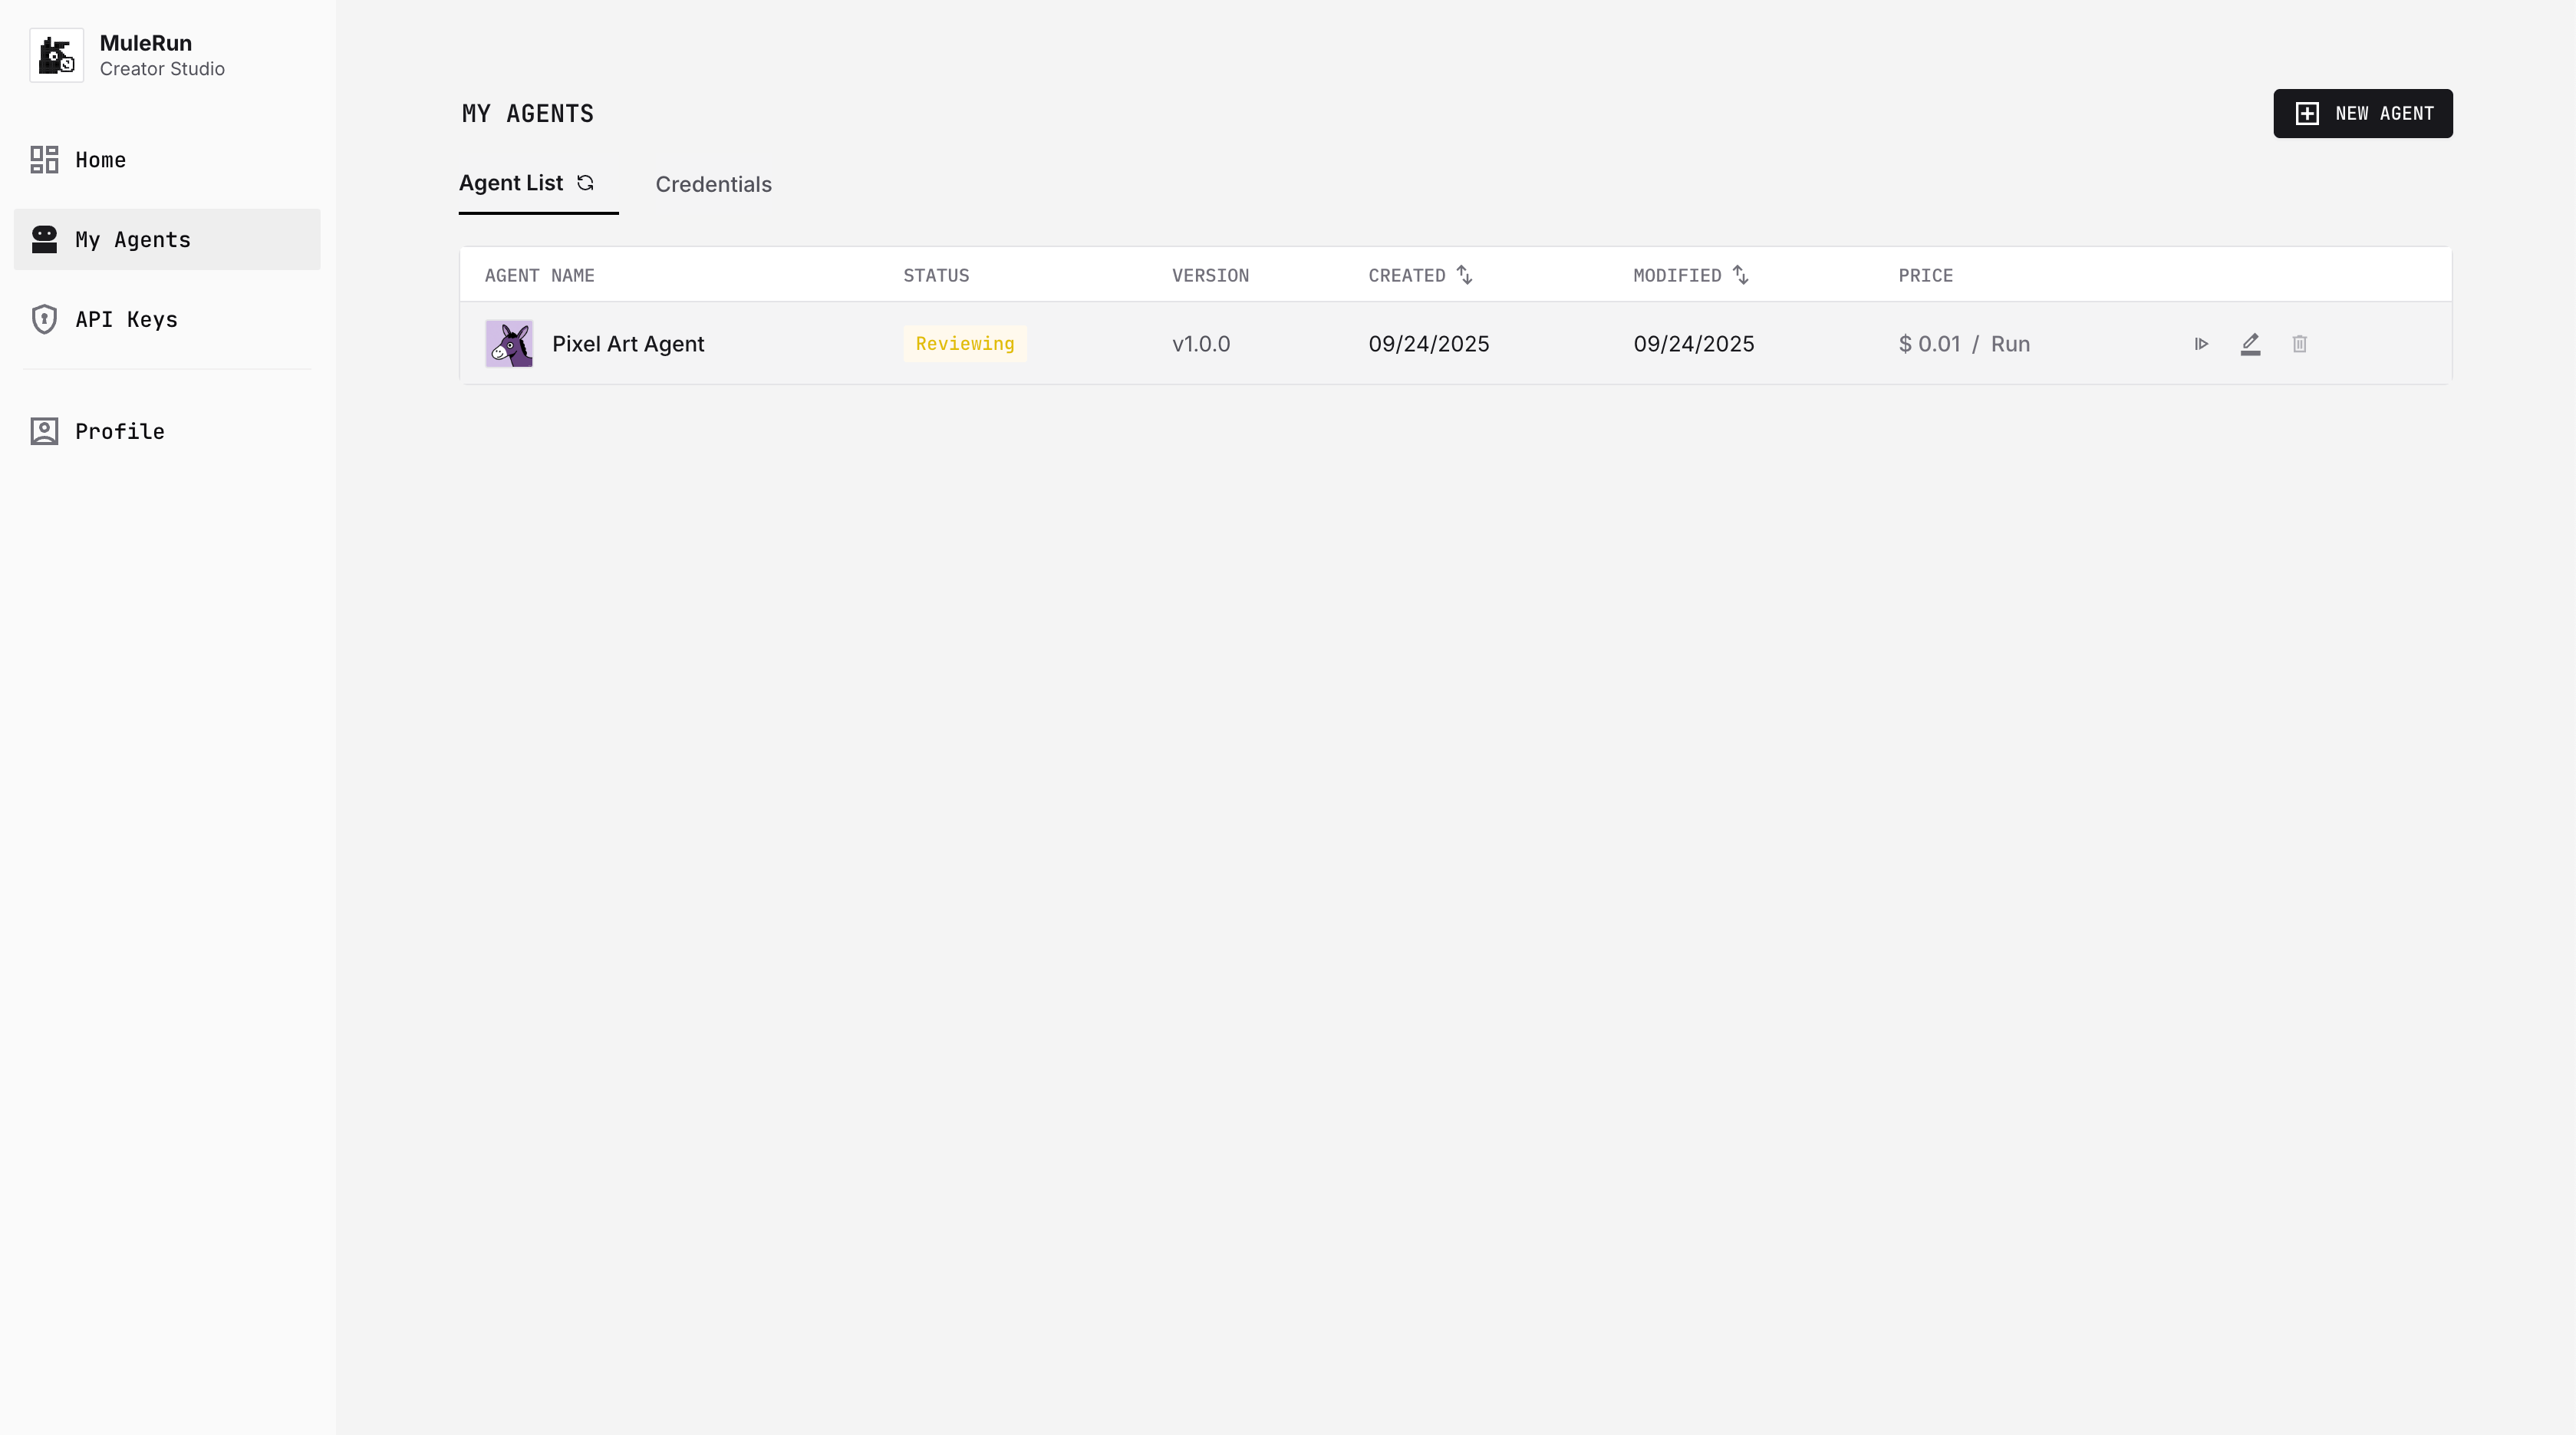
 Once the Agent is created, test it before submitting for review. You can cancel out and return to Creator Studio.
Before submission, the Agent is Unpublished. You can still run it yourself.
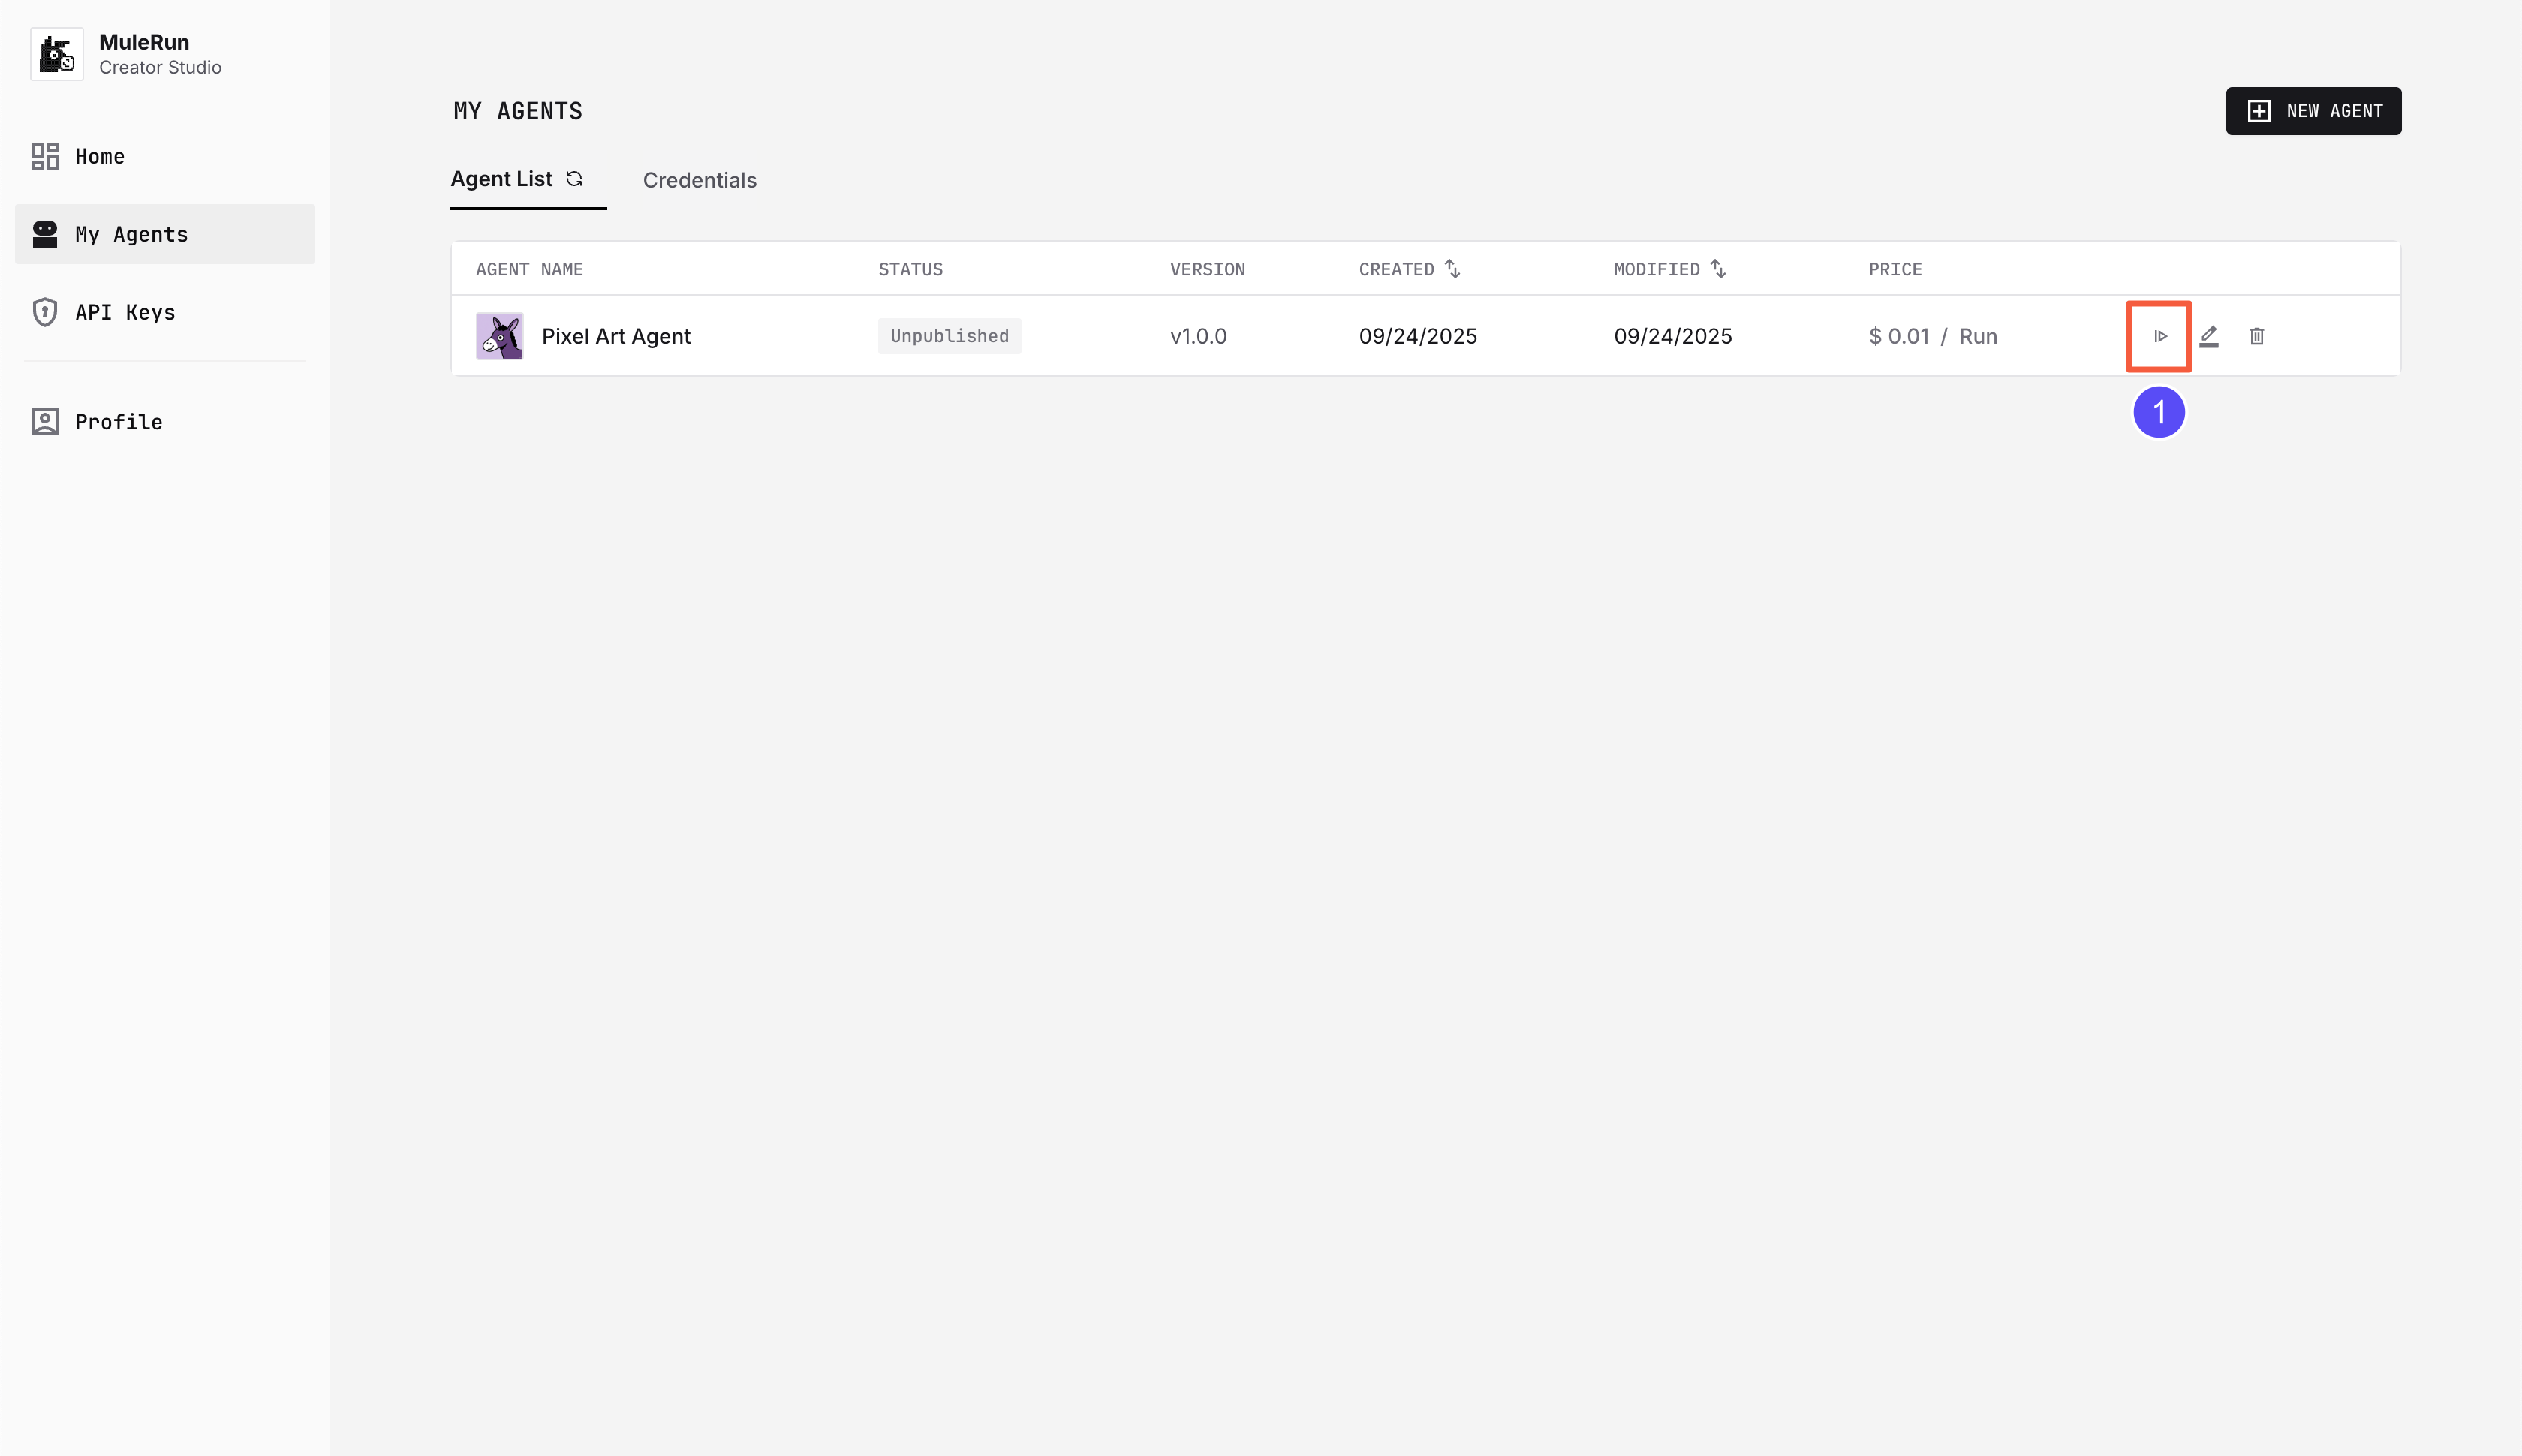 Click the Agent button to open the run page.
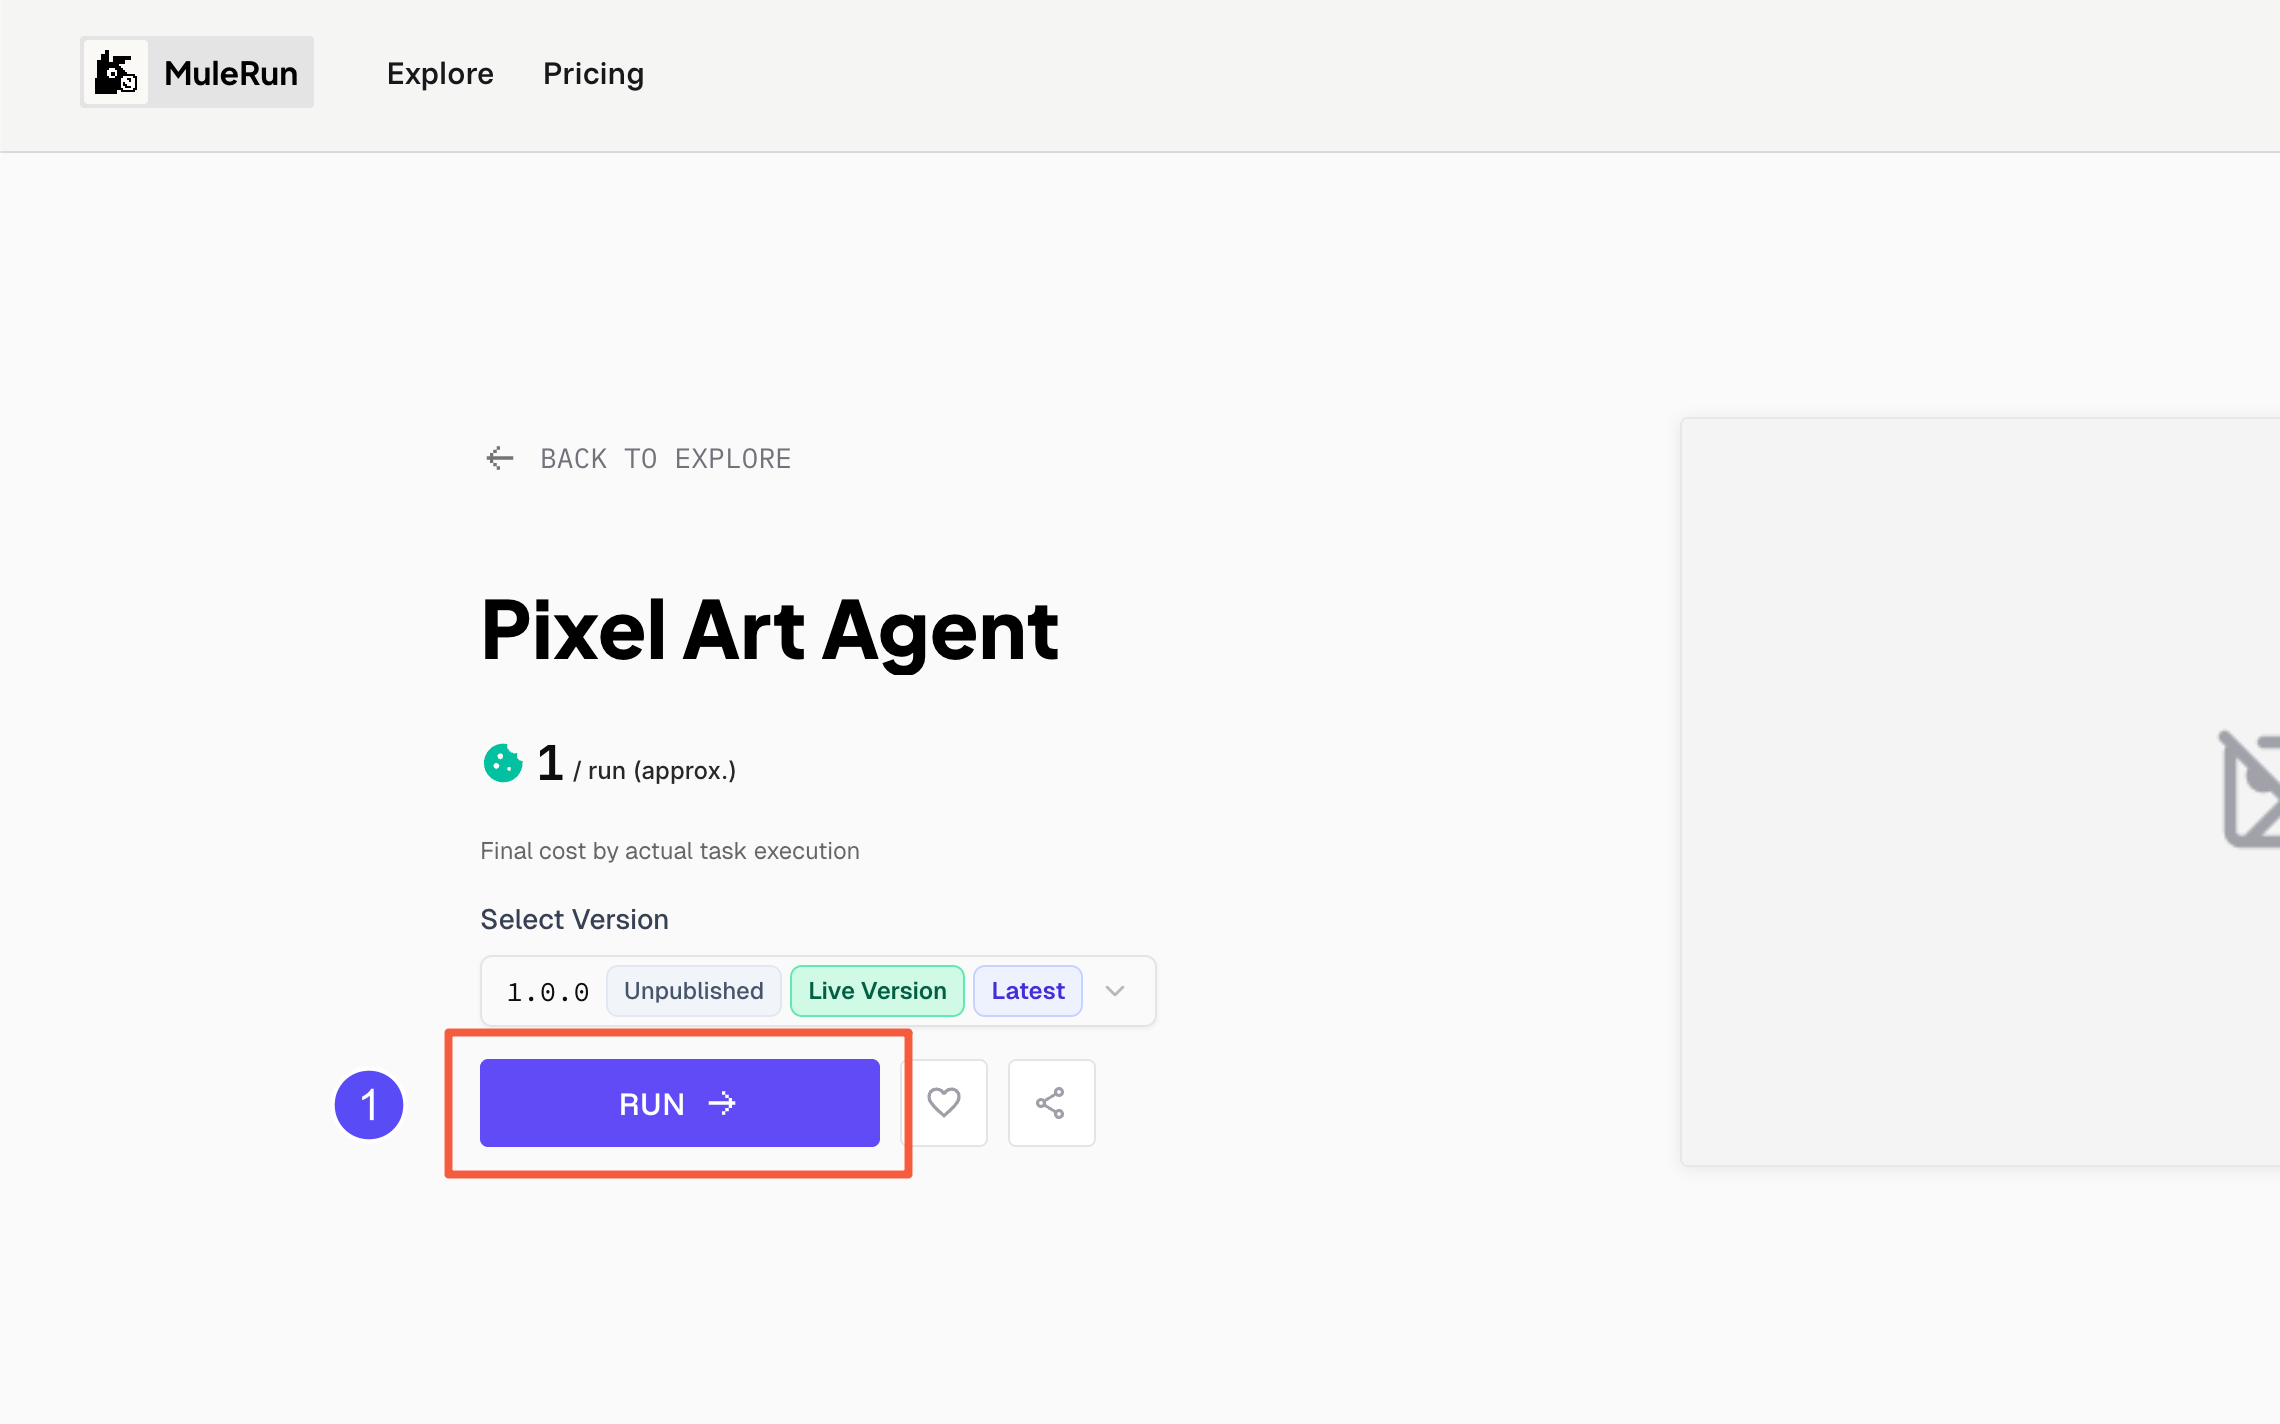 Click RUN to execute. Tags help distinguish versions.
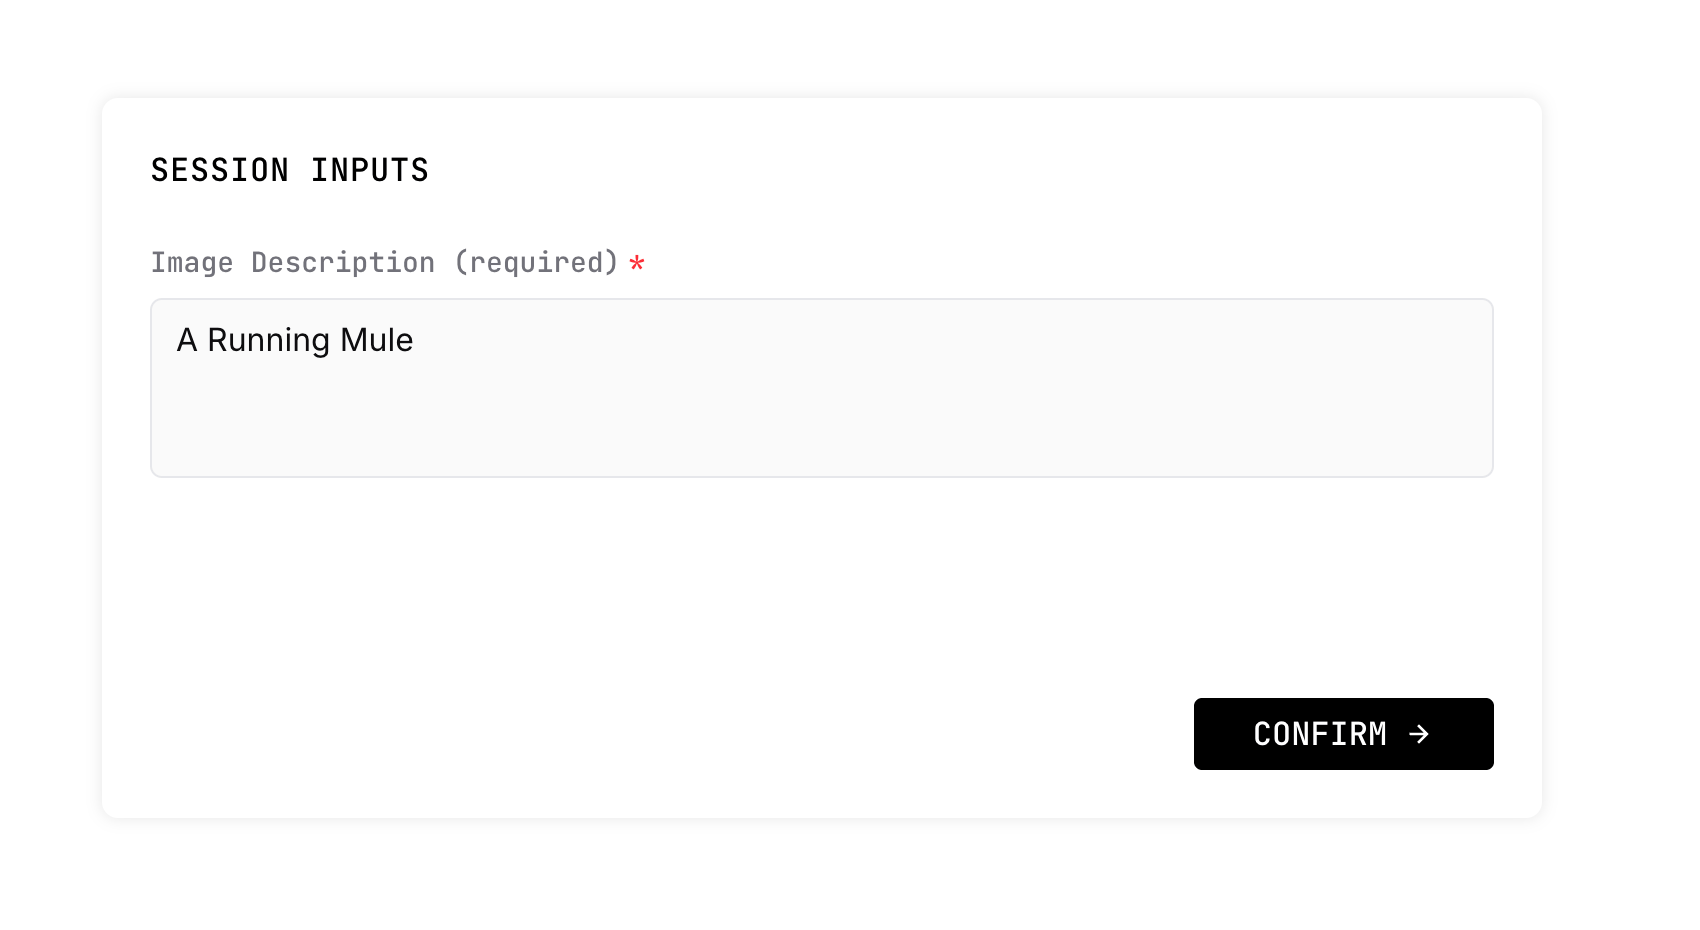 In the Session page, enter a prompt, e.g.
 A Running Mule.
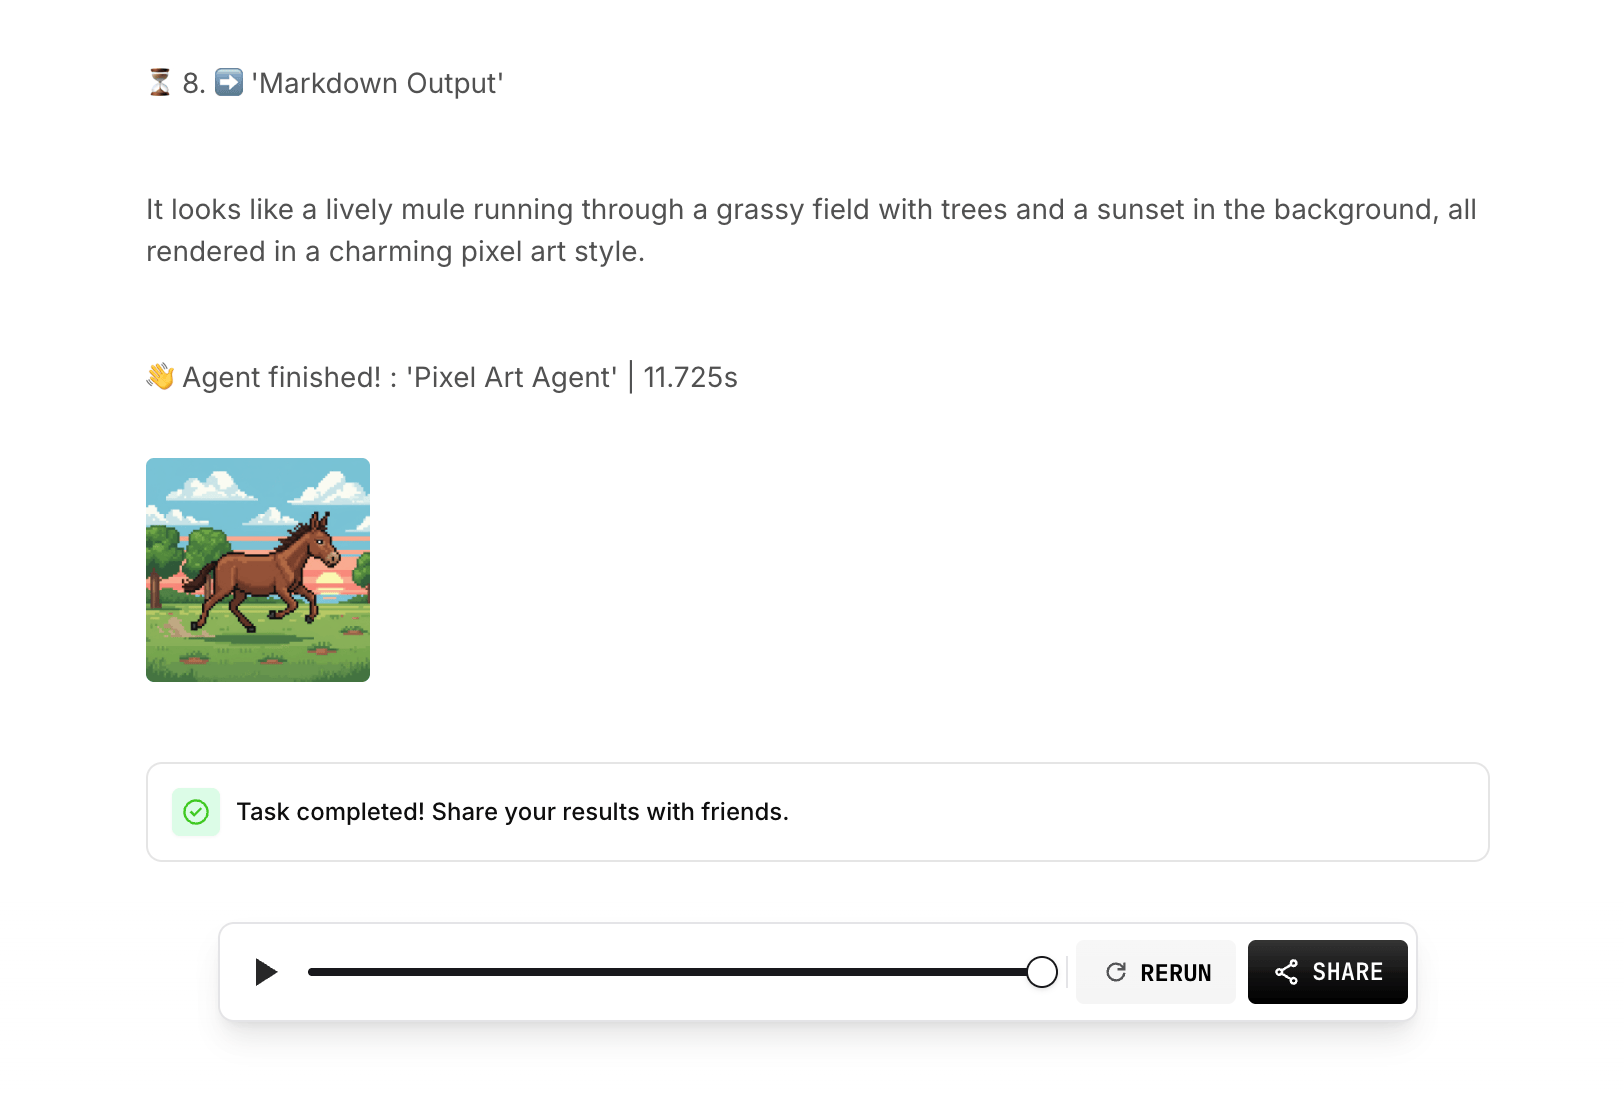 Wait a moment, and you’ll see the result: a description and an image. Click the image to enlarge.
Step 8: Submit Your Agent
When everything works, click Submit to send your Agent for review.
Editing an Agent under review will automatically reject the submitted version.